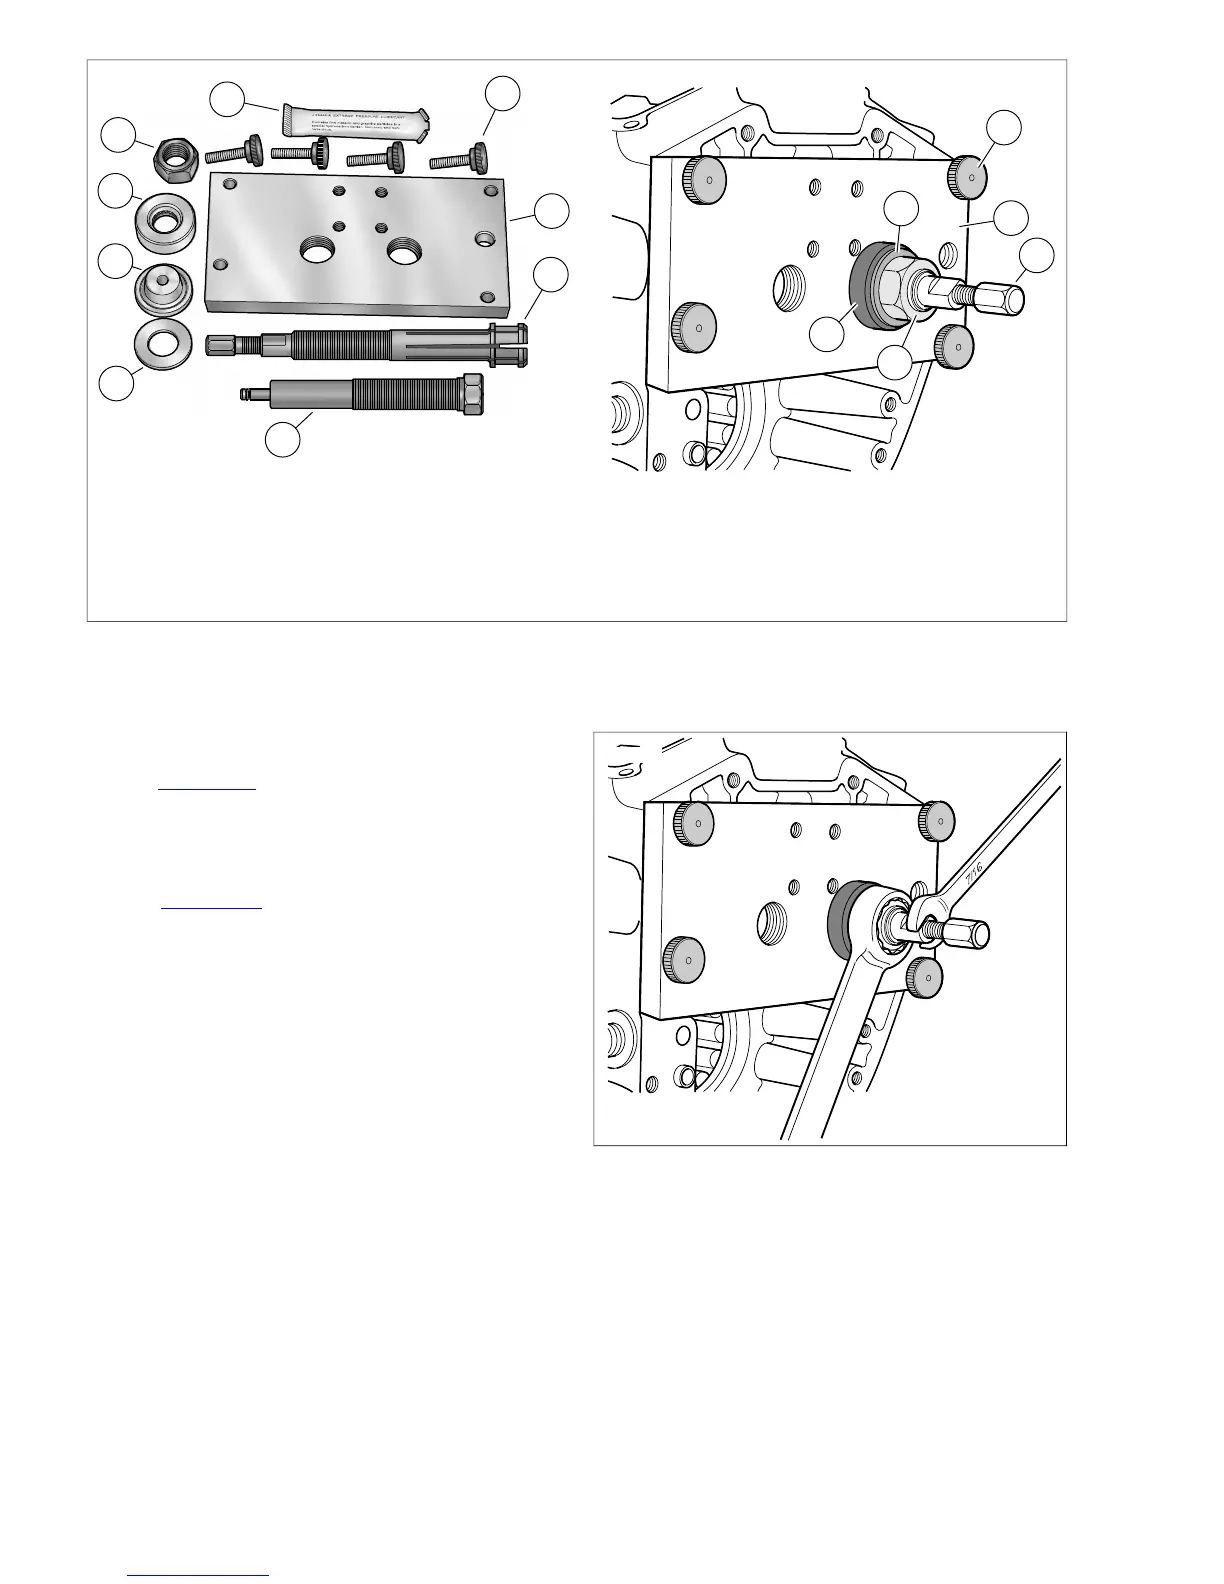
6.1. Installer (1 in., 25.4 mm)Thumb screw
2. 7.Support plate Nice bearing
8.3. Hex nutRemoval collet (Threaded end: left, Expandable
end: right) 9. Graphite lubricant
4. Installer forcing screw
5. Flat washer
Figure 3-121. Camshaft Needle Bearing Remover/Installer (Part No. HD-42325-A)
9. Holding collet to prevent lateral movement, finger tighten
hex nut until Nice bearing contacts support plate.
10. See Figure 3-120. Using a 7/16 in. open end wrench, hold
flat on collet to prevent rotation. Using a second 7/16 in.
open end wrench, expand collet by turning hex at end of
shaft in a clockwise direction. Expandable end of collet
makes contact with needle bearing ID.
11. See Figure 3-122. Using a 15/16 in. open end wrench,
turn hex nut in a clockwise direction until bearing is free.
If necessary, hold flat on collet to prevent rotation.
12. Remove four thumb screws and pull support plate from
crankcase.
13. Holding flat on collet, turn hex at end of shaft in a counter-
clockwise direction to close collet. Remove and discard
needle bearing.
14. Remove hex nut, flat washer and Nice bearing from
threaded end of collet. Pull collet from support plate.
15. Repeat this procedure to remove second needle bearing.
Figure 3-122. Bearing Removal
Installation
1. Obtain the CAMSHAFT NEEDLE BEARING
REMOVER/INSTALLER (Part No. HD-42325-A).
NOTE
To avoid engine damage, care must be taken to install needle
bearings to the correct depth. The correct depth is achieved
only when the edge of the needle bearing is 3.10 in. (78.7 mm)
from the cam cover flange.
3-86 2008 Dyna Service: Engine



 To Next Page