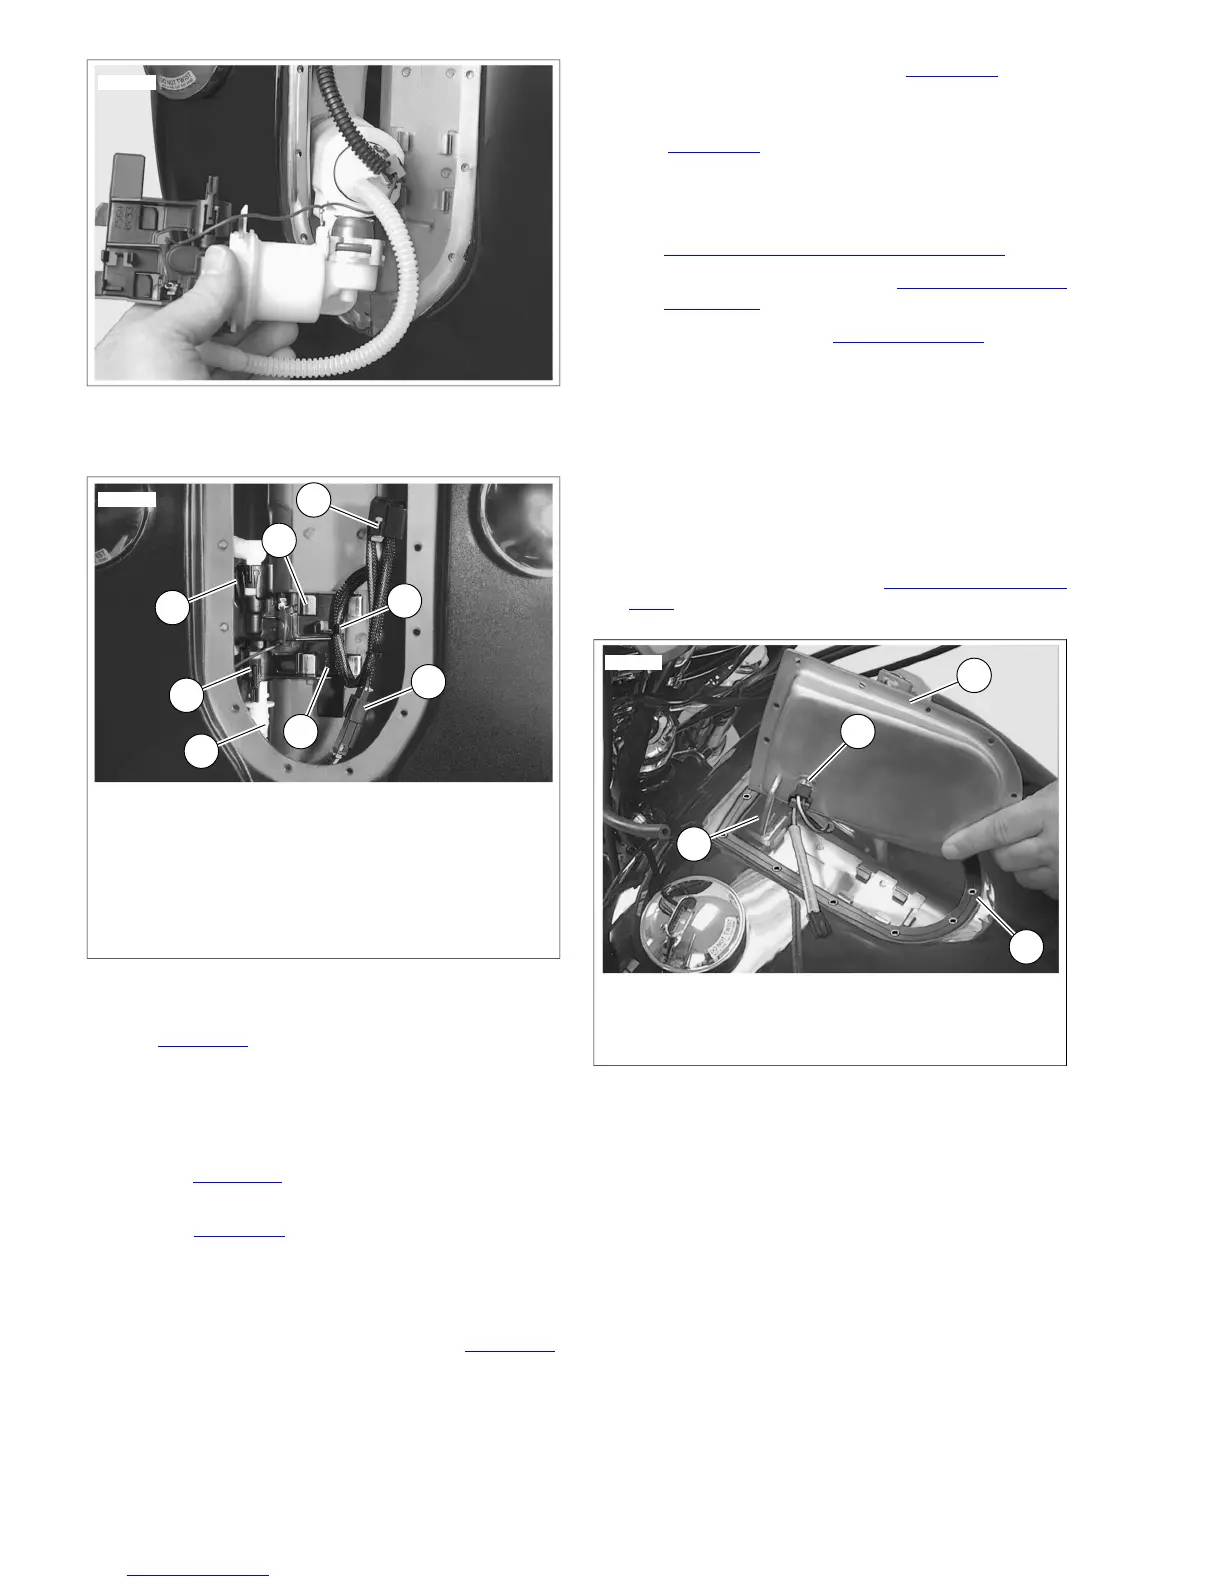
1. Fuel line
2. Tabs (2)
3. Fuel pump assembly
4. Mounting tabs (4)
5. Fuel gauge wiring harness
6. Clip
7. Fuel pump connector
8. End cap
Figure 4-50. Fuel Pump
8. See Figure 4-51. Install fuel pump/sender wire connector
(4) on top plate (3).
9. Install top plate.
a. On FXDL, FXDWG and FXDF models, hold top plate
at 90° angle.
b. See Figure 4-52. On all models, install sender wiring
into clip (3).
c. See Figure 4-51. On FXDL, FXDB, FXDWG, FXDC
and FXDF models, making sure that vent tube is
installed inside of tank, rotate top plate into position.
10. Loosely install new sealing screws in top plate.
11. On FXDWG, FXDC and FXDF models, see Figure 4-54.
Tighten sealing fasteners using pattern shown to 20 in-
lbs (2.3 Nm).
12. On FXD/FXDB/FXDL models, see Figure 4-55. Tighten
sealing fasteners using pattern shown to 20 in-lbs (2.3
Nm).
13. See Figure 4-53. Connect fuel pump/sending unit con-
nector [141].
14. Install instrument console.
a. For FXDWG/FXDC/FXDF models, see
8.17 INSTRUMENTS: FXDWG/FXDC/FXDF.
b. For FXDL/FXDB models, see 8.18 INSTRUMENTS:
FXDL/FXDB.
c. For FXD models, see 8.15 FUEL GAUGE.
NOTE
In next step, be sure crimped end of clamp faces toward front
of vehicle.
15. Connect crossover hose with new clamps.
16. Connect the fuel pump fuse to the main wiring harness.
17. Connect negative battery cable.
18. Fill tank with gasoline and check for leaks.
19. Check fuel system pressure. See 4.15 FUEL PRESSURE
TEST.
 Loading...