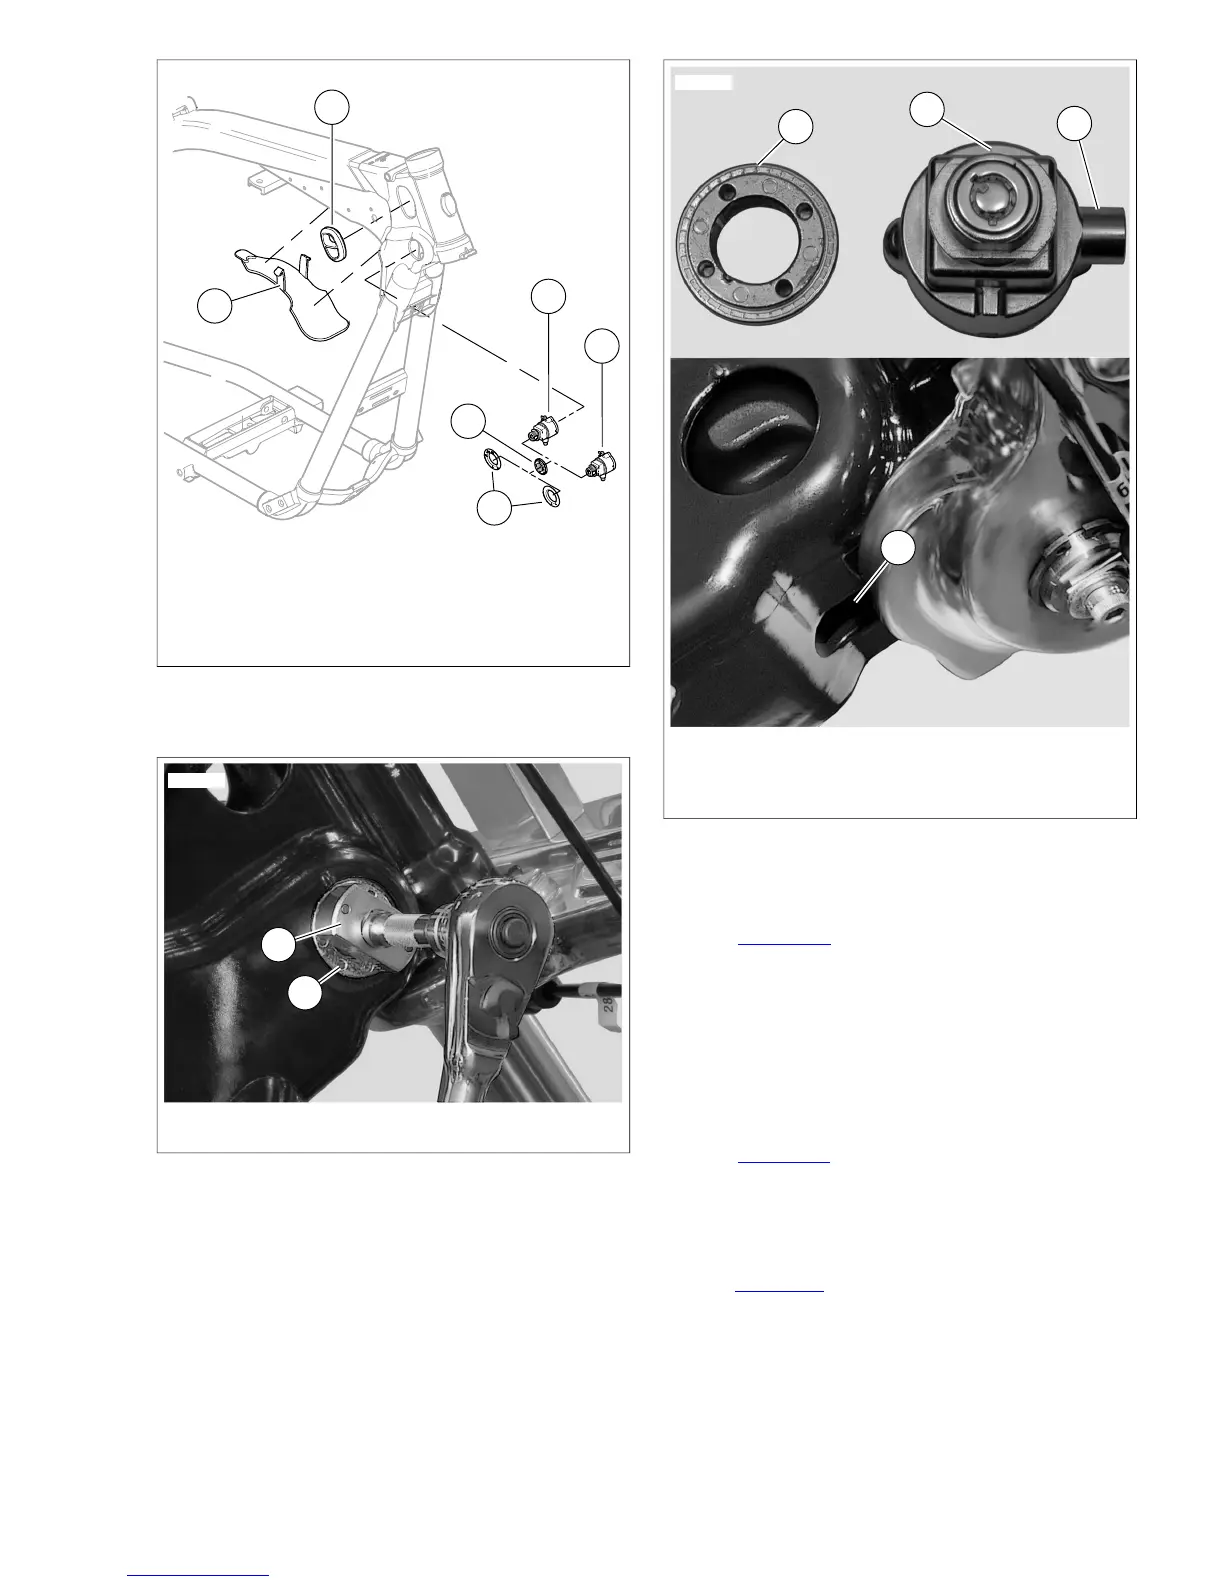
1. Harness shield
2. Grommet (2)
3. Fork lock (FXD, FXDL, FXDB models)
4. Ignition switch/fork lock (FXDWG, FXDC models)
5. Face nut
6. Decal
Figure 8-12. Harness Shield
1. Face nut
2. Ignition switch/fork lock
3. Fork lock boss
4. Fork lock boss cavity
Figure 8-14. Fork Lock/Ignition Switch
Installation
1. See Figure 8-14. Apply a drop of LOCTITE THREAD-
LOCKER 243 (blue) to threads of face nut (1).
2. Install face nut on ignition switch/fork lock (2). Turn face
nut clockwise until it bottoms on ignition switch/fork lock.
3. On FXD, FXDL, FXDB models, install connector on ignition
switch/fork lock.
4. With fork lock boss (3) facing front of vehicle, install ignition
switch/fork lock into frame.
5. See Figure 8-15. Align flats on ignition switch/fork lock
with slots (2) in fork lock cavity (1).
NOTE
In next step, setting fork lock in the "locked" position may ease
installation.
6. See Figure 8-14. Rotate ignition switch/fork lock until fork
lock boss (3) engages fork lock boss cavity (4).
7. To ensure proper fork lock positioning, hold ignition
switch/fork lock as far forward as possible in frame while
tightening.
2008 Dyna Service: Electrical 8-9
 Loading...