1. Screw (2)
2. Headlamp housing
3. Headlamp connector (2)
4. Bulb (2)
5. Reflector and lenz assembly
6. Trim ring
7. Vertical adjusting nut
8. Washer (2)
9. Lockwasher
10. Horizontal adjusting bolt
11. Mounting block
12. Vertical adjusting bolt
13. Headlamp housing connector
Figure 8-22. Dual Bulb Headlamp
BULB INSTALLATION
Install new bulb and assemble headlamp components. To
adjust light beam, see 1.23 HEADLAMP ALIGNMENT.
NOTES
• Single Bulb Headlamp: When reassembling headlamp,
make sure slots and tabs in headlamp, adapter ring and
trim ring are aligned.
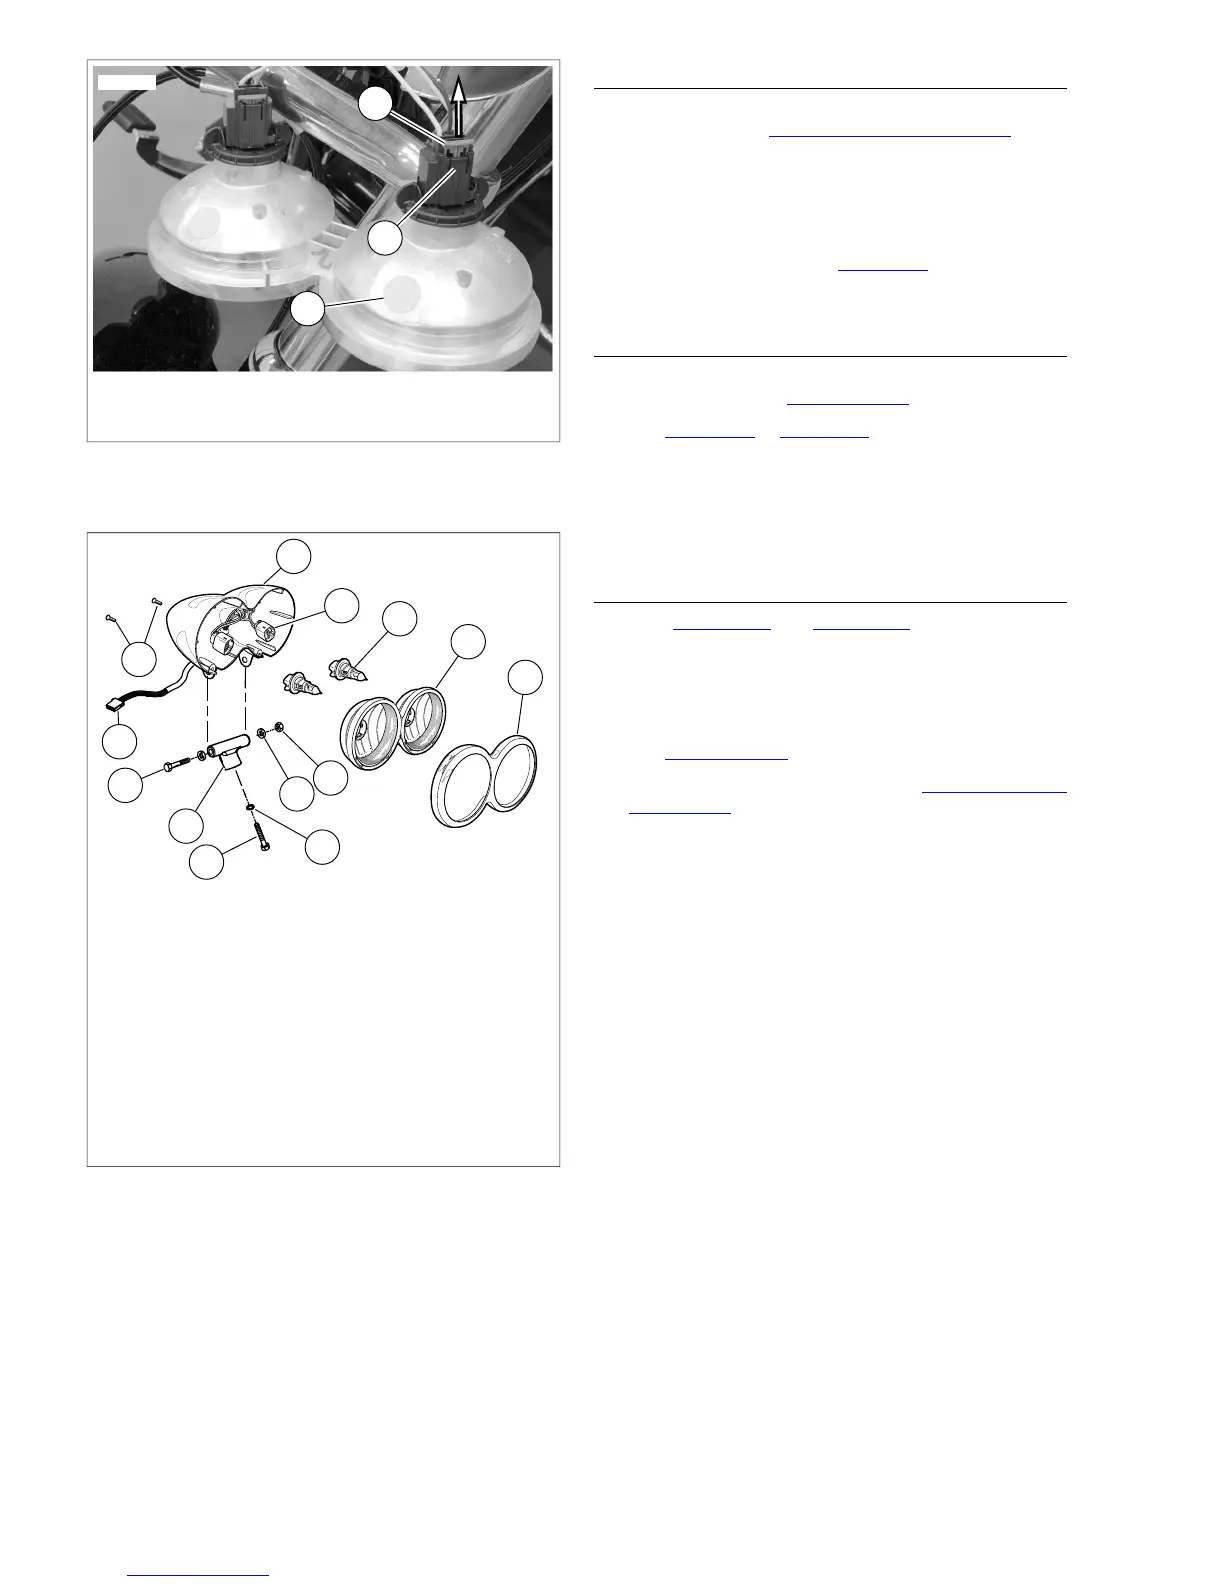
• Dual Bulb Headlamp: See Figure 8-21. Ensure vents (3)
(yellow dots) are UP when installing reflector assembly in
housing.
HEADLAMP ASSEMBLY REMOVAL
1. Loosen fuel tank to gain access to the headlamp harness
connector (13). See 4.5 FUEL TANK.
2. See Figure 8-20 or Figure 8-22. Separate connector (13)
[38].
3. Remove bolt (12) nut (7) and washers (8, 14).
4. Remove headlamp assembly.
5. Disassemble and repair headlamp as necessary.
HEADLAMP ASSEMBLY INSTALLATION
1. See Figure 8-20 or Figure 8-22. Attach headlamp
assembly to mount (11) using bolt (12) nut (7) and washers
(8, 14).
2. Tighten bolt (10) to 25-30 ft-lbs (33.9-40.7 Nm).
3. Connect electrical harness connector and attach fuel tank.
See 4.5 FUEL TANK.
4. Adjust headlamp alignment. See 1.23 HEADLAMP
ALIGNMENT.
8-16 2008 Dyna Service: Electrical