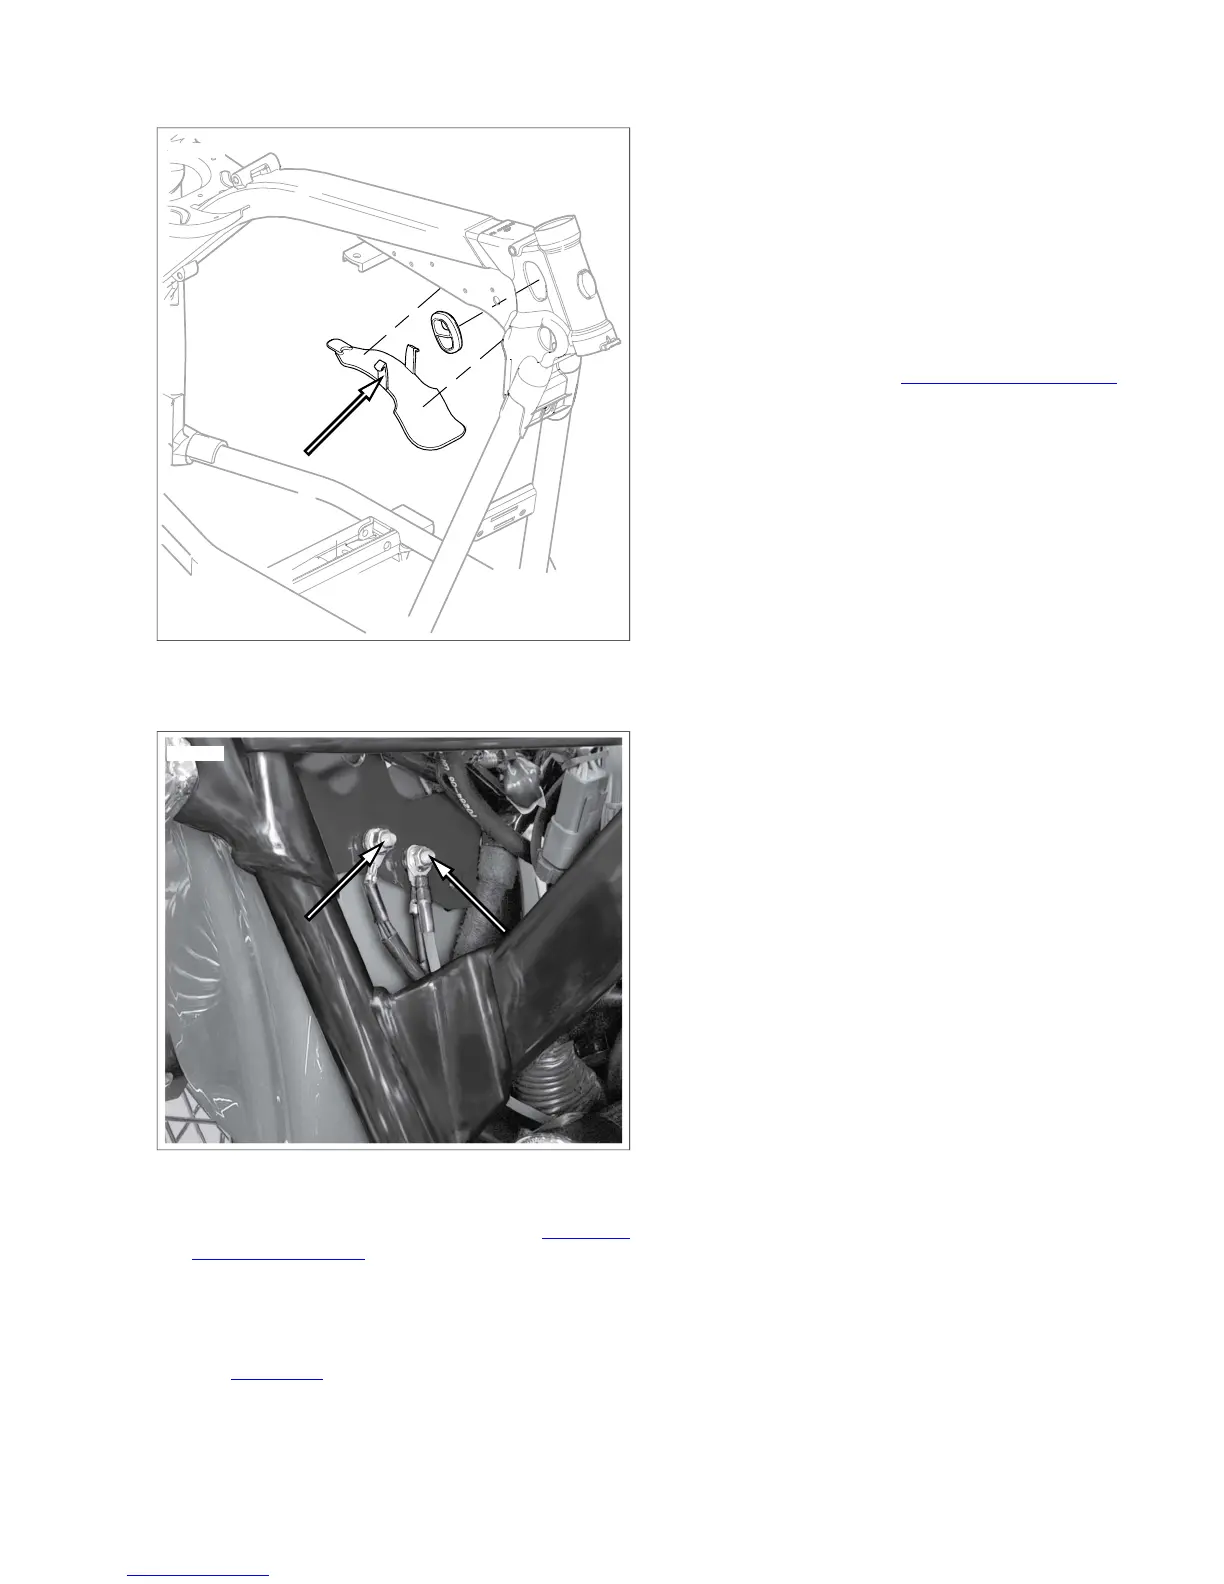
Figure 8-73.Vehicle Ground Studs
20. Remove rear stop light switch terminals. See 8.24 REAR
STOPLIGHT SWITCH.
21. Remove starter post nut, positive battery cable and main
wiring harness ring terminal from starter post.
22. Disconnect rear fender extension from fender.
23. See Figure 8-74. Slide wire harness retainer up frame
tubes. Remove harness retainer from frame and harness.
24. Remove the following connectors located in fuel tank area:
a. MAP sensor connector [80].
b. Horn wires.
c. IAT sensor connector [89].
d. ET sensor connector [90].
e. IAC connector [87].
f. TP sensor connector [88].
g. Front [84] and rear [85] fuel injector connectors.
25. Disconnect voltage regulator connector [77], crank position
sensor connector [79], stator connector [46] and front
oxygen sensor [138]. See 8.5 VOLTAGE REGULATOR.
26. Disconnect oil pressure switch connector [120].
27. On HDI vehicles, remove intake solenoid connector [178]
from air cleaner backing plate.
28. Disassemble voltage regulator connector.
NOTE
The upper portion of the wiring harness is now free. Be careful
to note routing before pulling harness out of position.
29. Attach a long thin wire to the top end of the wiring harness
before pulling harness through frame backbone.This guide
wire will aid in pulling the new harness back through the
backbone.
30. Gently pull wiring harness out of rear of frame tube.
2008 Dyna Service: Electrical 8-49
 Loading...