2.4REAR WHEEL
REMOVAL
1. Block motorcycle underneath frame so rear wheel is raised
off the ground.
2. Remove three screws to detach the debris deflector from
rear fork. See 2.20 DEBRIS DEFLECTOR.
3. Inspect wheel bearing end play and service bearings if
necessary. See 2.5 SEALED WHEEL BEARINGS.
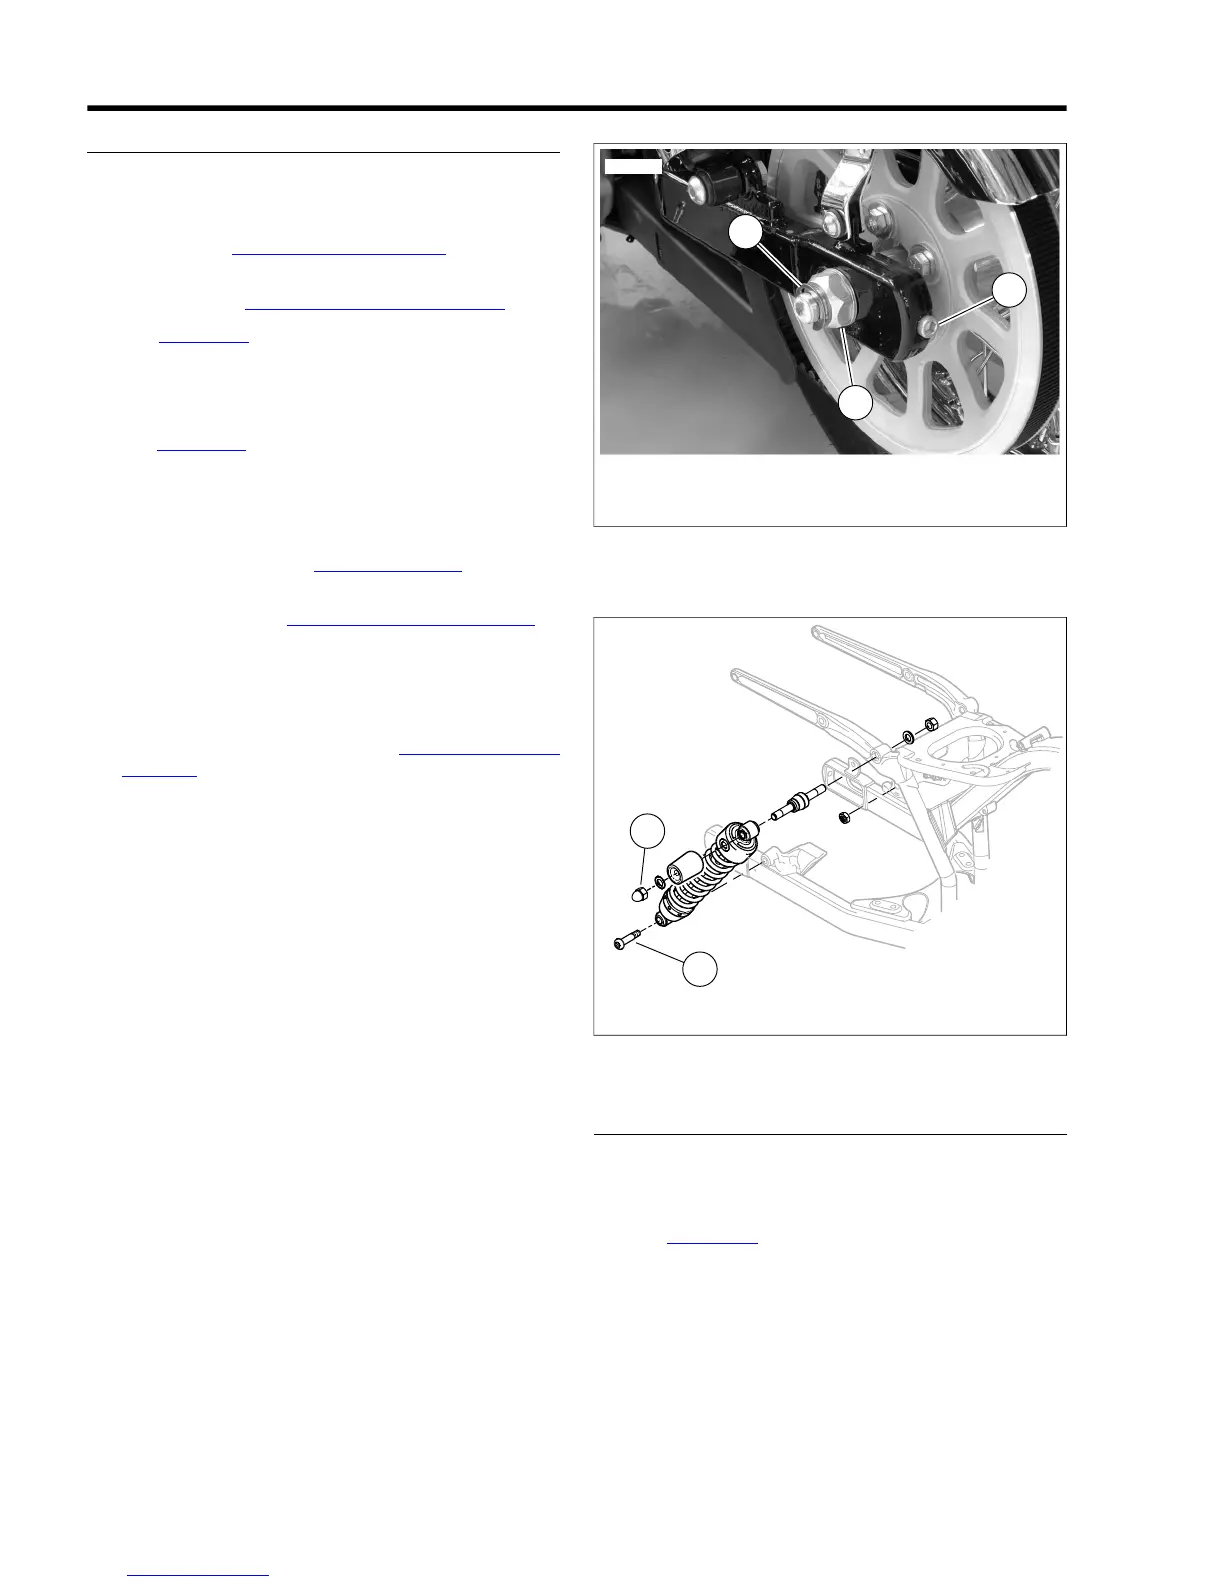
4. See Figure 2-10. Remove retaining ring (3), axle nut (2),
and washer from left side of axle.
5. Loosen adjuster on each side several turns to remove belt
tension.
6. See Figure 2-11. Loosen, but do not remove, left and right
upper mounting nuts (1).
7. Remove left and right lower shock mounting screws (2).
8. Allow rear fork and wheel to lower.
9. Remove belt guard. See 2.19 BELT GUARD.
10. Pry brake pads away from rotor and remove retaining pin
and brake pads. See 1.16 BRAKE PADS AND DISCS.
NOTE
Caliper to rear wheel clearance is minimal.To prevent damage
to surfaces, be careful when removing caliper from rear fork.
11. Remove caliper assembly from caliper mount. Support
caliper with an elastic cord. See 2.15 REAR BRAKE
CALIPER.
NOTE
Spacer and caliper mount may fall out when axle is removed.
12. Remove axle from wheel.
13. Move wheel forward and slip belt off sprocket.
14. Pull wheel and belt sprocket from rear fork.
NOTE
Do not operate rear brake pedal with the rear wheel removed
or the caliper piston may be forced out of piston bores.
Reseating the piston requires disassembly of the caliper.
1. Upper mounting nut (2)
2. Lower mounting screw (2)
Figure 2-11. Rear Shock Mount
DISASSEMBLY
NOTE
With the exception of the sprocket cover, component parts for
cast and laced rear wheels are identical.
1. See Figure 2-12. Remove spacers (2, 10) from left and
right sides.
2. If necessary, remove brake disc and/or rear sprocket.
a. On left side of wheel, remove five screws (14) and
washers (15) to detach rear sprocket (9). Discard
screws.
b. On right side of wheel, remove five screws (3) to
remove rear brake disc (4).Discard screws.
2-10 2008 Dyna Service: Chassis