5
P68 Pellet Stove
Assembly and Installation
Unpacking
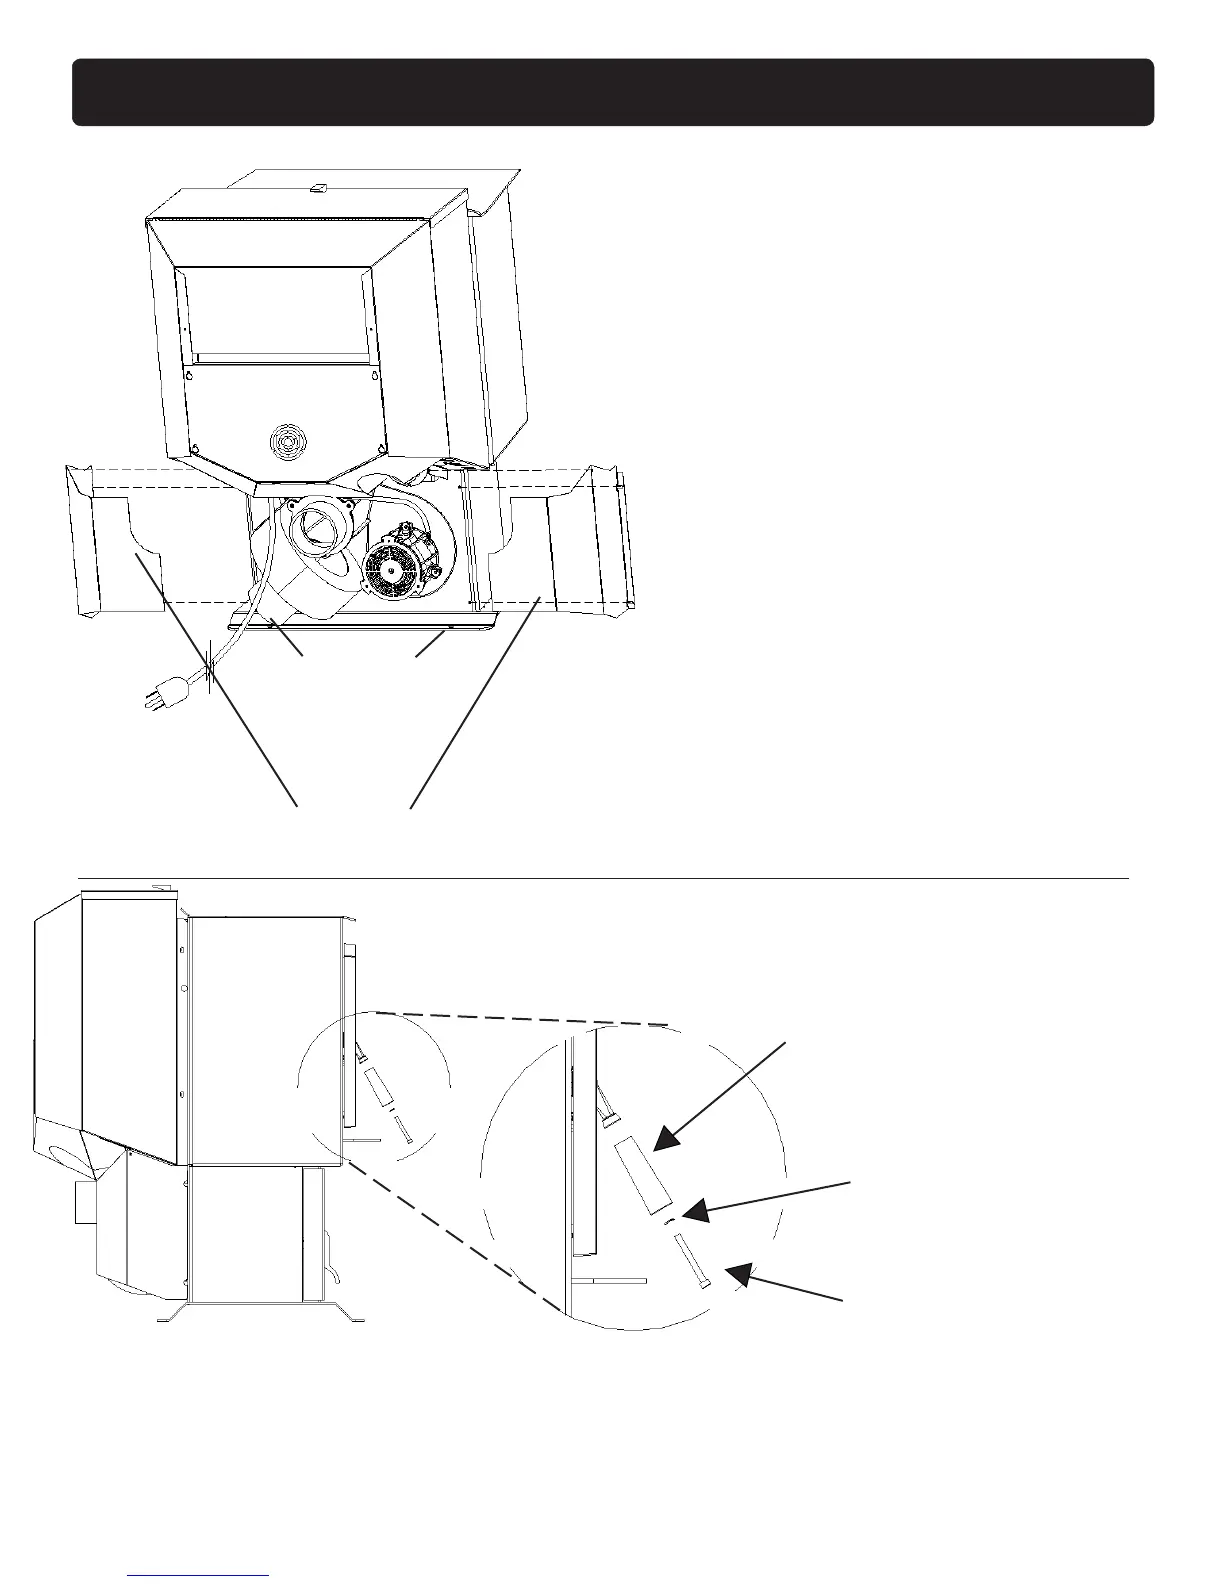
The P68 is bolted (1/4 x 1" hex head bolts) to the
skid to prevent movement during shipping.
To free the stove from the skid you must remove
the hold-down bolts in the rear of the pedestal
base.
Installing rear cover panels
The rear cover panels are removed from the stove
to make it easier to get at the hold-down bolts.
The rear cover panels are packed inside the
hopper and should be installed on the stove as
shown. It is recommended that the rear covers
are installed after the unit is in place and the vent
pipe is installed.
Firebrick
Installtherebrickverticallyontheanglebracket
above the burnpot.
Flame Guide
Install the cast iron ame guide on top of the
burnpot.Makesurethattheameguideisfully
seated on the vertical sides of the burn pot and
that the back of the guide rests against the body
of the stove.
INSTALL EXHAUST VENT AT CLEARANCES
SPECIFIED BY THE MANUFACTURER. Most
pellet pipes require a minimum of 3" of clearance
Rear Cover
Panels
Shipping Bolts
Note: These same holes
are used for securing the
stove in mobile home
installation.
8mm Spring Washer
3-31-08558
1. Remove wood handle ( P.N. 4-30-00123 ), 6mm
spring washer ( P.N. 3-31-08558 ) and socket head
cap screw ¼-20 x 2-1/4" ( P.N. 3-30-3025202252 )
from hardware pack.
Wood Handle
3-40-00123
SHCS 1/4-20 x 2-1/4
3-30-3025202252
Door Handle Installation
2. Install spring washer and wood handle onto socket
headcapscrewasshowning.2andthreadonto
latch on front door.
3. Tighten using a 3/16" hex key wrench.
Fig. 2
Fig. 1

 Loading...