22
Dry Seasoned Wood Only! Save These InstructionsHarman® • TL300 Owner's Manual_R25 • 2007 -___ • 08/15
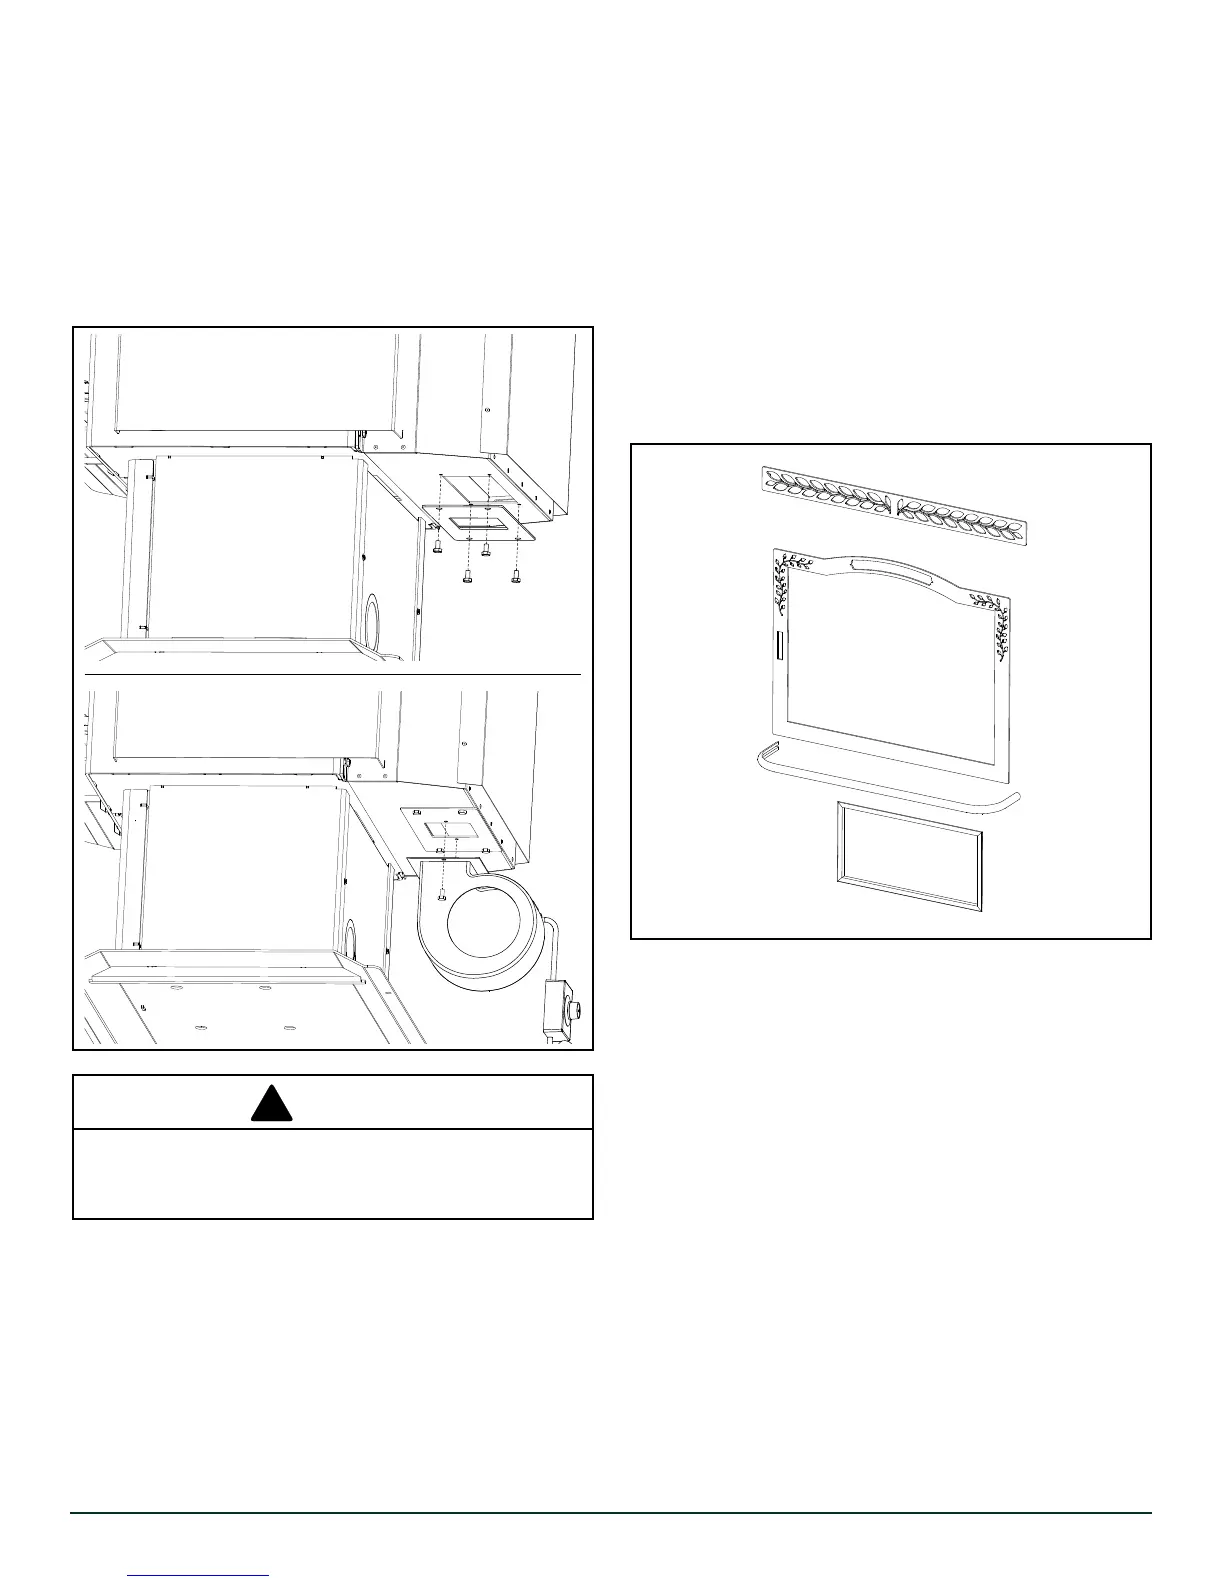
D. Optional Blower Installation
Use ONLY Blower Part #1-00-856002 With This
Appliance.
The optional blower kit installs easily to the rear of the
TL300. First, install the Blower Mount to the rear of the
stove using (4) 1/4-20 x 1/2" bolts as shown below.
Now that the Blower Mount is installed you can now install
the Distribution Blower to the Blower Mount by using (2)
1/4-20 x 1/2" bolts shown below.
E. Brushed Stainless Trim Kit Option
The trim kit consists of three pieces; Load door trim, Ash lip
trim, and the Ash door frame. To install the load door trim, it
is best to remove the door by lifting from the hinges. Lay the
doordownatonit'sface.Drillthedimpledholesineach
corner of the door and re-install the door onto the stove.
From the outside, install the frame with the studs going
through the newly drilled holes and install the nuts on the
inside. To install the ash lip trim, just slide it onto the ash lip.
You may attach with silicone if desired. The ash door frame
uses a spring clip on one end to hold it into the recessed
area of the ash door. Install the clip in the frame channel
and push that end into the door opening until the other end
oftheframets.
Plug the blower into a properly grounded electrical outlet.
Keep the blower on low speed or off during low res.As
you get out of the low burn range, the speed can be set
wherever desired, or kept off.
ROUTE POWER CORD AWAY FROM THE APPLIANCE.
DO NOT RUN THE CORD UNDER OR IN FRONT OF
THE APPLIANCE.
WARNING
 Loading...