2-22 888-2595-001 12/20/11
WARNING: Disconnect primary power prior to servicing.
Section 2 Installation
ZX Series
STEP 9 If tri-mode operation is anticipated, verify FlexStar exciter currently has
correct operating mode selected (FM, FM+HD, HD) and transmitter has
assumed same mode.
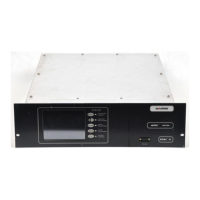
STEP 10 Open front door of amplifier chassis and verify following alarms on
controller card:
a. FORWARD POWER LOW: forward power is zero
b. LOW FAN SPEED: all fans have zero rpms (does not include fans
internal to PS modules)
c. PA MODULE SHUTDOWN: all PA modules are currently shut
down.
d. If RF MUTE ACTIVE is seen with a FlexStar exciter, verify exciter
mute is switched off by actuating MUTE soft button on FlexStar
main control screen.
e. If INTERLOCK LOOP OPEN is seen, verify dummy plug or suit-
able remote control connection is in place.
STEP 11 Switch on transmitter via front panel ON button on amplifier chassis.
Verify following actions take place:
a. Amplifier starts, as evidenced by sound of rushing air from main DC
fans at PA chassis rear.
b. Amplifier front panel STATUS LED changes from red to yellow and
ultimately to green after several seconds.
c. Exciter output un-mutes and supplies amplifier with drive power.
d. Amplifier ramps up from zero to full power as indicted by front
panel power meter.
STEP 12 Open amplifier chassis front door and verify no red alarm LEDs are
being reported on controller board. If alarms are present, consult
Section 6 – Troubleshooting of this manual.
STEP 13 Allow transmitter to operate for thirty minutes to warm up.
STEP 14 Inspect output transmission line to antenna for signs of localized heating.
STEP 15 If infrared inspection equipment is available, check AC mains
connections, disconnect switches, circuit breakers for signs of excessive
heat rise.
STEP 16 Verify all meter readings closely match those recorded on factory test
data report. Meter calibration should not normally be necessary. All
meters have been calibrated during factory test.
 Loading...
