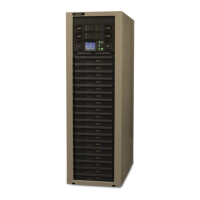
Do you have a question about the Harris Maxiva ULX and is the answer not in the manual?
Details on obtaining replacement parts from Harris Service Parts Department.
Instructions for carefully unpacking equipment and conducting a visual inspection.
Information regarding the process for returning or exchanging equipment.
Guidance on how to treat electrical burns, distinguishing between extensive and less severe cases.
Outlines the information covered in the technical manual for the Maxiva ULX Series transmitter.
Provides an overview of the Maxiva ULX Series COFDM digital television transmitters.
Details the various liquid-cooled power levels and models available in the Maxiva COFDM Series.
Presents a basic system block diagram showing signal flow and configuration.
Explains the simplified control system architecture, TCU, and communication buses.
Describes how transmitter RF output power is controlled via the Phase and Gain Board.
Details the touchscreen GUI, its software and hardware buttons for monitoring and control.
Explains the CAN bus system for control, status, and analog monitoring.
Information on updating the transmitter's software via a serial port connection.
Details discrete wired parallel remote control and web-enabled GUI interface.
Describes the Maxiva ULX Series PA Module utilizing LDMOS amplifiers.
Explains the primary method for control and monitoring of PA modules via ribbon cable bus.
Details the three-phase AC mains input requirements and configurations for the transmitter.
Provides an overview of the transmitter's liquid cooling system and its components.
Describes the controls and indicators on the cooling system control panel for operation.
Details the control panel, pump module, and heat exchanger units.
Explains how heat exchanger fans are controlled electronically based on temperature.
Describes the automatic pump operation modes (LOCAL and REMOTE) and control logic.
Information on liquid-cooled cold plates for PA modules, combiners, and splitters.
Describes the M2X exciter used with the Maxiva ULX Series transmitter.
Lists general specifications for the transmitter, including performance and physical characteristics.
Overview of installation and initial turn-on procedures for the Maxiva ULX Series transmitter.
Lists the documentation that ships with the transmitter and provides document package numbers.
Recommends reviewing the drawing package for installation and planning information.
Provides numbered steps for the installation process, with primary goals indicated by bold letters.
Details the required clearance and steps for placing the transmitter cabinet.
Outlines the major components of the cooling system and installation procedures.
Provides restrictions and considerations for installing the heat exchanger and pump module.
Explains how to calculate cooling system capacities for coolant and distilled water needs.
Provides guidance on handling and setting the heat exchanger and pump module units.
Instructions for immediately inspecting equipment and accessories upon receipt for shortages or damage.
Details the proper placement of the heat exchanger and pump module units.
Provides guidelines for installing the liquid cooling system plumbing, including valve usage and pipe sizing.
Covers the electrical installation of the heat exchanger and pump module unit.
Details the AC inputs to the top of the cabinet and AC connection procedures.
Explains the requirement for a safety ground wire for each AC mains input.
Provides step-by-step instructions for routing and connecting the primary AC conduit and wires.
Details how to compare voltage specifications and verify jumpers in various panels.
Provides guidelines for connecting RF inputs and ensuring proper conduit separation for signal/control cables.
Instructions for installing inter-cabinet connections for multi-cabinet transmitter models.
Describes external interlock connections and the interlock connector on the customer I/O panel.
Details the interlock connector's pins and their functions for external interlocks.
Explains the function of fault-off interlocks for personnel and cabinet safety.
Describes RF mute interlock connections used for temporary RF mute conditions.
Refers to electrical installation drawings for patch panel connections.
Provides steps for the initial turn-on of the liquid cooling system components.
Covers electrical installation, motor rotation checks, and cleaning procedures.
Details the procedure for verifying pump rotation and addressing incorrect rotation.
Explains how to verify heat exchanger fan rotation and correct improper rotation.
Provides steps for checking static pressure and performing visual leak checks on the cooling system.
Describes the process for creating and using a cleaning solution to clean the cooling system.
Outlines the procedure for flushing the system with distilled water to remove cleaning solution residue.
Details the procedure for filling the cooling system with the required glycol/water mixture.
Provides instructions for installing PA modules into the transmitter cabinet.
Details the critical steps for the initial powering on of the transmitter and its systems.
Guides the user through the final steps to turn on the cooling system.
Explains how to check and adjust the transmitter's flow rate to match nominal values.
Describes the normal operating conditions for pumps and fans in the cooling system.
Lists typical operational pressure values for various points in the cooling system.
Directs the user to the M2X Exciter manual for setting exciter parameters.
Provides critical steps for the initial RF turn-on of the transmitter.
Details connections for parallel remote control units to the Customer I/O Board.
Lists the pin functions for remote control connectors J3, J4, and J5.
Lists the pin functions for remote status output connectors J6, J7, and J8.
Details the connections for analog metering output J9 on the External I/O Board.
Describes the external RF switch connector J10 for controlling motorized switches.
Provides instructions for installing the real-time clock battery on the TCU PCM card.
Provides detailed operational information for the Maxiva ULX Series transmitter.
Describes the front panel interface, including the touchscreen display and hardware buttons.
Details the six pairs of hardware control buttons for main transmitter functions.
Explains the GUI's design for intuitive transmitter control and navigation.
Describes the global areas of the touchscreen display showing transmitter status and navigation.
Identifies the HOME screen as the primary operator screen displaying general operational information.
Details the Drive Chain screen for exciter, pre-driver, and IPA control and monitoring.
Describes the screen that displays faults for exciters and pre-driver/IPA units.
Explains the screen displaying input and output information for exciters and pre-driver/IPA units.
Details the Power Amps screen showing current and forward power for individual PA modules.
Lists all faults monitored in each PA module, highlighting active faults in red and warnings in yellow.
Provides total system Forward and Reflected power, VSWR, and Foldback status.
Displays faults considered Cabinet or System level such as VSWR and Power High.
Shows the power supply metering screen for low voltage units and AC Mains.
Lists monitored power supply faults for AC mains and low voltage power supplies.
Provides overall status information and access to additional System screens.
Displays system faults, highlighting active conditions in red and warnings in yellow.
Provides a complete listing of transmitter and system faults in the order they occurred.
Allows modification of station name, model number, and serial number used throughout the GUI.
Details admin setup parameters accessible via the System Service Admin screen.
Guides setting system nominal power, center frequency, modulation type, and AC line voltage.
Covers setting cabinet output power, number of PA's, IPA's, and cooling pumps.
Refers to Section 5 for procedures utilizing these calibration screens.
Displays software revision information for TCU controllers.
Provides information on network settings like MAC, IP, Netmask, and Gateway.
Shows the menus accessible on the GUI, serving as a navigation guide.
Provides detailed descriptions of transmitter sub-assemblies and external assemblies.
Explains the system for differentiating between active high/low logic states on schematics.
References block diagrams for transmitter overview, signal flow, and model configurations.
Details the three-phase AC mains supply to PA cabinets and jumper configurations.
Explains the advanced yet simple control system, including cabinets, modules, and buses.
Describes the GUI as a touchscreen interface for operator control and monitoring.
Explains how RF output power is controlled via the Predriver modules and ALC loop.
Details the TCU's role as the heart of the control system, acting as master or slave.
Describes the MCM card as a microprocessor-based controller for critical transmitter functions.
Explains the PCM card for enhanced monitoring, control, and data collection.
Details the card containing RMS detectors, pump control, and interlock wiring.
Explains the PA interface card's role in connecting TCU, Predriver, IPA, and PA backplanes.
Describes the buses providing control and monitoring for predriver and IPA modules.
Details the I/O card's function for interfacing with external devices.
Explains the exciter switcher card's function in controlling exciter switching.
Describes the PS monitor card's function in monitoring AC power, fuses, and temperatures.
Details the PA monitor board's role in controlling and monitoring PA module operation.
Explains the CPLD device within PA modules for fault reporting and action.
Describes functions active when the main control system is not functioning properly.
Explains the CAN bus as a high-speed serial link for transmitter control boards.
Describes the system bus as a ribbon cable distributing CAN and parallel control lines.
Explains the cabinet bus connecting the TCU (MCM card) to IPA and PA backplanes.
Details the I/O board's function for interfacing with external devices and provides connection information.
Provides an overview of the transmitter's RF system components.
Describes the M2X exciter and its role in signal generation for the transmitter.
Explains the predriver's function in redundant power and phase adjustment of RF drive signals.
Details the IPA and PA modules' function in amplifying modulated RF signals.
Describes the AC distribution board's function in AC line filtering and transient protection.
Explains the AC/DC converter board as a switching power supply for module operation.
Details the path for the PA voltage select signal controlling power supply output voltage.
Describes the PA monitor board's role in controlling and monitoring PA module operation.
Details the pins and functions of the PA/IPA connector I/O board.
Explains the board's function in routing analog and digital control and monitoring data.
States that PA modules are phase optimized at the factory and do not require field alignment.
Describes the splitter's function in dividing RF signals equally among PA pallets.
Explains the combiner's function in combining RF signals from PA pallets.
Describes the PA pallet as a single stage of amplification in the Triton module.
Notes that LDMOS FETs maintain factory bias characteristics without field re-biasing.
Describes the module combiner's function in optimizing across the UHF frequency band.
Provides references for information on the Maxiva ULX cooling system.
Shows block and schematic diagrams of the heat exchanger/pump module system.
Explains the function of the leak detector and cabinet drains in the cooling system.
Refers to block diagrams for the Maxiva 16 Module transmitter configuration.
Presents a block diagram of the Maxiva 16 Module transmitter RF signal path.
Outlines maintenance, alignment, replacement, and calibration procedures for the transmitter.
Provides detailed instructions and cautions for removing and replacing PA modules.
Outlines the slots containing PA modules in various transmitter model configurations.
Details the step-by-step procedure for safely removing PA modules from the rack.
Provides step-by-step instructions for installing PA modules correctly into the rack.
Explains how the transmitter continues to produce RF power with some modules removed.
Outlines the procedure for aligning the rack if difficulty is encountered during module installation.
States that PA module re-biasing is not required on Maxiva ULX transmitters.
Notes that PA module phasing is factory controlled and requires no field adjustment.
Emphasizes identifying faulty components before attempting field repairs.
Provides instructions for replacing PA and IPA (driver) pallets.
Covers the PA Module AC/DC Converter (PS) Board and its replacement.
Details the steps for removing and replacing the PS board.
Explains how the PS board output voltage changes with modulation type and adjustment.
Guides the user through setting the PS board output voltage using a test fixture.
Lists required power calibrations such as system and cabinet forward/reflected power.
Details the procedure for calibrating forward power using a local GUI screen.
Describes repeating the forward power calibration using internal cabinet samples.
Establishes values for VSWR protection thresholds for foldback and fault events.
Guides the calibration of system reflected power using the GUI screen.
Describes calibrating reflected power at the cabinet output using internal samples.
Details the procedure for calibrating exciter output levels using the GUI and web browser.
Explains the calibration procedure for the predriver unit's input power measurement.
Guides the user to the CALIBRATE screen to adjust various system thresholds.
Describes setting exciter A and B detector and threshold levels for fault indication.
Specifies setting cabinet reject loads to approximately 3V thresholds at 100% reject power.
Details setting system reflected threshold voltage relative to detected voltage levels.
Explains setting system foldback power to a maximum of 2.8% of nominal output power.
Sets the kW level at which the power bar turns yellow.
Sets the kW level at which the power bar turns red and a fault is logged.
Details the procedure for replacing the two 230V AC fans in the Maxiva cabinet.
Provides steps for removing the fan assembly from the cabinet.
Explains when RF system removal is required and the initial steps for removal.
Details the process of removing the cabinet fan assemblies and output coax.
Covers various maintenance tasks including cooling system checks and filter cleaning.
Routine inspection of the cooling system for leaks and coolant level.
Instructions for cleaning heat exchanger and pump motor housing fins.
Recommends switching pumps every three months to maintain proper working state.
Details the inspection and cleaning of the pump module strainer.
Explains how to check and manage the coolant level in the closed pressurized system.
Provides notes on coolant checks, changing pumps, and general maintenance.
Guidelines for checking the pH level and 50/50 glycol/water mixture.
Provides steps for changing pumps, including disconnecting fittings and maintaining flow direction.
Describes how to operate the pump module independently using LOCAL mode.
Recommends monthly inspection and cleaning of the air filter.
Explains how to adjust LCD display contrast via the GUI System Service screen.
Details accessing the GUI screen to adjust the LCD contrast setting.
States that the GUI touchscreen is calibrated at the factory and requires no further calibration.
Explains how to perform date and time settings using the local GUI screen.
Provides instructions for installing the real-time clock battery on the TCU PCM card.
Outlines the procedure for changing cards within the TCU, noting revision levels.
Provides instructions for replacing the MCM card, including component settings.
Lists recommended test equipment for maintenance and alignment procedures.
Contains diagnostic and troubleshooting information for the ULX series UHF transmitter.
Lists all faults that have occurred, including fault type, time, date, and active/inactive status.
Details the three-strike fault policy for reflected power faults and transmitter actions.
Identifies reflected power faults that initiate a three-strike procedure.
Lists module faults that trigger a three-strike action, affecting only the specific PA module.
Provides a listing of drive chain faults, descriptions, fault levels, and transmitter actions.
Lists faults related to PA and IPA modules, including temperature, VSWR, and power overload.
Details power supply faults for AC mains and low voltage supplies, including voltage failures and fuse issues.
Lists output faults such as VSWR, power overload, and foldback conditions.
Provides a list of system faults including ambient temperature, coolant flow, and leaks.
Lists replaceable parts with Harris PN, description, quantity, and reference designators.
Details replacement parts specifically for the heat exchanger and pump module.
Provides guidelines for field cutting and soldering RF transmission line for system interconnection.
Describes various methods for making a square, smooth cut on transmission line.
Details the procedure for soldering silver solder type transmission line flanges.
Step-by-step guide for preparing and soldering transmission line flanges.
Describes methods for cleaning soldered joints using acid solutions or Naval Jelly.
Provides an alternative procedure for cleaning soldered transmission lines.
Recommends a 50% mixture of deionized water and industrial grade ethylene glycol.
Provides guidelines for pipe sizing, routing, and installation techniques.
Lists necessary materials for plumbing system installation, including tools and supplies.
Outlines good plumbing practices for ensuring system integrity and quality soldering.
Covers routine inspections for leaks, pump operation, and system analysis.
Specifies ambient air temperature limits for heat exchanger dry coolers.
Describes using a hydrometer or refractometer to verify the 50/50 glycol/water mixture.
Provides an example to help understand the process of determining Ucartherm percentage.
Guides on reading a chart to determine the glycol percentage in the coolant solution.
Discusses protection against transients from lightning and the effectiveness of surge protectors.
Explains the importance of low-impedance ground wiring for noise reduction.
Details requirements for ground wires, including impedance, length, and insulation.
Describes the grounding method for AC power input and equipment cabinets.
Explains DC ground connections routed to a common cabinet ground and earth ground.
Specifies requirements for connecting to earth ground, including impedance limits.
Covers effective grounding and shielding for reliable equipment operation.
Discusses the destructive nature of lightning strikes and their impact on electronic equipment.
Lists and defines anomalies like over/under voltage, single phasing, RFI, and EMP.
Provides recommendations for minimizing lightning risk and maximizing system efficiency.
Summarizes protection strategies against lightning strikes and emphasizes surge protection.
| Brand | Harris |
|---|---|
| Model | Maxiva ULX |
| Category | Transmitter |
| Language | English |


 Loading...