This document is a manual for Haskris LX1, LX2, and LX3 chiller models, providing comprehensive information on their installation, operation, maintenance, and technical specifications.
Function Description:
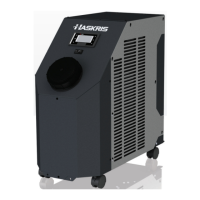
The Haskris LX series chillers are designed to provide controlled cooling for various applications. They circulate a fluid (typically distilled water, but some units are compatible with other fluids) to remove heat from an external system, maintaining a desired temperature. The chillers are available in air-cooled and water-cooled condenser configurations, catering to different environmental and facility requirements. They feature a controller display for monitoring and adjusting operational parameters, as well as remote communication capabilities for integration with building monitoring systems (BMS).
Important Technical Specifications:
- Dimensions:
- LX1 and LX2: 15" W x 32" D x 30" H (38.1cm W x 81.3cm D x 76.2cm H)
- LX3: 19" W x 34" D x 34" H (48.3cm W x 86.4cm D x 86.4cm H)
- Note: Custom dimensions may exist for alternative design configurations.
- Clearances:
- At least 6 inches (15 cm) on sides and rear for air flow.
- At least 36 inches (91 cm) on the front for controller access.
- Access to the top of the unit.
- Additional clearances on sides and rear may be required for service.
- Standard Ambient Air Temperature (for air-cooled condensers): 55°F to 90°F (13°C to 32°C).
- Note: Some units may be customized for extended ambient temperature ranges.
- Maximum Heat Rejection To Air (for air-cooled condensers):
- LX1: 7,510 BTU/hr (2.2 kW)
- LX2: 15,020 BTU/hr (4.4 kW)
- LX3: 29,700 BTU/hr (8.7 kW)
- Water-cooled Condenser Requirements:
- Maximum inlet pressure: less than 100 psi (6.9 bar).
- Minimum available differential pressure: 10 psi (0.7 bar).
- Maximum differential pressure: 100 psi (6.9 bar).
- Required facility water flow rate depends on the model and inlet temperature, calculated using a multiplier (LX1: 0.9, LX2: 1.3, LX3: 2.9) against a base GPM value derived from a provided chart.
- Fluid Compatibility: Typically clean, potable distilled water. Contact Haskris for compatibility with other fluids.
- pH Range: Acceptable range is 7 to 10.
- Electrical: Refer to the nameplate label for detailed electrical requirements. 3-phase units include a phase monitor.
Usage Features:
- Installation:
- Location: Clean indoor environment. For air-cooled units, ensure compatible ambient air temperature and sufficient climate control capacity for heat rejection. For water-cooled units, confirm building water source meets temperature and flow rate requirements.
- Piping: Comply with local codes. Use opaque 150 psi minimum rated reinforced EPDM hose for short runs; copper piping for long runs with vibration isolators. Insulate piping, label flow directions, and install isolation ball valves. For water-cooled units, an 80-mesh wye strainer at the building water inlet is recommended.
- Line Sizing: Recommendations provided for various flow rates (8 LPM/2.1 GPM, 16 LPM/4.2 GPM, 23 LPM/6.1 GPM) based on total straight pipe length and nominal pipe size (ID). Haskris offers assistance for pipe run review and recommendations.
- Electrical: Requires a licensed electrician for installation. Dedicated service disconnect and time-delay fusing or circuit breaker per nameplate. Units may have a power cord or require hardwiring to a terminal block.
- Reservoir Filling: Fill with clean, potable distilled water just below the threaded neck. Have extra water available for initial startup.
- Startup:
- 50/60Hz Selection Switch: Some chillers have a selector switch to match incoming electrical frequency.
- ON/OFF Switch: Rocker switch on the front. Toggling OFF then ON resets faults.
- Pre-startup Power: Electrical power must be applied at least 12 hours before startup to energize the crankcase heater and remove liquid refrigerant from the compressor. If not possible, energize for at least 1 hour, then cycle the unit ON/OFF 3-4 times before leaving it ON.
- Pump Priming: All fluid is removed from the pump head before shipment. The pump typically self-primes if the reservoir is full. If low pressure (<10 psi) is displayed, loosen the priming plug on the pump head to release air and a small amount of fluid, then re-tighten.
- Bypass Pressure Relief Valve (for turbine pumps): Limits pressure by bypassing flow. Adjustment involves loosening a nut, restricting the external circuit, rotating an adjustment post with a flat head screwdriver (clockwise to increase, counterclockwise to decrease pressure), removing restriction, and repeating until desired flow/pressure is achieved. Then, tighten the nut.
- Final Checks: Verify flow and pressure, replenish tank level as piping fills, check for leaks, and allow 15 minutes for temperature stabilization. Flush the tank if debris is present.
- Controller Display:
- Main Display: Shows status, set value (sv) and present value (pv) of supply fluid temperature, supply pressure, supply flow rate, and refrigerant pressures (low and high).
- Adjusting Set Value (sv): Use the arrow buttons to move the blinking cursor to the sv, adjust the value, then move the cursor back to the top left.
- Units of Measure: Selectable combinations: CAN (°C, psi, GPM), UK (°C, bar, IGM), USA (°F, psi, GPM), SI (°C, bar, LPM). Access through the Settings menu.
- Status Modes: STARTUP, ON, OFF, Off by Alrm (alarm/fault), Remote OFF.
- Faults: The "!" button flashes red when a fault occurs. Press the button to view fault descriptions, time, and date stamp. Multiple faults are indicated. Faults are reset by cycling the ON/OFF switch.
- Fault History: View past faults even when "NO ALARMS" is displayed.
- Remote Communication Capability:
- Options: Alarm contacts, remote ON/OFF interlock, Modbus, BACnet.
- Modbus and BACnet: For integration with Building Monitoring Systems (BMS). Requires a physical wire connection (3-wire RS-485 MSTP or ethernet TCP/IP) and software alignment.
- Configuration: Access communication settings via the Service menu (password 6420). Select the communication option (BACnetIP Ethernet, ModbusIP Ethernet, BACnet RS-485, Modbus RS-485), then adjust associated settings, including IP address if applicable. Power cycle the controller for changes to take effect.
Maintenance Features:
- Schedule: Recommended inspection every 6 to 12 months, depending on environmental and operating conditions.
- Activity: Check cleanliness of water and electrical readings during each inspection.
- Condenser Coils (Air-cooled units): Dust and debris can restrict airflow. Remove a side panel, use a brush to loosen debris, and vacuum to collect it.
- Suction Strainer: Nylon strainer in the tank prevents pump damage. Check for debris or biological growth. Clean or replace if dirty. Note: Cavitation due to a dirty strainer is not covered under warranty.
- Particle Filter: Captures debris leaving the chiller. Replace when pressure increases 5-6 psi (0.3-0.4 bar) above startup running pressure.
- Wye Strainer (Water-cooled units): Captures debris from building water. Clean during routine maintenance or when pressure at the inlet increases 10 psi (0.7 bar) or more.
- Liquid Level and Water Quality:
- Liquid Level: Ensure the reservoir is full of clean water.
- pH: Maintain pH between 7 and 10. Add sodium bicarbonate to raise pH if needed.
- Cleanliness and Flushing: If substantial debris or biological growth is present, flush the system. This involves adding 1 pint (0.5 L) of 3% hydrogen peroxide per 15 gallons (57 L) of water (after confirming compatibility with the application), circulating for 20-30 minutes, draining, and refilling with clean, potable distilled water. Repeat as necessary.
- Glycol: If biological growth persists, use laboratory/food grade (99% pure) propylene glycol to create a 10% mixture. Haskris recommends additives only as a last resort.