This document provides installation instructions and specifications for the HAT (Human Active Technology) Electric Height Adjustable Bases, specifically the MID HAT and HI HAT models.
Function Description
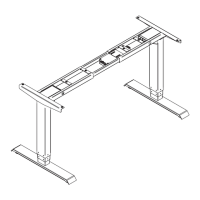
The HAT Electric Height Adjustable Bases are designed to provide a flexible and ergonomic workspace, allowing users to easily adjust the height of their desk. These bases are suitable for various worksurface configurations, including rectangular and angular shapes. The system includes a control box, programmable handset, and motorized legs that enable smooth height transitions.
Important Safety Instructions
Before using the electric height adjustable base, it is crucial to follow several safety precautions:
- Unplugging: Always unplug the furnishing from the electrical outlet before cleaning, servicing, or putting on/taking off parts.
- Supervision: Close supervision is necessary when the furnishing is used by or near children, invalids, or disabled persons.
- Intended Use: Use the furnishing only for its intended purpose as described in the instructions. Do not use attachments not recommended by the manufacturer.
- Damage: Never operate the furnishing if it has a damaged cord or plug, if it is not working properly, or if it has been dropped, damaged, or dropped into water. Return it to a service center for examination and repair.
- Heat: Keep the cord away from heated surfaces.
- Air Openings: Never operate the furnishing with blocked air openings. Keep the air openings free of lint, hair, and the like.
- Objects: Never drop or insert any object into any opening.
- Environment: Do not use outdoors or where aerosol (spray) products are being used or where oxygen is being administered.
- Disconnecting: To disconnect, turn all controls to the off position, then remove the plug from the outlet.
- Grounding: Connect the furnishing to a properly grounded outlet only. Refer to the "Grounding Instructions" section for details.
- Cord Type: Use only SJ, SJT, SJE, SJEO, S, SO, SOW, SOO, SOOW, STO, STOW, STOO, STOOW, SEO or SEOW or equivalent type 16 AWG cord minimum.
- Worksurface: Read instructions to determine the appropriate size, shape, and weight of the worksurface and/or secondary surfaces (shelves) used.
- Components: Review assembly instructions to confirm that appropriate critical components and accessories are being used.
- Load Rating: The maximum intended load is 250 lbs (113 kg), including the weight of the worksurface itself.
- Duty Cycle: This product is designed with a duty cycle of 10% – 2 minutes on / 18 minutes off.
Grounding Instructions
This product is designed for use on a nominal 120-volt circuit and features a grounding plug (Figure A). Ensure the product is connected to an outlet with the same configuration as the plug. No adapter should be used.
Important Technical Specifications
Models and Dimensions
- HAT2-HI-S-XX (HI HAT Short):
- Base Weight: 70 lbs.
- Height Range: 23.75" - 49"
- Clearance Under Base: 20"
- Width Range: 24" - 41"
- Load Rating w/Worksurface: 250 lbs.
- Max Speed: 1.5" per second
- HAT2-HI-L-XX (HI HAT Long):
- Base Weight: 74 lbs.
- Height Range: 23.75" - 49"
- Clearance Under Base: 20"
- Width Range: 42" - 74"
- Load Rating w/Worksurface: 250 lbs.
- Max Speed: 1.5" per second
- HAT2-MID-S-XX (MID HAT Short):
- Base Weight: 64 lbs.
- Height Range: 27.25" - 46.75"
- Clearance Under Base: 23"
- Width Range: 24" - 41"
- Load Rating w/Worksurface: 250 lbs.
- Max Speed: 1.2" per second
- HAT2-MID-L-XX (MID HAT Long):
- Base Weight: 68 lbs.
- Height Range: 27.25" - 46.75"
- Clearance Under Base: 23"
- Width Range: 42" - 74"
- Load Rating w/Worksurface: 250 lbs.
- Max Speed: 1.2" per second
Note: The 250 lbs load rating includes the weight of the worksurface itself.
Power Rating: 120VAC, 60Hz, 4A.
Recommended Worksurfaces
- Material: 1-1/8" thick wood or laminate worksurface.
- Sizes: Various sizes, with the largest being 96" long x 30" wide.
- Flame Rating: Worksurfaces greater than 10 sq. ft. (0.93 sq. m.) shall be tested to ASTM E84/(UL 723) and have a flame rating of 200 or less, or a smoke rating of 450 or less, or be marked with the smoke rating.
- Tools Required: 4mm Allen wrench (included), Phillips head screwdriver (AND/OR power drill), tape measure.
- Components:
- A: Base Frame-Leg Assembly (1x)
- B: Side Bracket Weldment (2x)
- C: Foot (2x)
- D: Programmable Handset (1x)
- E: Control Box (1x)
- F: Power Cord (1x)
- G: Cable 1.3m (1x)
- H: Wire Manager (1x)
- I: Cable Clip (2x)
- J: 4mm Allen Wrench (1x)
- K: M6 x 16mm Button Head Socket Cap Screw (8x)
- L: M6 x 14mm Flat Head Socket Cap Screw (4x)
- M: M5 x 20mm Phillips Pan Head Wood Screw (8x for L models, 6x for S models)
- N: M5 x 16mm Phillips Pan Head Screw (6x)
Usage Features
Assembly Steps
- Attach Legs to Base Frame: Rotate the legs of the base frame assembly (A) into position and secure them.
- Attach Side Brackets: Secure the side bracket weldments (B) to the base frame using M6 x 14mm flat head socket cap screws (L).
- Attach Feet: Attach the feet (C) to the bottom of the legs using M6 x 16mm button head socket cap screws (K).
- Mount Worksurface: Position the worksurface on the assembled base. Use the 4mm Allen wrench (J) to secure the worksurface. Note: Center rails must be removed if a 24" wide worksurface is installed.
- Secure Worksurface (cont.): Continue securing the worksurface to the base.
- Attach Control Box (L models): For HAT2-MID-L and HAT2-HI-L models, attach the control box (E) to the base. Ensure M5 x 20mm wood screws (M) are not too long for the desktop.
- Attach Control Box (S models): For HAT2-MID-S and HAT2-HI-S models, attach the control box (E) to the base using M5 x 20mm wood screws (M).
- Attach Programmable Handset: Attach the programmable handset (D) to the worksurface using M5 x 16mm Phillips pan head screws (N).
- Connect Cables: Connect the power cord (F), motor cables (G), and handset cable to the control box (E).
- Install Wire Manager: Install the wire manager (H) to the underside of the worksurface using M5 x 16mm Phillips pan head screws (N). Use cable clips (I) to organize cables.
- Leveling: Adjust the leveling glides on the feet to ensure the desk is stable and level.
Programming and Control
Reset Procedure
- Important: The desk must be reset prior to use.
- Safety Check: Ensure no obstacles are in the desk's path, the desktop is not touching walls, all cords are of appropriate length, and the control box is properly installed.
- Steps:
- Press and hold the DOWN button on the Handset (D) until the desk reaches its lowest height. Release.
- Press and hold the DOWN button again until the LED display reads "RST". Release.
- Press and hold the DOWN button again until the desk lowers a little more, slightly rises, and stops. Release.
- Your desk is now ready to use.
Adjusting Height
- Press and hold either the UP or DOWN button on the handset until the desired height is reached.
Programming Presets
- Find a desired height using the UP/DOWN buttons.
- Press "M" followed by a number (1-4) to save the preset.
- Caution: Once a preset button is held, the desk will move to and auto-stop at the programmed height.
Setting the LED Retracted Height
- Press the DOWN button until the base reaches its lowest position.
- Measure the distance from the floor to the top surface of the desktop.
- If the LED display does not match the measurement:
- Press and hold the DOWN button until the LED display reads "RST".
- Press and hold the "M" button (about 5 seconds) until the LED displays the flashing height.
- Use the UP/DOWN buttons to change the value to match your measurement.
- Wait about 5 seconds for the display to return to "RST".
- Finish the reset process (press and hold DOWN until desk lowers, rises slightly, and stops).
Setting Upper & Lower Limits
- To Set Upper-Limit:
- Move the base to the desired maximum height.
- Press "M" and release.
- Press UP and release. The LED will flash "S -".
- Press and hold "M" (about 2 seconds) until the LED changes to "999". The new upper limit is set.
- To Set Lower-Limit:
- Move the base to the desired minimum height.
- Press "M" and release.
- Press DOWN and release. The LED will flash "S -".
- Press and hold "M" (about 2 seconds) until the LED changes to "000". The new lower limit is set.
- To Remove Limits:
- Press and hold "M" until the LED flashes "S -" and release.
- Within 5 seconds, press "M" again and hold for 2 seconds. The LED will change to "555". Limits are removed.
- Caution: A RESET procedure requires the desk base to full retract (beyond any lower limit set). Ensure proper clearance below the desk base.
Handset Lock
- To Lock: Press and hold "M" (about 8 seconds) until the LED switches to "S -" then "LOC". Release.
- To Unlock: Press and hold "M" (about 8 seconds) until the LED switches from "LOC" to the height display. Release.
Changing Inches to Centimeters
- Press the DOWN button until the base reaches its lowest position.
- Press and hold the DOWN button again until the LED reads "RST".
- Press and hold the 2 button (about 5 seconds) while the LED flashes "RST" then switches to "10.3 = cm" or "10.4 = inches".
- Release 2, press 2 again until desired setting is reached. Wait 5 seconds for display to return to "RST".
- Finish the reset process.
Changing Anti-Collision Sensitivity
- Press the DOWN button until the base reaches its lowest position.
- Press and hold the DOWN button again until the LED reads "RST".
- Press and hold the UP button (about 5 seconds) while the LED flashes "RST" then switches to:
- 10.5 = 22 lbs. (10 kg) pressure (most sensitive)
- 10.6 = 33 lbs. (15 kg) pressure (middle sensitive)
- 10.7 = 44 lbs. (20 kg) pressure (least sensitive)
- Release UP, press UP again until desired setting is reached. Wait 5 seconds for display to return to "RST".
- Finish the reset process.
Maintenance Features
Troubleshooting
- General Malfunction: If the desk is not functioning properly, perform the RESET procedure.
- Error Messages ("Er1" - "Er13"):
- Confirm all wired connections are secure (legs to cables, cables to control box).
- Perform the RESET procedure.
- If the error persists, contact HAT Collective at 408 437 8770 or cs@hatcollective.com.
- Height Discrepancy: If the height between the legs exceeds 1.5 inches, stop the reset procedure and contact HAT Collective.
- "HOT" Display: If the handset displays "HOT", let the base cool down for 20 minutes.