Form No. DHLM-1207
7
INSTALLATION
INSTALLING NON-TRACK MOUNT
(A, C, P, S AND R)
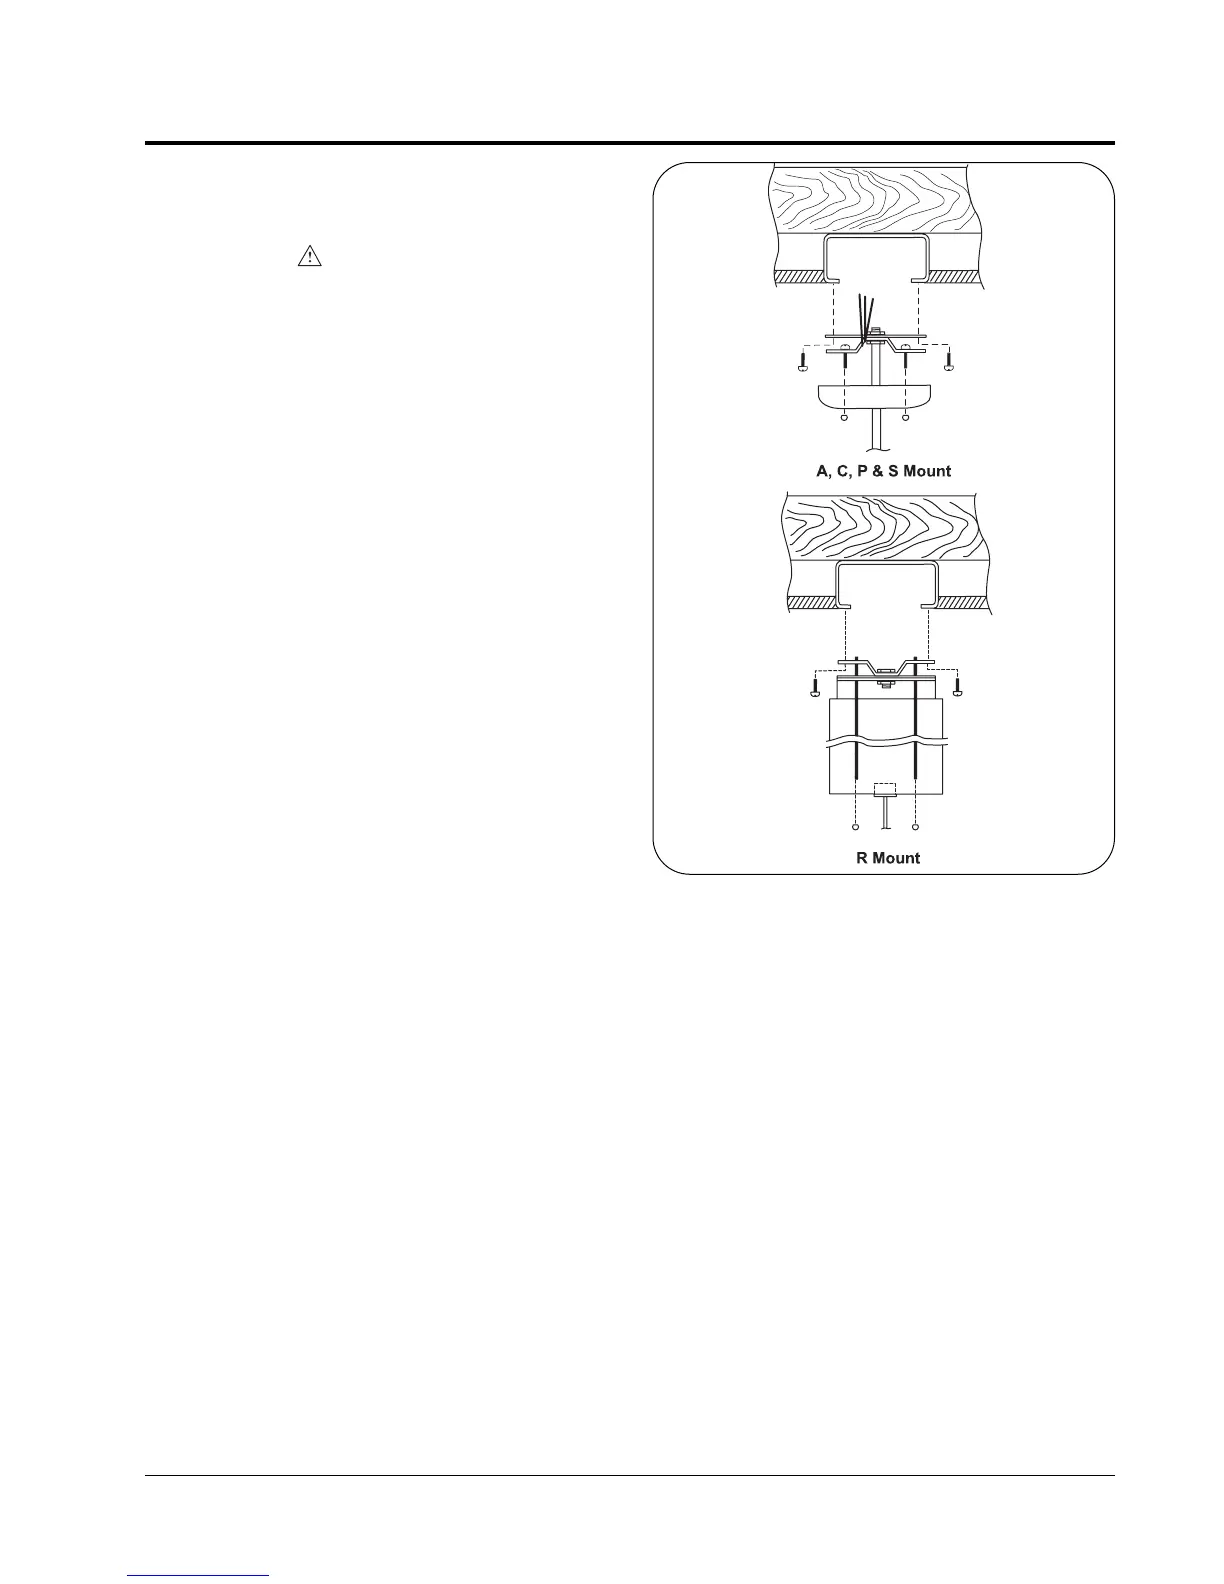
(See Figure 6)
WARNING
To avoid any injury, turn the power supply OFF
to the electrical junction box before mounting.
1. Mount the top bracket to the 4" (102 mm)
octagon junction box using the two screws
provided with the junction box.
2. Making sure all power is OFF, connect supply
lead L1 to the black lamp lead, connect neutral to
the white lamp lead,
If lamp is equipped with three wires, connect
ground to the green lead. If lamp is equipped
with two wires, make proper ground wire
connections from junction box. Tuck excess
wires into junction box.
3. Slide the canopy cover or cord housing up until it
rests against the ceiling and install the two ball
cap-nuts until snug to the ceiling.
INSTALLING NON-TRACK MOUNT
(TS) (UL RECOGNIZED ONLY)
1. Drill 7/16" (11 mm) hole through mounting fixture.
2. Pass wires from Decorative Heat Lamp through
hole in fixture.
3. Secure Decorative Heat Lamp to fixture with nut.
4. Making sure all power is OFF, connect supply
lead L1 to the black lamp lead, connect neutral to
the white lamp lead, and the ground to the green
lead.
Figure 6. Non-Track Mounting