USE ONLY HAYWARD GENUINE REPLACEMENT PARTS
42
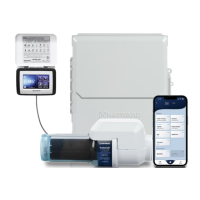
Wired - For a wired connection, run an Ethernet cable from the OmniLogic to the router. After selecting “Wired”, the system will display the ip
address and other network properties. Press the check mark and the OmniLogic will verify the network connection. You can now exit back to the
main menu and continue with the Configuration Wizard.
External Antenna - Make this selection when setting up a Hayward HLWLAN. Note that a 2.4GHz connection to the router is required. Once the
system is done running through the diagnostics, press the check mark to continue to the next section of the Configuration Wizard.
Switch Network - This selection allows you to look at a list of available networks and change from the current connection.
Change Password - This selection will allow you to enter a new wifi password. Use this option if you’ve changed the wifi password on your
router/access point.
Network Properties - Network properties will allow you to set a static ip address for the OmniLogic. The OmniLogic will default to a dynamic
ip connection and display current network information such as the local/gateway ip addresses. If a static connection is desired, select
“Static” and enter the required network information.
Diagnostic - This selection will re-establish a connection to your wireless network and display current network information such as wifi SSID,
signal strength, and the local/gateway ip addresses.
Not Now - Skip network setup and continue with Configuration Wizard.
Mood Color - To alert the user of warning conditions (no flow, failed sensor, etc.), the OmniLogic can change its screen color. The screen can display yellow
or red depending on the severity of the condition.
Simple Mode - Use this selection to enable and disable icons to be displayed while in Simple Mode screen. For more information, refer to the Simple
Mode section in the Operation manual.
If Spa Side is selected (requires HLSPASIDE):
Spa Side - Press this button to setup or modify a HLSPASIDE remote control.
Select an Aux button to configure - The 3 Aux buttons on the HLSPASIDE can be configured to run equipment, favorites or themes. In some cases,
these buttons may be assigned to default functions. To change functions or assign a new function, select the button that you’d like to configure.
If an Aux button is selected:
Select Function - There are 4 options available.
Equipment - Pressing this button will bring you to a screen that shows all available equipment. Select the desired equipment that you
want to assign to the Aux button.
Favorite - Pressing this button will bring you to a screen that shows all available Favorites. These Favorites had to have been defined
prior to configuring the Aux buttons. Select the desired Favorite that you want to assign to the Aux button.
Theme - Pressing this button will bring you to a screen that shows all available Themes. These Themes had to have been defined prior
to configuring the Aux buttons. Select the desired Theme that you want to assign to the Aux button
Unconfigured - If set to “Unconfigured”, the Aux button will have no function.