© 2021 HBX Controls12
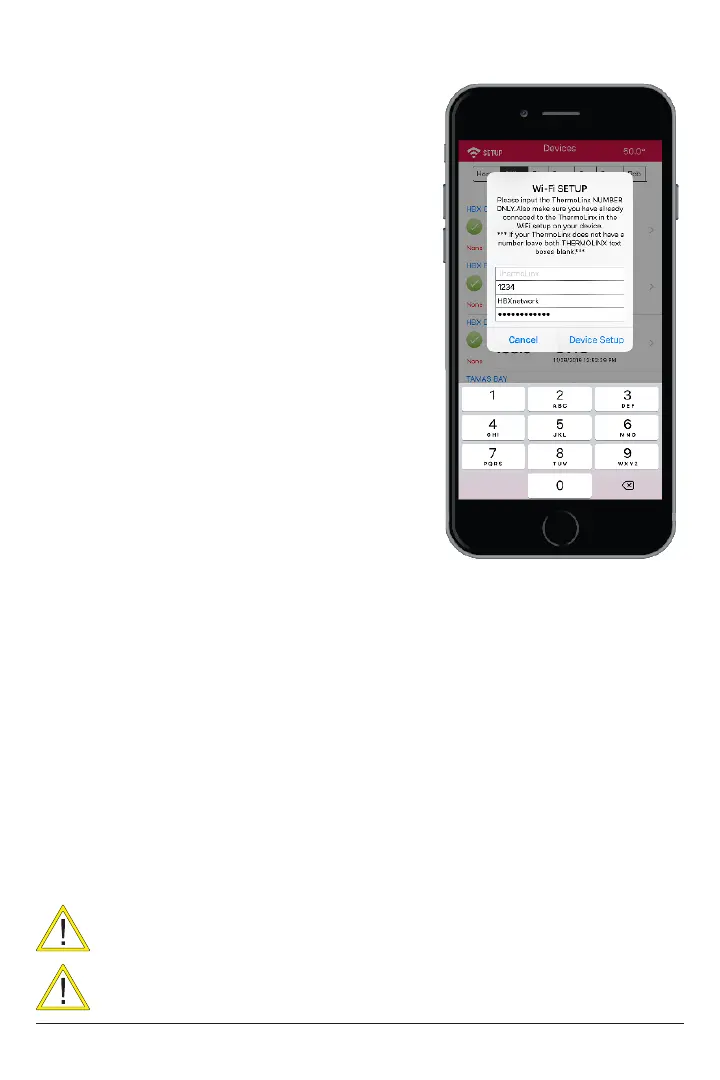
9. Once you are in the setup, a menu
will appear. Type in the 4 digits in the TLBTU
section that correspond to your device
numbers. TLBTU XXYY , leave the ThermoLinx
position empty
10. In the network SSID, type the network
name of the building Wi-Fi you are trying to
put the SensorLinx device on.
11. In the Password, type the password foe
the building Wi-Fi you are trying to put the
SensorLinx device on.
12. When nished press the Device Setup
button. This will connect to the TLBTUXXYY
device and send it the local network
information.
13. Once the App has sent all the
information it will reset the SensorLinx device
automatically and it will try to connect to
the local building Wi-Fi with the SSID and
password that you had provided.
14. Once the 120 second wait period is
up you should see all 3 LED’s on the SensorLinx device stay on solid. RED,
GREEN and BLIUE.
• If only the green light is solid, this is means that you have inputted
the incorrect password for the network, or an incorrect network name.
• If the green and the red light are on then you will need to open
port 1314 of your router to allow the ThermoLinx to communicate with our
server. If you need assistance with this please contact your internet provider.
15. At this point you are now ready to add the SensorLinx device to your
location.
CONNECTING TO A NETWORK (IOS)
Connections can only be made to a 2.4GHz network.
Home network name cannot contain more than 30 characters. The
password should not contain any special characters.
 Loading...