5/31/96
30
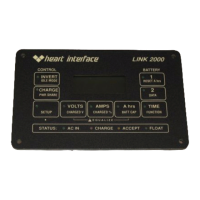
MICROPROCESSOR RESET PROCEDURE
The LINK 2000 uses a microprocessor to perform all of its calculations and
functions. We have worked very hard to insure a stable trouble-free product, however like
all computer products the unit is sometimes susceptible to power supply dips or surges that
can cause erratic behavior or memory errors. If you detect a problem please use the
following procedure to reset the microprocessor you may also need to reset the memory to
the factor defaults as described on the next page. If you reset to factory defaults be sure
and set up appropriate values for battery capacity, battery type, ambient temperature, and
Peukert's exponent as previously described. Please read the entire instruction set before
beginning the procedure.
TO RESET FROM A LOCKUP, ERRATIC DISPLAY, OR ERRATIC BEHAVIOR
1) Disconnect from shore power.
2) De-power the meter by removing the fuse from the red wire. If the red wire
is jumpered to the blue or violet wires, remove the fuses in the appropriate wire
to remove power to the unit. If your meter is a LINK 2000R you can de-power
the meter by removing the gray ribbon cable from the monitor terminal board
and reconnecting it.
3) Wait at least 30 seconds before reconnecting the fuse (or the ribbon cable).
When the fuse is reconnected use a continuous motion. If the meter is
intermittently powered and de-powered several times in a short period, the
microprocessor may lock-up.
4) Press the INVERT and CHARGE buttons so that their LED's are illuminated.
5) Restore shore power. After a few seconds you should see the AC STATUS
light illuminate and the charge status lights come on indicating the CHARGE
mode. (If the battery is full the CHARGE lite will only be on for a short time
before the ACCEPTANCE LED comes on.)
6) Check to see that your battery capacity, battery type, ambient temperature,
Peukert's exponent, charged voltage parameter, and any other values you
might have previously set up are still correct. If they are, end here, if not
change them to the appropriate values or follow the procedure on the next
page for resetting to factory values.