This document is a user manual for the Heat Storm Garage Heater, model HS-6000-GC. It provides detailed instructions for installation, operation, troubleshooting, and maintenance, along with safety guidelines and warranty information.
Function Description:
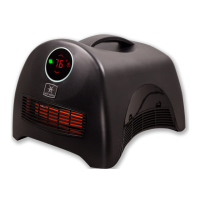
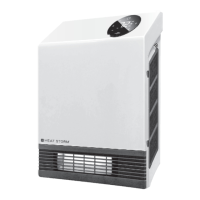
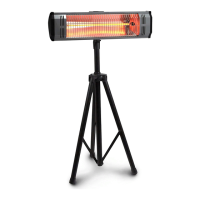
The Heat Storm Garage Heater is an indoor electric heating appliance designed to provide warmth in spaces like garages. It operates by heating infrared elements, and then a fan distributes the warm air. The heater offers adjustable temperature settings, multiple working modes (Low-Auto-High-Low), and a child lock feature for safety. It is designed for direct wiring to a 240V electric power source and should not be used with extension cords or relocatable power outlets. The heater can be controlled via a touchscreen interface on the unit itself or through the Smart Life app on Wi-Fi models, allowing for remote temperature adjustments, scheduling, and child lock activation.
Important Technical Specifications:
- Power: 3000-6000 W
- Voltage: 240V electric power (direct wired)
- Connectivity: Wi-Fi enabled (2.4 GHz networks only) for app control
- Temperature Range: Default set temperature is 70°F (21°C). Displays temperatures from 16°F (-9°C) to 99°F (37°C).
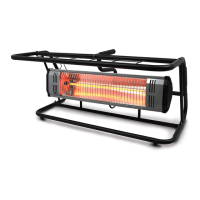
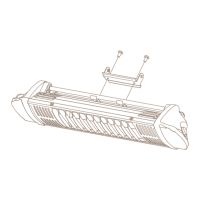
- Installation: Designed for ceiling or wall mounting using provided brackets. Requires finding wood studs for sturdy installation. Offers two positions from the ceiling and three facing angles for flexible installation.
- Wiring: Requires 10 gauge internal wires for connection.
- Safety Features: Includes safety guards to prevent large objects from hitting emitters, and a tilt-over error detection that turns off the heater and fan if it tips over.
Usage Features:
- On/Off: Single touch of the power icon.
- Child Lock: Press and hold the power icon for 5 seconds to engage/disengage. A red lock icon appears when active.
- Temperature Calibration: Enter calibration mode by touching the power icon for 10 seconds until the temperature number flashes. Use '+' or '-' to calibrate.
- Working Modes: Single touch of the lightning bolt icon shifts between Low, Auto, and High modes.
- Beep Sound: Press and hold the lightning bolt icon for 5 seconds to turn the beep sound on/off.
- Temperature Adjustment: Single touch of '+' or '-' icons increases/decreases temperature by one degree. Holding the icons allows for rapid incremental changes.
- Fahrenheit/Celsius Toggle: Pressing '+' and '-' icons simultaneously alternates between Fahrenheit and Celsius display. This feature is only available via the touchscreen or Smart Life app on Wi-Fi models.
- Display Brightness: Single touch of the sun icon changes display brightness.
- Delay On/Off Timer: Single touch of the timer icon enables edit mode. Display flashes. Use '+' or '-' to add/remove hours for "ON" timer. Single touch again to switch to "delay off" mode. Settings activate after 5 seconds. When the heater is "on," only the "delay off" timer can be set.
- Factory Reset: Power off, unplug, and plug in the heater. Within 3 minutes, press and hold the timer icon for 10 seconds.
- Wi-Fi Connectivity (Smart Life App):
- Connect phone to a 2.4 GHz Wi-Fi network.
- Download and create an account on the Smart Life App.
- Add device: Tap "Add Device," then "Small Home Appliance," then "Heater."
- Enter Wi-Fi network name and password (case sensitive).
- On the heater, press and hold the Wi-Fi/sun symbol on the control screen for 5 seconds until a beep sounds and the Wi-Fi symbol blinks blue.
- Confirm indicator rapidly blinks in the app.
- The app will connect to the heater.
- Rename the heater in the app.
- Control the heater remotely: adjust temperatures, create schedules, set child lock, and manage multiple heaters.
- AP Mode: If connection fails, the Wi-Fi light will automatically enter AP mode (slowly blinking blue light). Alternatively, press and hold the Wi-Fi/sun icon for 5 seconds until the blue light quickly blinks to enter AP mode. Choose "AP pairing mode" in the Smart Life app.
Maintenance Features:
- Cleaning: Unplug the heater and allow it to cool down before cleaning. Use a soft cloth to wipe off heavy dirt. The manual states the heater contains no moving parts and requires very little maintenance.
- Filter Maintenance: The manual mentions "Washable Lifetime Filter System" and directs users to the operations and control section for cleaning instructions, implying the presence of a filter that needs cleaning.
- Heating Element Replacement: If heating elements malfunction, they should only be replaced by a service agent. Replacement elements can be ordered through an authorized repair center or customer service if the heater was purchased online or is older than one year.
Troubleshooting Guide:
- No air at first: Normal. The first 15 seconds allow infrared elements to heat up before the fan turns on.
- Ambient temperature mismatch: Thermostats vary. Calibrate the heater's thermostat to match the central HVAC system (see calibration section).
- Fan keeps blowing after turn-off: Normal cool-down phase (up to 12 minutes) to protect internal components and extend element lifespan.
- Not blowing warm air: Check for blocked air inlet or dirty air filter. Clean the filter if dirty. Ensure ambient temperature is not higher than the thermostat setting. Check for airflow obstructions.
- Heater near objects: Can cause varying room temperatures due to poor air circulation.
- Persistent issues: Disconnect from wall outlet for 2 hours, then plug back in. If problems persist, call customer service (435-752-6611).
- Burning plastic smell: Normal for new heaters. If it persists for more than a couple hours, call customer service.
- Error Codes:
- "EE": Temperature sensor (probe) error. Heating element and fan off. Unplug and check sensor.
- "EO": Program cannot set up to run. Unplug and plug in again. If persistent, PCBA needs replacement.
- "E1": Heater tilt-over error. Heater and fan off. Turn back on by touching on/off icon after standing up.
- "UH": Incorrect high voltage power supply. Unplug immediately.
- "LO": Temperature is less than 16°F (-9°C).
- "HI": Temperature is greater than 99°F (37°C).
- For LO/HI errors: Unplug for 2 hours, plug back in. Perform factory reset. If persistent, call customer service.
Warranty and Returns:
- 1 Year Limited Warranty: Covers manufacturing and material defects for one year from purchase date. Non-transferable, applies to original owner through authorized supplier. Limited to repair or replacement of defective parts. Voided by unauthorized repair, alteration, abuse, accident, misuse, dampness/condensation, or lack of original receipt. Excludes installation, labor, construction, transportation costs.
- Return Policy (direct from EnergyWise Solutions): Full refund if merchandise is received in new condition, packed in original manufacturer's box with all packaging material, and includes original manuals and accessories.
- Manufacturer Return Policy: Buyer responsible for all rates/shipping charges after 30 days of purchase date for exchange, refund, or warranty claims.
- Warranty Service: Contact customer service at 435-752-6611. Requires sales receipt, purchase location, and product model. Email proof of purchase and manufacturer sticker picture to cs@heatstorm.com for troubleshooting. Units older than 30 days may incur shipping costs. Repairs are attempted first; new units are provided only if unrepairable.