7
(3) Look for a button on the remote control for the TV you are connecting to that
says 'VIDEO', 'VIDEO 1', 'AUX', 'EXT', 'LINE 1. The 'LINE-IN' button will
display the Video input source.
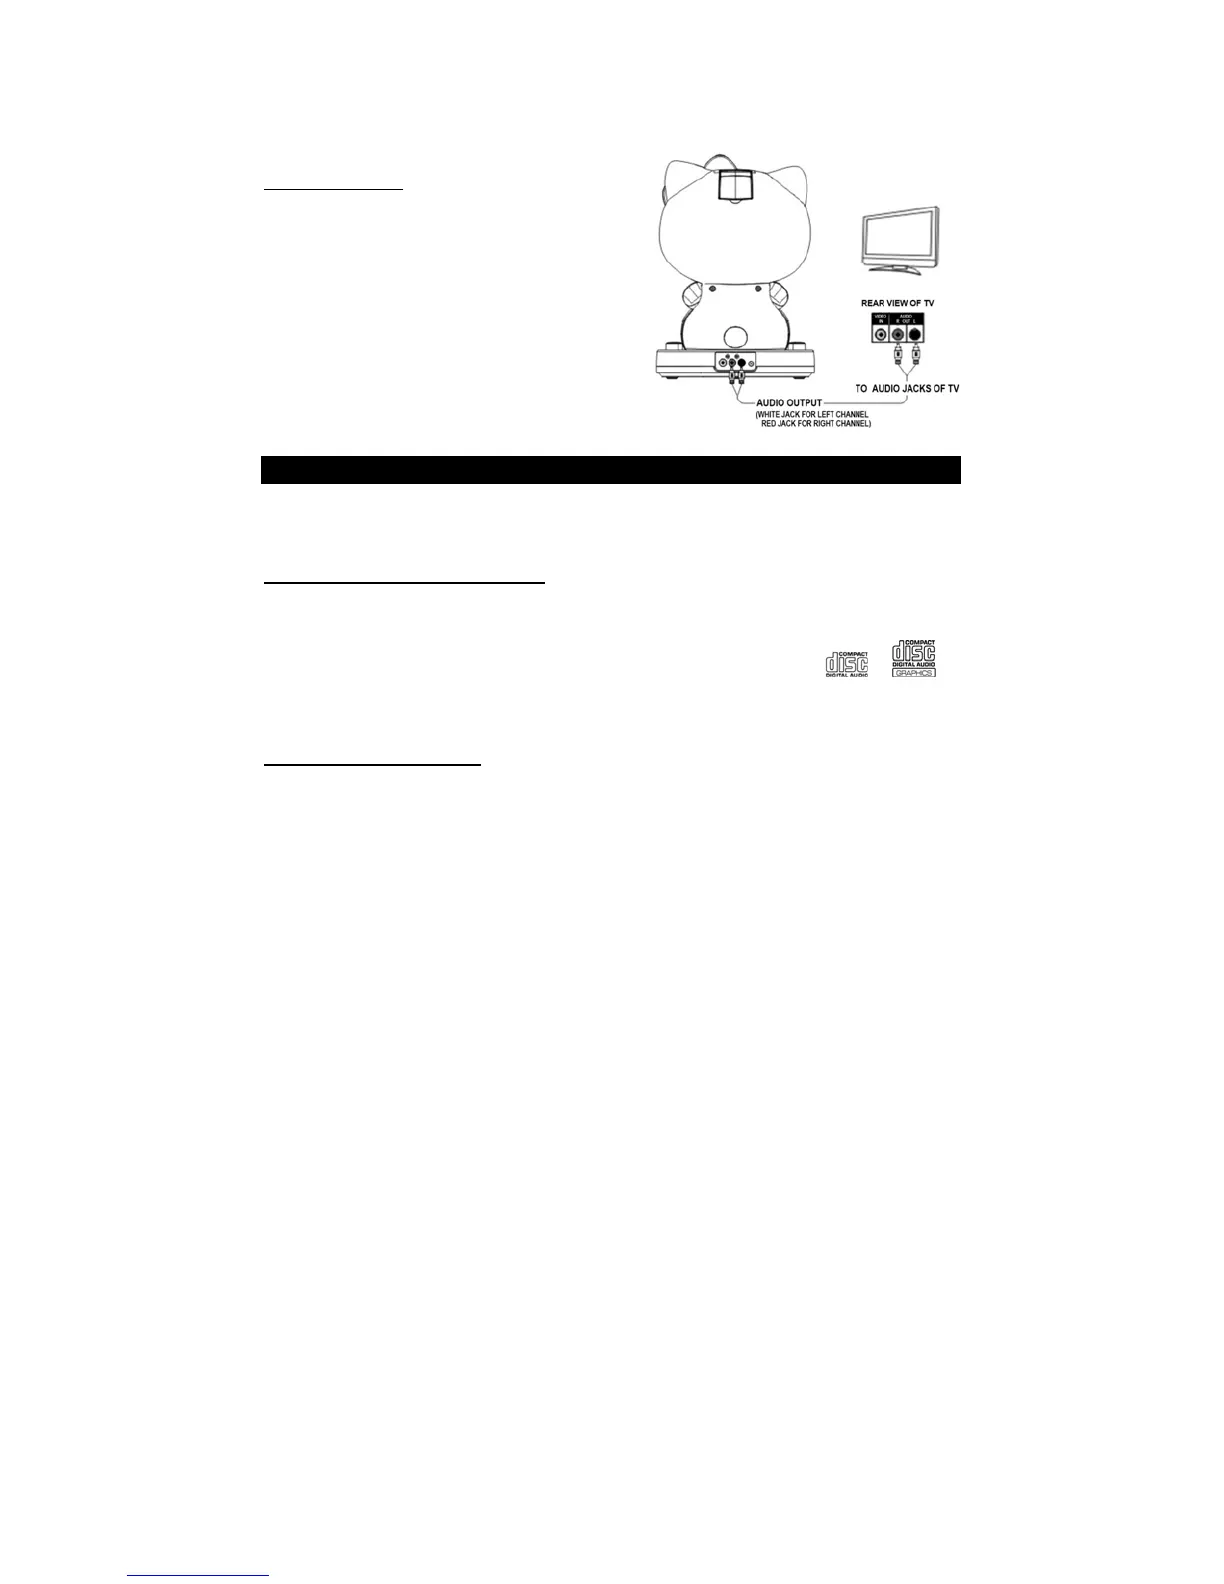
Audio connection
Connect the unit to your TV or home stereo
system using the White and Red connections
on the supplied patch cord. Plug the white end
of the patch cord into the white AUDIO OUT
jack on the unit. Plug the red end of the patch
cord into the red AUDIO OUT jack on unit. Now
connect the other end of the cable's white (left
channel) and red (right channel) plugs to your
TV or home stereo system's 'AUDIO IN' or
'AUX IN' jacks.
CD OR CD+G OPERATION
WARNING - Tapping or dropping the microphone while it is on can permanently damage
your microphone. Do not swing the microphone around by the cord.
ABOUT THE CD-R/CD-RW DISCS
This unit is CD-R/CD-RW compatible but playback capability may vary depending on the
quality of the disc, the recording device and application software.
NOTE: This unit is designed to play CDs bearing the identification logo
or . If
CDs do not conform to the CD standard, they may not play properly.
CD or CD+G OPERATION
Do not press the door of the CD compartment while it is playing.
Never place anything except a compact disc in the disc tray. Foreign objects can
damage the unit.
Do not apply excessive force to disc cover.
Only place one disc in the tray at a time.
TURNING POWER ON/OFF
(1) Press the POWER button switch on the Karaoke system, the POWER indicator will
light up.
(2) Press the POWER button again to switch off the system, the POWER indicator will
be off.