Do you have a question about the Henny Penny Velocity Series and is the answer not in the manual?
| Category | Commercial Food Equipment |
|---|---|
| Manufacturer | Henny Penny |
| Series | Velocity Series |
| Material | Stainless Steel |
| Construction | Heavy-duty stainless steel |
| Heat Transfer System | High-Efficiency |
| Capacity | Varies by model |
| Power Source | Electric or Gas |
Provides contact information for technical assistance and support services.
Details the physical size and required surrounding space for appliance installation.
Outlines key performance parameters and operational details of the appliance.
Identifies the location of the data plate containing essential appliance information.
Instructions for safely removing the appliance from its shipping packaging.
Steps for safely moving the fryer off its shipping pallet.
Guidance on properly fitting and securing counterweights for lid operation.
Final steps to complete the unpacking process after initial removal.
Advice on choosing an appropriate and safe placement for the fryer.
Procedures for ensuring the fryer is set up level to prevent operational issues.
Requirements and recommendations for proper ventilation of the appliance.
Details the necessary electrical connections, voltage, and safety precautions.
Specific electrical requirements for international installations and CE marking.
Instructions for assembling and preparing the drain pan for filtration.
Procedures for filling the fryer vat with cooking oil for the first time.
Steps to clear oil lines of water or residual oil before initial use.
Method for manually adding oil to the fryer vat to the correct level.
Procedure for filling the vat using a bulk oil supply system.
Instructions for filling the reservoir that supplies oil to the vat.
Process for loading cooking parameters and menu settings into the fryer.
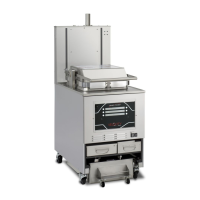
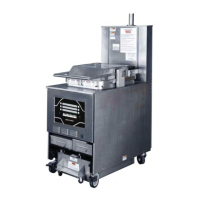
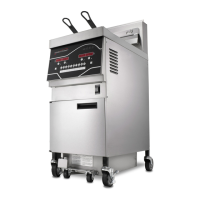
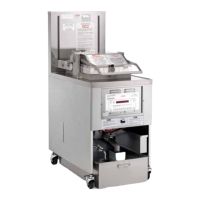
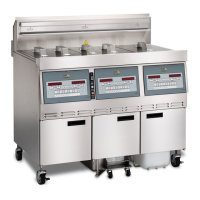
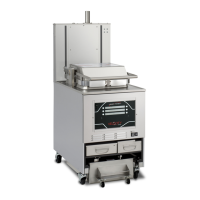
Identifies and describes the main parts and components of the fryer.
Explains the function of the control panel buttons, lights, and displays.
Details the functions and usage of various action buttons on the control panel.
Describes different operational modes and their behaviors within the fryer's system.
Instructions on accessing and navigating the primary menu structure of the control panel.
Provides a visual overview of the fryer's menu hierarchy and navigation flow.
Explains different ways the fryer's operational data can be displayed on the screen.
Describes a display format showing four cook items with their menu title.
Describes a display format showing five cook items and a button to advance to the next set.
Describes a display format allowing control over six items on the cook menu.
Explains factors that prematurely break down oil, shortening its useful life.
Provides essential rules to prevent oil overflow, burns, and appliance damage.
Discusses the importance of filtering for oil life, product quality, and safety.
Guides on accessing and navigating the different filter options available on the control panel.
Details on performing a quick, on-demand oil filtration cycle.
Instructions for performing a daily oil filtration and cleaning cycle for thorough maintenance.
Explains the process of extending oil life through an extended filtration cycle.
Outlines the procedure for starting the fryer each day, including heating and system checks.
Provides typical heating durations and temperatures for various fryer functions.
Instructions for the safe and correct operation of the fryer's lid.
Detailed steps for properly closing and securing the fryer lid for pressure cooking.
Procedures for safely opening the fryer lid after pressure has been released.
Guidance on optimal placement of product racks for even cooking.
Instructions and warnings related to the pressure frying process.
Describes the automatic quick filtering process that occurs after cook cycles.
Explains the automatic feature that maintains the oil level in the vat.
Details the automatic feature that mixes oil to maintain consistent temperature.
A summary table of scheduled maintenance tasks and their frequencies.
Describes a mode to safely clean the control board without activating functions.
Daily cleaning procedures to maintain hygiene and product quality.
Instructions for cleaning the exterior surfaces of the fryer for appearance and hygiene.
Procedure for draining and cleaning the pan that collects condensation.
Steps for cleaning the reservoir that supplies fresh oil to the fryer.
Detailed instructions for cleaning the drain pan assembly and its components.
Weekly maintenance for castor wheels to ensure smooth operation and stability.
Weekly cleaning of nylatron strips to prevent debris buildup and maintain unit integrity.
Weekly cleaning of lid filler slides to prevent food debris entry into the lid mechanism.
Monthly procedure for cleaning the deadweight assembly to ensure proper pressure building.
Monthly cleaning of the lid gasket to ensure a proper seal and prevent steam leaks.
Steps for safely lifting and securing the fryer lid for maintenance access.
Instructions on how to safely remove the lid gasket for inspection or replacement.
Procedures for cleaning both the lid and its gasket to maintain hygiene and seal.
Steps for correctly installing a new or cleaned lid gasket.
Overview of different methods for safely draining and disposing of used cooking oil.
Explains how to access the oil disposal functions through the control menu.
Detailed instructions for manual oil disposal using an Oil Disposal Shuttle (ODS).
Steps to navigate to the specific oil disposal menu options.
Procedure for draining oil from the vat using an ODS.
Steps to clear oil lines, valves, and fittings of residual oil after disposal.
Instructions for cleaning the fryer vat after oil has been drained.
Procedures for refilling the vat with fresh cooking oil.
Explains the process of draining oil via a rear-connected bulk disposal system.
Steps to navigate to the rear bulk oil disposal menu.
Procedure for draining oil using the rear bulk disposal connection.
Steps to clear oil lines, valves, and fittings after rear bulk oil disposal.
Instructions for cleaning the fryer vat after rear bulk oil disposal.
Specific steps for pumping oil out via the rear connection.
Procedures for refilling the vat with fresh oil manually after disposal.
Procedures for refilling the vat with fresh oil from a bulk supply.
Explains the process of draining oil via a front-connected bulk disposal system.
Steps to navigate to the front bulk oil disposal menu.
Reminder to connect the hose for front bulk oil disposal.
Procedure for draining oil using the front bulk disposal connection.
Steps to clear oil lines, valves, and fittings after front bulk oil disposal.
Instructions for cleaning the fryer vat after front bulk oil disposal.
Specific steps for pumping oil out via the front connection.
Procedures for refilling the vat with fresh oil manually after front disposal.
Procedures for refilling the vat with fresh oil from a bulk supply after front disposal.
Instructions for performing a thorough cleaning of the fryer vat.
How to select between heated or cold-soak cleaning modes.
Explains how to access the clean-out functions within the control menu.
Steps to enter the clean-out mode for vat cleaning.
Steps to prepare the fryer for cleaning, including filling with water and solution.
Procedure for cleaning the vat by letting it soak overnight in a cleaning solution.
Procedure for cleaning the vat using heated water and a cleaning solution.
Steps for draining water and cleaning solution from the fryer vat.
Procedures for rinsing the fryer vat with clean water after cleaning.
Steps to flush oil lines with clean oil after cleaning.
Instructions for wiping down the fryer vat after rinsing.
Final steps to confirm completion of the clean-out process and prepare for operation.
Instructions on how to access the main programming menu.
Detailed steps for programming new products or modifying existing cook settings.
Explains how to enter programming mode for product setup and maintenance options.
Instructions for copying product settings from one program slot to another.
Provides an overview of the information mode, including error logs and usage statistics.
Accesses advanced settings and configurations not covered in standard programming.
Allows modification of filter cycle parameters for optimal performance.
Instructions for resetting the filter pump motor's overload protection.
A table listing common problems, their causes, and recommended corrections.
Explains error messages displayed by the control board and how to resolve them.