Page 5For technical questions, please call 1-888-866-5797.Item 64751
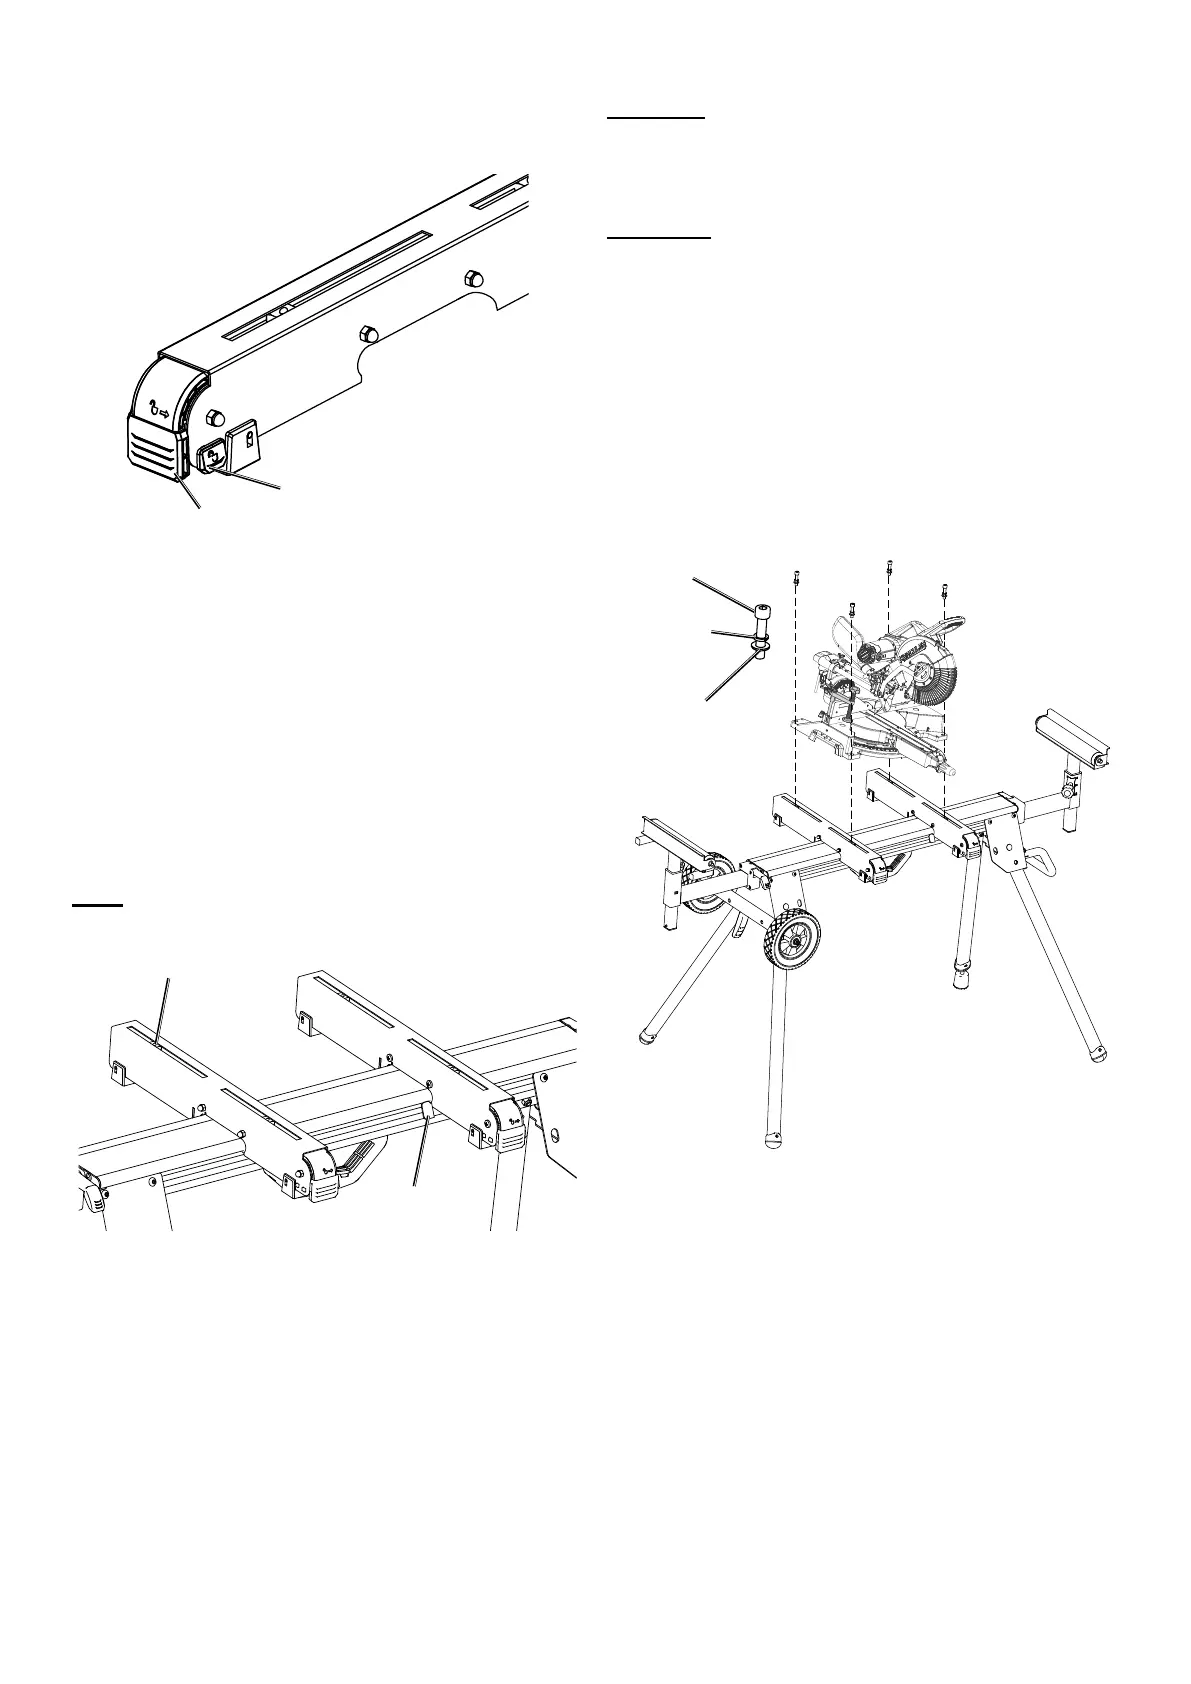
9. Attaching Mounting Brackets:
a. Push in Lock Button.
b. Lift Lock Handle.
Lock
Button
Lock
Handle
c. Measure distance between mounting
holes on saw (sold separately).
d. Place Right Mounting Bracket in Guide Bracket.
e. Push Lock Handle down until
Lock Button clicks in place.
f. Place Left Mounting Bracket so that it lines up
with distance between mounting holes on saw.
g. Push Lock Handle down until
Lock Button clicks in place.
h. Move Mounting Nuts as necessary to
fit the mounting holes on saw.
Note: Move Guide Bracket as necessary to fit the saw.
Guide
Bracket
Mounting
Nuts
10. Mounting saw:
CAUTION! Unplug saw before mounting it.
a. Place saw on Mounting Brackets.
b. Secure saw with four Bolts (27),
Spring Washers (26) and Washers (25).
WARNING! Included Bolts may be too long or short
for your miter saw. They must properly secure the
miter saw to the brackets, thread all the way through
the washers and nut, and not interfere with the safe
operation of the saw in any way.
Replacement bolts can be used instead, but they
must be grade 5, have the same head type and size
as the included Bolts, and have a 1.25mm thread
pitch and M8 thread diameter.
They also must properly secure the miter saw
to the brackets, thread all the way through
the washers and nut, and not interfere with
the safe operation of the saw in any way.
Saw sold
separately
Bolt
(27)
Spring
Washer
(26)
Washer
(25)
11. Removing saw: The saw may be removed
while attached to Mounting Brackets.
a. Push in Lock Buttons and lift Lock Handles.
b. Lift the saw off of the Stand.
12. Replacing saw while attached
to Mounting Brackets:
a. Push in Lock Buttons and lift Lock Handles.
b. Place Right Mounting Bracket in Guide Bracket.
c. Push Lock Handles down until
Lock Buttons click in place.