Page 7For technical questions, please call 1-888-866-5797.Item 58747
OPERATING INSTRUCTIONS
Read the ENTIRE IMPORTANT SAFETY INFORMATION section at the beginning of this manual
including all text under
subheadings therein before set up or use
.
Tool Set Up
TO PREVENT SERIOUS INJURY FROM
ACCIDENTAL OPERATION: Make sure that the
Power Switch is in the off-position and remove the
Battery Pack before performing any procedure in
this section.
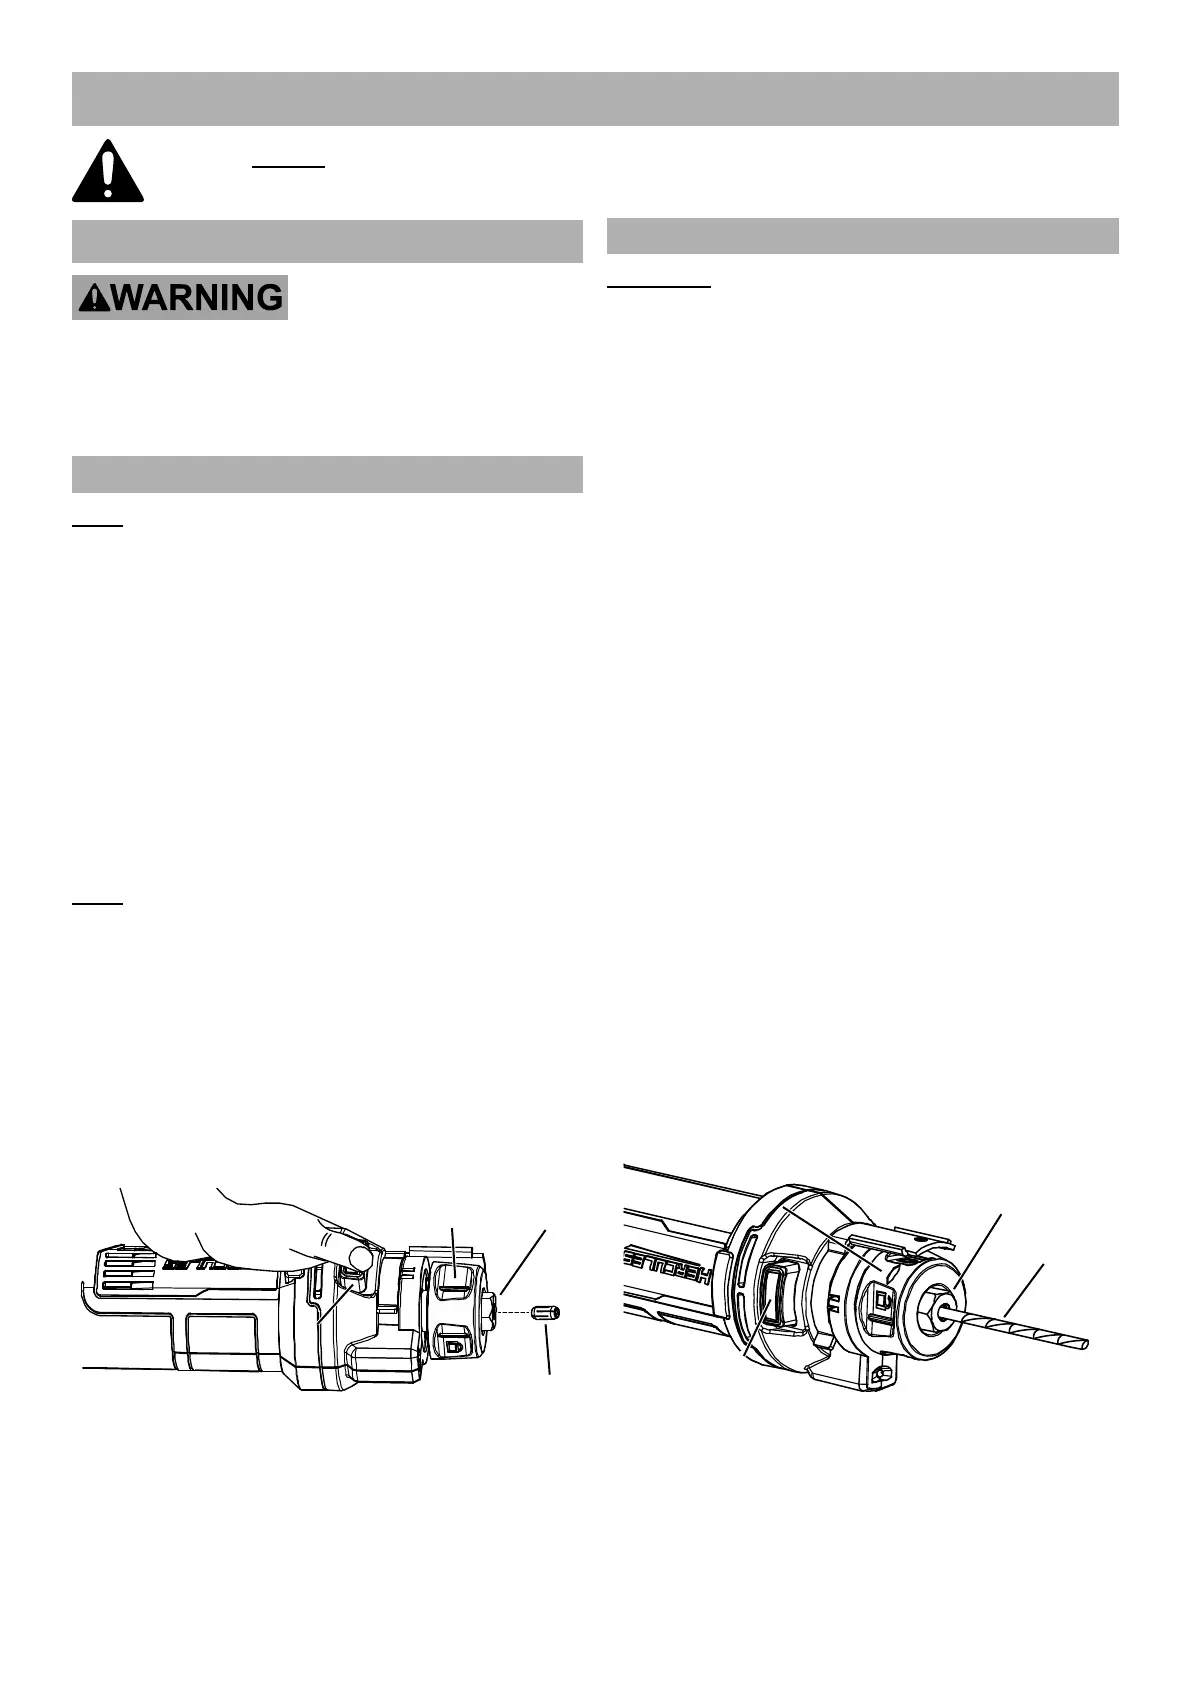
Changing the Collet
Note: This tool includes 1/8" and 1/4"
Collets. Install the Collet that matches the
shank size of the Cutting Bit to be used.
1. To change collets, loosen the Depth
Adjustment Screw enough to remove the
Depth Guide from the Cut-Out Tool.
2. Press the Spindle Lock in to keep
the Spindle from turning.
3. Turn the hex Collet Nut to align with
the hex in the Locking Collar.
4. Pull the Locking Collar out to engage Collet Nut
and turn counterclockwise to loosen Nut.
Note: The Collet Nut may also be
loosened using a wrench.
5. If there is a bit in the Collet, remove it.
6. Unscrew the Collet Nut and remove
it from the Cut-Out Tool.
7. Remove the Collet and replace with the correct
size Collet for the Cutting Bit to be used.
8. Replace the Collet Nut and finger-tighten.
Proceed to Installing the Cutting Bit.
Locking
Collar
Collet
Nut
Collet
Spindle Spindle
LockLock
Installing the Cutting Bit
WARNING! TO PREVENT SERIOUS INJURY:
Carefully inspect cutting bits for cracks, chips, or
other damage before installing. Do not use bits
that have been dropped, cracked, or damaged.
The bit may shatter causing serious injury.
1. Use only bits whose shank size matches
that of the installed Collet.
2. Use only bits that are marked as suitable
for the type of material being cut.
3. Use only bits that are marked with a speed equal
or higher than the speed marked on the tool.
4. Press the Spindle Lock in to keep
the Spindle from turning.
5. Turn the hex Collet Nut to align with
the hex in the Locking Collar.
6. Pull the Locking Collar out to engage
Collet Nut and turn counterclockwise to
loosen Nut, but do not remove.
7. If there is already a bit in the Collet, remove it.
8. Hold tool horizontally and push the shank end of
the new bit (sold separately) into the opening in
the Collet Nut. There may be some resistance,
so make sure that it goes in all the way.
9. While holding in the Spindle Lock, turn Collet
Nut by hand until snug. Then pull the Locking
Collar out to engage Collet Nut and turn clockwise
about 1/4 turn to tighten the Collet Nut.
10. Replace the Depth Guide and tighten
the Depth Adjustment Screw.
Collet
Nut
Cutting
Bit
Locking Locking
CollarCollar
Spindle Spindle
LockLock
 Loading...