Page 7)RUWHFKQLFDOTXHVWLRQVSOHDVHFDOOItem 57150
General Operation
7235(9(176(5,286,1-85<
:HDU$16,DSSURYHGVDIHW\JRJJOHVHDUSURWHFWLRQ
VWHHOWRHERRWVDQGGXVWPDVNGXULQJXVH
.HHSIHHWFOHDURI%UHDNHU+DPPHU
.HHSFKLOGUHQDQGDQLPDOVZHOO
FOHDURIWKHZRUNDUHD
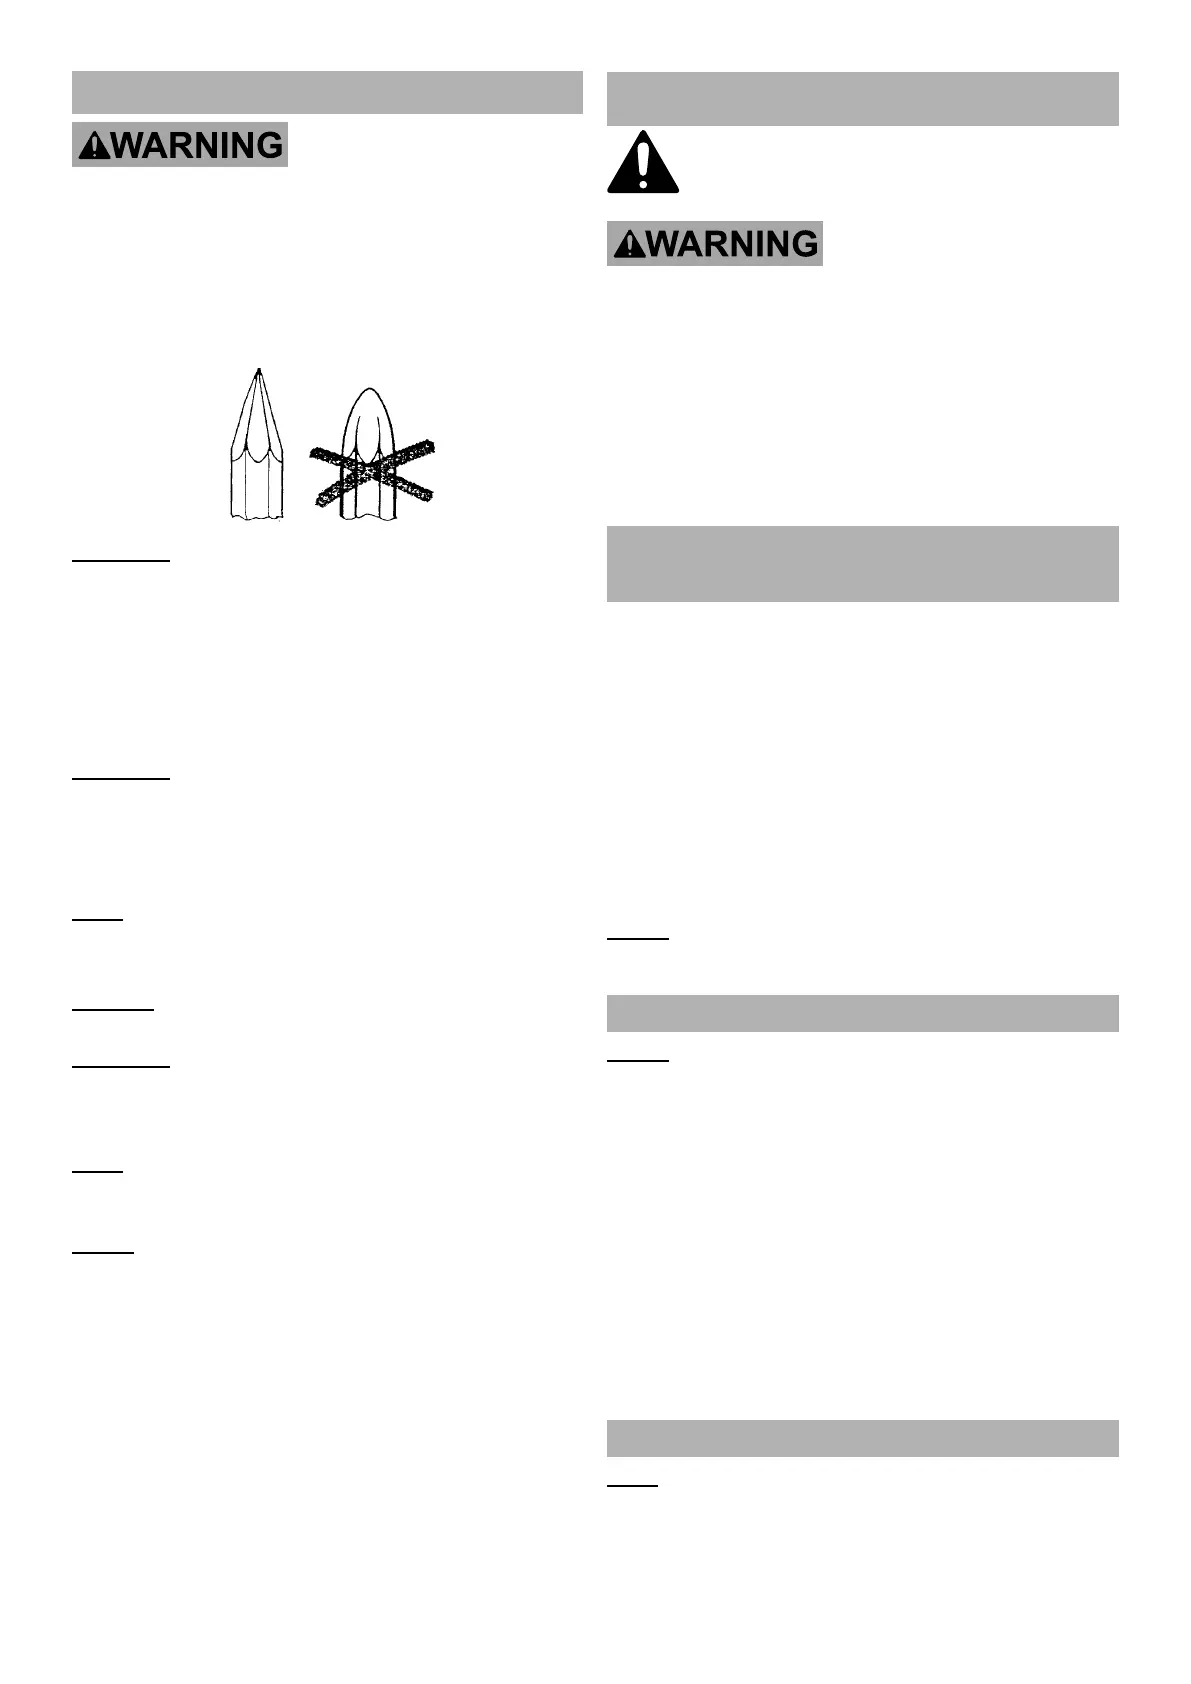
1. Check Bit for dullness, cracks, or other damage.
&$87,21 Dull tipped bits can cause unnecessary
bit movement, resulting in tool wear and
possible injury. Use only sharp tipped bits.
2. Clearly mark the work area.
3. Make sure that the Trigger is in
the off-position, then plug the tool into an
outlet on a circuit rated to 20 amps.
4. Set the bit against the work area.
&$87,21 Keep power cord away
from moving machines.
5. Place one hand on the Side Handle and
the other hand around the Main Handle.
6. Press down on the Trigger.
1RWH Trigger does not lock. Keep pressure
on the Trigger to keep running the tool.
7. Push the tip forcibly down to begin striking material.
127,&( Running tool with no load or “empty
blows” will damage the Breaker Hammer.
&$87,21 Once activated, do not press,
bear down, or thrust forcibly against the work
surface. Allow the Breaker Hammer’s own
weight to supply the needed force.
1RWH If the Breaker Hammer has not been used for
a long time or is being used in low temperatures,
the tool may require 3-5 minutes to warm up.
127( Carbon Brushes will wear during use.
7KH%UHDNHU+DPPHUZLOOVWRSZRUNLQJLIWKH
%UXVKHVDUHZRUQ This does NOT mean Breaker
Hammer is malfunctioning or broken, only that the
worn Brushes will need to be replaced with the
included Brushes by a qualified technician.
8. When work is complete, release the Trigger.
The Trigger is spring-loaded and will return
to the off position automatically.
9. To prevent accidents, turn off the tool and
disconnect its power supply after use.
10. Clean, then store the tool indoors
out of children’s reach.
MAINTENANCE AND SERVICING
3URFHGXUHVQRWVSHFLILFDOO\H[SODLQHG
LQWKLVPDQXDOPXVWEHSHUIRUPHG
RQO\E\DTXDOLILHGWHFKQLFLDQ
7235(9(176(5,286,1-85<)520
$&&,'(17$/23(5$7,21
0DNHVXUHWKDWWKH7ULJJHULVLQWKHRIISRVLWLRQ
DQGXQSOXJWKHWRROIURPLWVHOHFWULFDORXWOHWEHIRUH
SHUIRUPLQJDQ\SURFHGXUHLQWKLVVHFWLRQ
7235(9(176(5,286,1-85<)520722/
)$,/85(
'RQRWXVHGDPDJHGHTXLSPHQW
,IDEQRUPDOQRLVHRUYLEUDWLRQRFFXUVKDYH
WKHSUREOHPFRUUHFWHGEHIRUHIXUWKHUXVH
Cleaning, Maintenance,
and Lubrication
1. %()25(($&+86( inspect the general
condition of the tool. Check for:
• loose hardware
• misalignment or binding of moving parts
• cracked or broken parts
• damaged electrical wiring
• any other condition that may
affect its safe operation.
2. $)7(586( wipe external surfaces
of the tool with clean cloth.
3. Store in temperatures no lower than 50-60°F.
127( The Breaker Hammer has airtight construction,
allowing long periods of use (approximately six
months of regular usage) before lubrication.
Replacing Carbon Brushes
127(7KH%UHDNHU+DPPHUZLOOFHDVHRSHUDWLRQ
RQFH&DUERQ%UXVKHVDUHZRUQ+DYHEUXVKHV
UHSODFHGE\DTXDOLILHGWHFKQLFLDQZKHQQHFHVVDU\
1. Remove the Fan Cover (70) by removing the
four Bolts (71) and Flat Washers (99).
2. Slide Fan Cover off of Housing (31).
3. Remove Carbon Brush Bracket (61).
4. Remove Carbon Brushes from Bracket.
5. Insert new Carbon Brushes into Bracket.
6. Replace Carbon Brush Bracket and slide
Fan Cover back over Housing.
7. Replace Bolts and Flat Washers
until securely fastened.
Greasing Gearbox
1RWH Due to the possibility of accidental damage
and/or contamination, only a qualified technician
should disassemble and lubricate this item.