Page 9)RUWHFKQLFDOTXHVWLRQVSOHDVHFDOOItem 56844
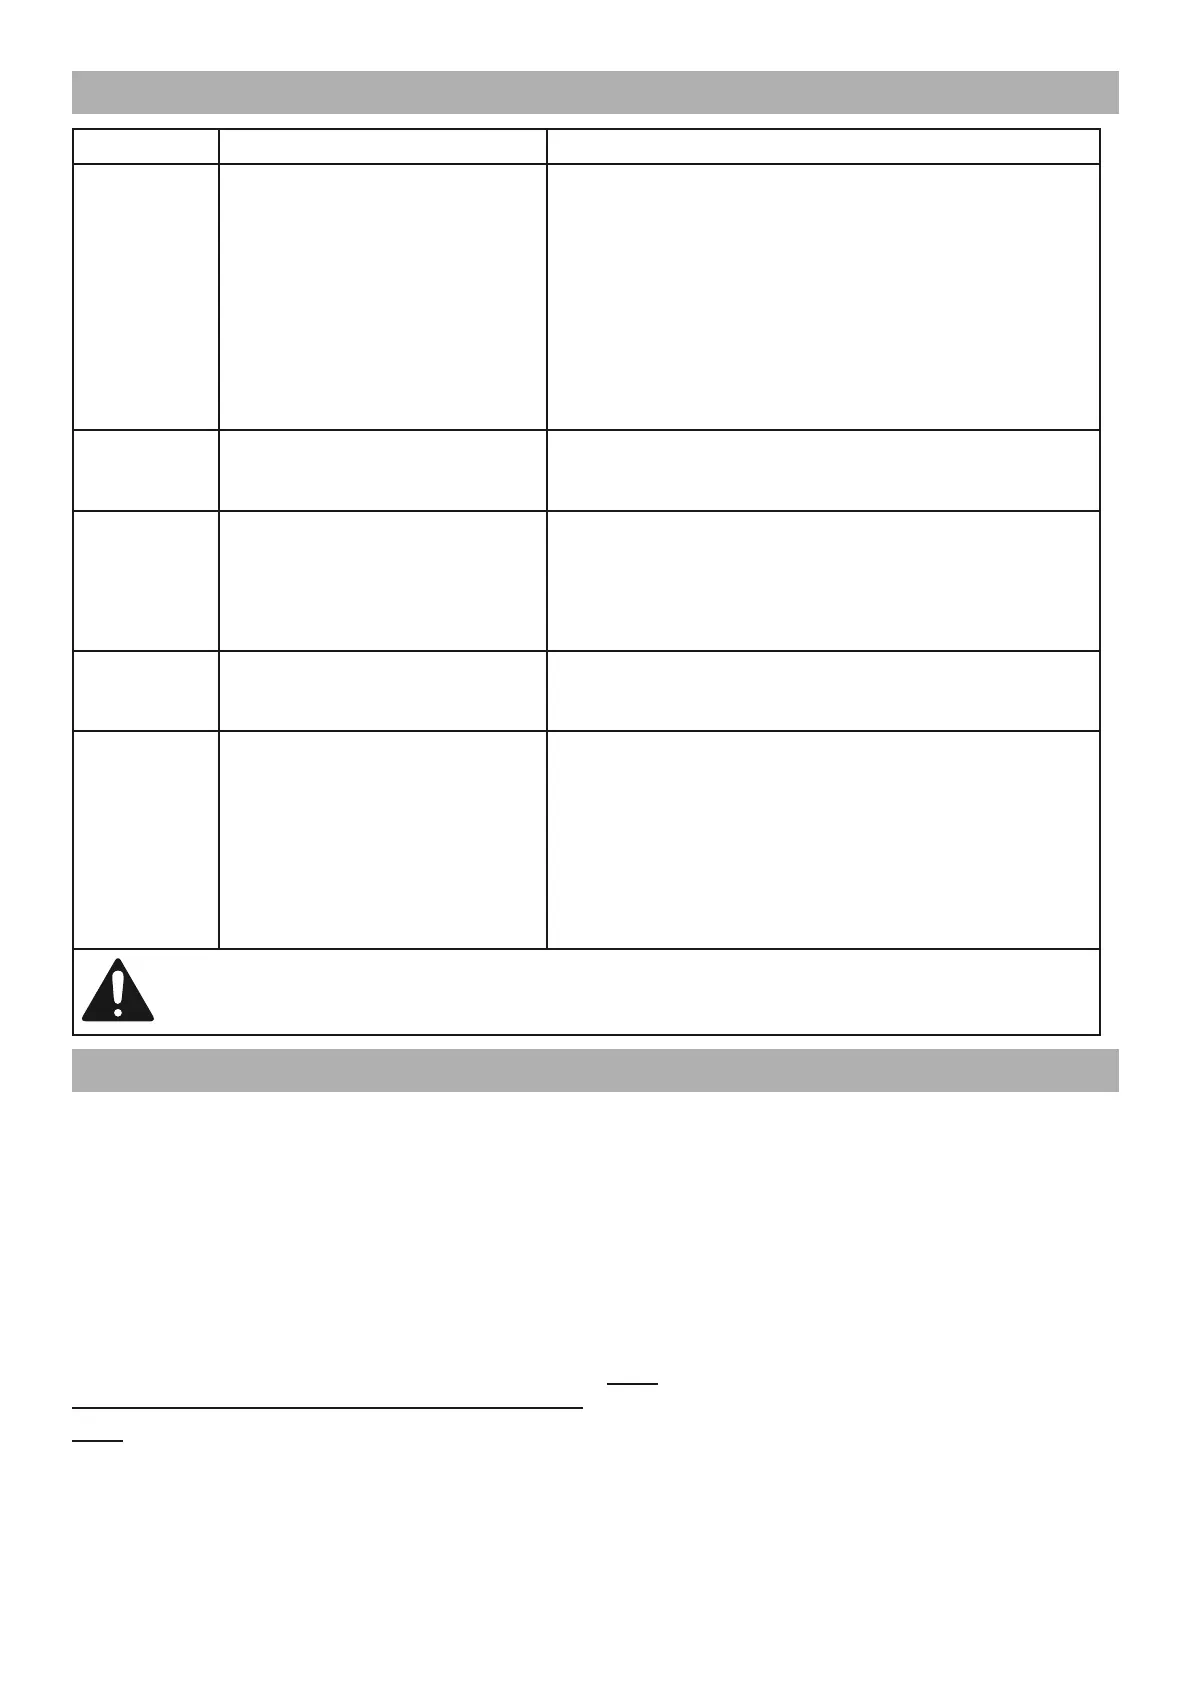
Troubleshooting
3UREOHP 3RVVLEOH&DXVHV /LNHO\6ROXWLRQV
Tool will
not start.
1. Cord not connected.
2. No power at outlet.
3. Tool’s thermal reset breaker
tripped (if equipped).
4. Internal damage or wear.
(Carbon brushes or
Trigger, for example.)
1. Check that cord is plugged in.
2. Check power at outlet. If outlet is unpowered,
turn off tool and check circuit breaker. If breaker
is tripped, make sure circuit is right capacity
for tool and circuit has no other loads.
3. Turn off tool and allow to cool.
Press reset button on tool.
4. Have technician service tool.
Tool operates
slowly.
Extension cord too long
or wire size too small.
Eliminate use of extension cord. If an extension
cord is needed, use shorter/heavier gauge cord.
See ([WHQVLRQ&RUGV in GROUNDING section.
Performance
decreases
over time.
1. Bit dull or damaged.
2. Internal lubrication cold.
3. Carbon brushes worn
or damaged.
1. Keep cutting bits sharp. Replace as needed.
2. Allow tool to operate with no load
for 5 minutes before use.
3. Have qualified technician replace brushes.
Excessive
noise or
rattling.
Internal damage or wear.
(Carbon brushes or bearings,
for example.)
Have technician service tool.
Overheating. 1. Forcing tool to work too fast.
2. Bit dull or damaged.
3. Blocked motor housing vents.
4. Motor being strained by long or
small diameter extension cord.
1. Allow tool to work at its own rate.
2. Keep cutting bits sharp. Replace as needed.
3. Wear ANSI-approved safety goggles and
NIOSH-approved dust mask/respirator while
blowing dust out of motor using compressed air.
4. Eliminate use of extension cord. If an extension cord is
needed, use one with the proper diameter for its length
and load. See ([WHQVLRQ&RUGV in GROUNDING section.
)ROORZDOOVDIHW\SUHFDXWLRQVZKHQHYHUGLDJQRVLQJRUVHUYLFLQJWKHWRRO
'LVFRQQHFWSRZHUVXSSO\EHIRUHVHUYLFH
PLEASE READ THE FOLLOWING CAREFULLY
THE MANUFACTURER AND/OR DISTRIBUTOR HAS PROVIDED THE PARTS LIST AND ASSEMBLY DIAGRAM
IN THIS MANUAL AS A REFERENCE TOOL ONLY. NEITHER THE MANUFACTURER OR DISTRIBUTOR
MAKES ANY REPRESENTATION OR WARRANTY OF ANY KIND TO THE BUYER THAT HE OR SHE IS
QUALIFIED TO MAKE ANY REPAIRS TO THE PRODUCT, OR THAT HE OR SHE IS QUALIFIED TO REPLACE
ANY PARTS OF THE PRODUCT. IN FACT, THE MANUFACTURER AND/OR DISTRIBUTOR EXPRESSLY
STATES THAT ALL REPAIRS AND PARTS REPLACEMENTS SHOULD BE UNDERTAKEN BY CERTIFIED AND
LICENSED TECHNICIANS, AND NOT BY THE BUYER. THE BUYER ASSUMES ALL RISK AND LIABILITY
ARISING OUT OF HIS OR HER REPAIRS TO THE ORIGINAL PRODUCT OR REPLACEMENT PARTS
THERETO, OR ARISING OUT OF HIS OR HER INSTALLATION OF REPLACEMENT PARTS THERETO.
5HFRUG3URGXFW¶V6HULDO1XPEHU+HUH
1RWH If product has no serial number, record
month and year of purchase instead.
1RWH Some parts are listed and shown for
illustration purposes only, and are not available
individually as replacement parts.