Page 6 M6#(/'.N0$."&(O3'-/$60-F(*&'"-'(."&&(;4PPP4PQQ4RSTSK Item 56214
OPERATION
( >'"+(/N'(9?5@>9(@2Y,>5=?5(
)=M95h(@?M,>2=5@,?(-'./$60("/(/N'(
%'1$00$01(6U(/N$-(H"03"&($0.&3+$01(
"&&(/'X/(30+'#(-3%N'"+$01-(/N'#'$0(
%'U6#'(-'/(3*(6#(3-'(6U(/N$-(*#6+3./K
Tool Set Up
5,(Y>9!9?5()9>@,G)(@?iG>h(M>,2(
=\\@W9?5=L(,Y9>=5@,?B(
2"V'(-3#'(/N"/(/N'()I$/.N($-($0(/N'(,MM(*6-$/$60("0+(
30*&31(/N'(/66&(U#6H($/-('&'./#$."&(63/&'/(%'U6#'(
*'#U6#H$01("0E(*#6.'+3#'($0(/N$-(-'./$60K
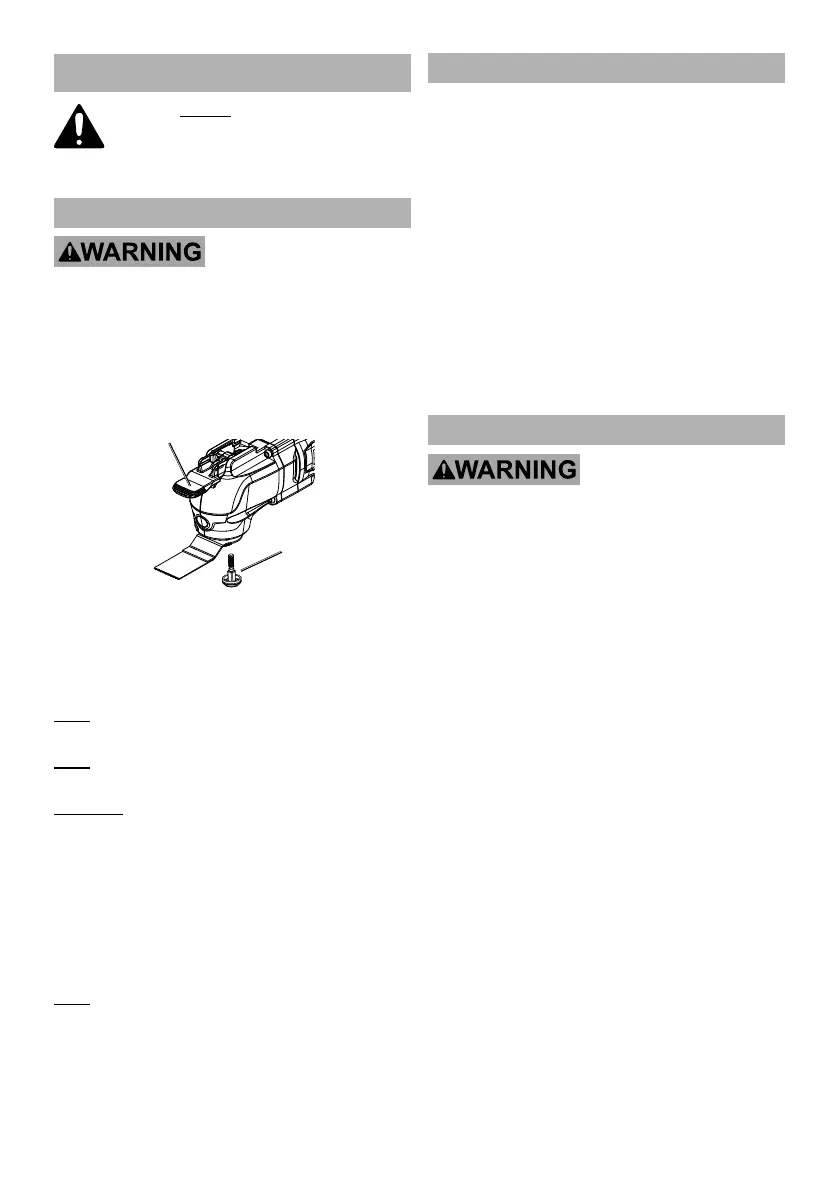
1. Flip the Release Lever forward to the open position
in order to remove the Flange Assembly.
M&"01'(
=--'H%&E(
>'&'"-'(
L'C'#
2. Install the desired accessory by inserting
onto the Shaft fitting pins.
3. Reattach the Flange Assembly and hold in place
momentarily to keep the accessory secure.
?6/'B Accessories may be mounted at angles
up to 90° left or right of straight ahead.
?6/'B The long Cutter Blade should only be
used in the straight ahead position.
\=G5@,?j When attaching the Cutter Blade,
orient the accessory so that the blade faces
AWAY from the handle to avoid injury.
4. Flip the Release Lever back to original
position to secure accessory.
5. After securing, the attachment should not move
on the Spindle. If it can move with the power off,
reattach it, making sure that the holes on the
attachment line up with the fitting pins on the Shaft.
?6/'B For sanding, first attach the Sanding Pad to the
tool, then align a sheet of Sandpaper over the pad and
press into place. Once a Sandpaper corner becomes
worn, turn it 120° or replace the sheet with a new one.
Workpiece and Work Area Set Up
1. Designate a work area that is clean and well-lit.
The work area must not allow access by children
or pets to prevent distraction and injury.
2. Route the power cord along a safe route
to reach the work area without creating a
tripping hazard or exposing the power cord to
possible damage. The power cord must
reach the work area with enough extra length
to allow free movement while working.
3. Secure loose workpieces using a vise or clamps
(not included) to prevent movement while working.
4. There must not be hazardous objects, such
as utility lines or foreign objects, nearby that
will present a hazard while working.
5. You must use personal safety equipment including,
but not limited to, ANSI-approved eye and hearing
protection, as well as heavy-duty work gloves.
General Operation
5,(Y>9!9?5()9>@,G)(@?iG>hB((A#$*(
/N'(/66&(U$#H&E($0(%6/N(N"0+-K
1. Make sure that the Power Switch is in the
off-position, then plug in the tool.
2. Hold the Tool with both hands and slide
the Power Switch forward to activate.
3. Adjust the speed of the tool using the Speed
Control Dial. There are six speed settings from 1
(slowest) to 6 (fastest). Determine the optimum
speed by testing on a scrap piece of material.
4. Do not allow contact between Sandpaper
or Blade and workpiece until the tool is
running at the intended speed.
5. Avoid contact with foreign objects such as metal
screws and nails when sanding, scraping, or cutting.
6. Do not apply excessive pressure on the
Tool. Allow the Tool to do the work.
7. When finished, slide the Power Switch to OFF. Allow
the tool to stop completely before setting it down.
8. To prevent accidents, turn off the tool and
unplug it after use. Clean, then store the
tool indoors out of children’s reach.