9
© HeyCafé Co., LTD. Version 1.0, Dec. 2019
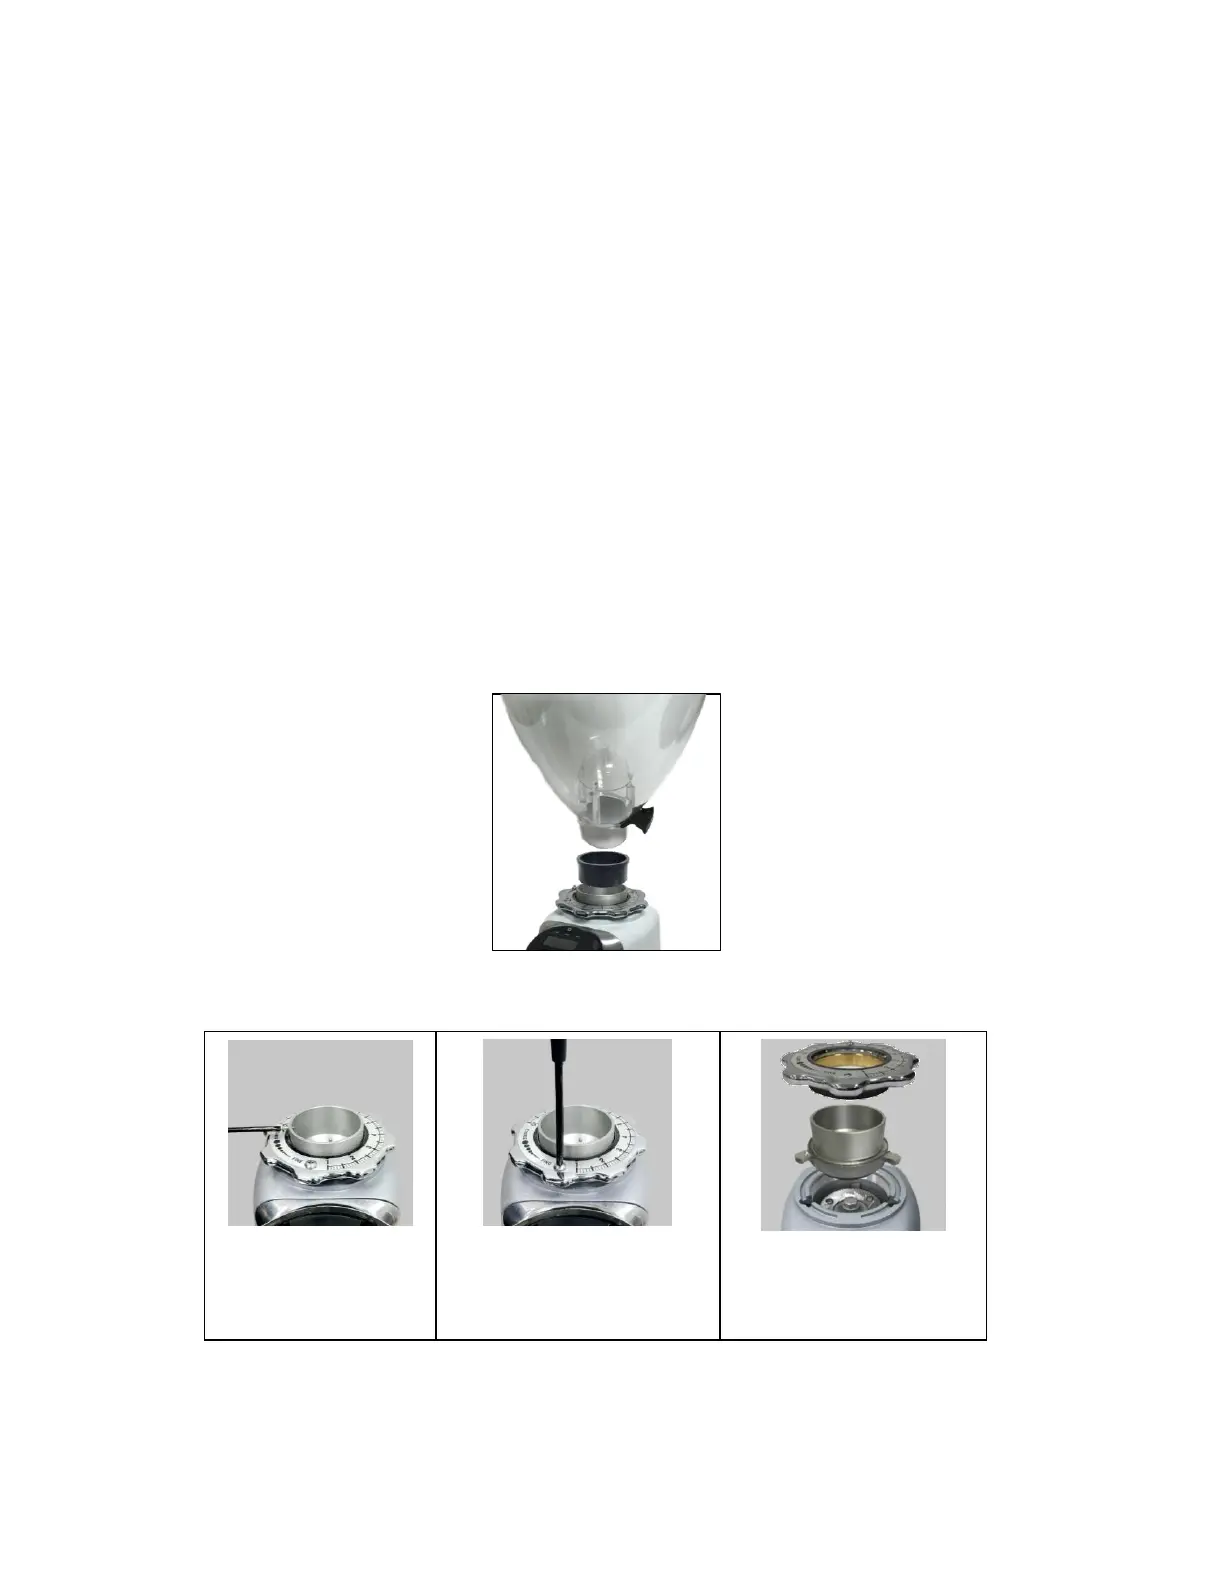
STEP3
Pull out the upper blade holder;
make sure not to lose the upper
blade three supporting springs.
8) MAINTENANCE AND SERVICE
Warning: All grinders’ technical handling operations, such as installation, maintenance, or service
should be performed by certified personnel or by your local dealer.
Check the state of the grindstones periodically (approximately every 50kg of grinded coffee) Good condition
grindstones will result in a high quality grind and prevent the grinders overheating. Replace grindstones every 400KG
of grinded coffee (when using original replacement parts)
Be aware of the grinder’s noise level. In case the noise level is higher than normal or irregular noises are coming
from within the grinder, get certified personnel to perform an overall check of the grinder.
9) CLEANING
BEFORE ANY CLEANING ROUTINE DISCONNECT THE GRINDER POWER SUPPLY. NEVER USE RUNNING WATER TO
CLEAN THE MAIN BODY AND DISPENSER. USE ONLY PERFECTLY CLEAN CLOTHS OR BRUSHES TO CLEAN THE
GRINDER. DO NOT USE ABRASIVE CLEANING PRODUCTS AS THEY MAY WEAR OUT THE GRINDER COATING.
Cleaning the bean hopper
Take off the bean hopper (by releasing Bean Hopper safety screw, Fig 4.3) and rinse it thoroughly with water and
soap. As the bean hopper is made of clear polymer, use only liquid detergent (free of abrasive components) and
soft sponge. Before reinstalling the beans hopper back to its position, make sure it is dried thoroughly. To ensure
great coffee taste, clean the bean hopper periodically.
Cleaning the grinding chamber and grinding parts
Follow the instruction below for grinding chamber and grinding parts cleaning:
STEP1
Take off the hopper screw
by using a screw driver.
STEP2
Take off the grinding dial by using
a screw driver to take out the dial
safety screw first.
 Loading...