Network Turret Camera·Quick Start Guide
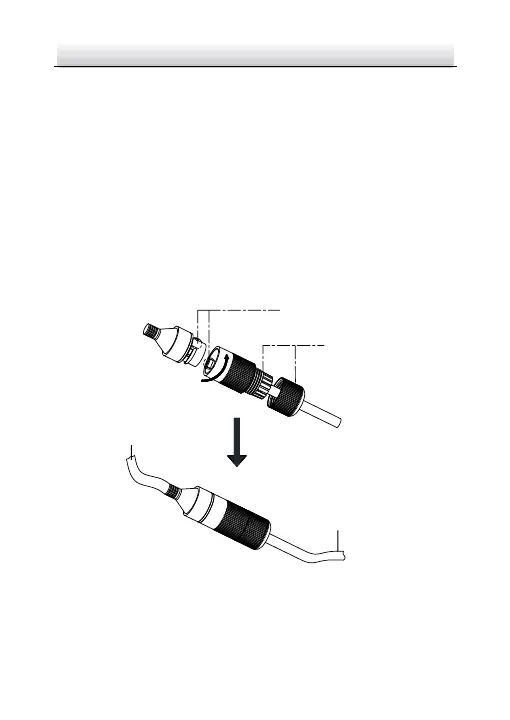
Place the O-type gasket ② onto the end of the camera’s 3.
network interface socket ①.
Insert the network plug ③ into the camera’s network interface 4.
socket ①.
Insert the waterproof rubber gasket ⑤ into the waterproof 5.
endcap ④, and secure lock nut ⑥ with the waterproof
endcap ④.
Align the snap on the waterproof endcap ④ with the notch on 6.
the camera’s network interface socket ①, and then secure the
waterproof endcap ④ to the camera’s network interface
socket ① to finish installation.
Camera
Switch/Router
Align the snap and notch.
i. Insert ⑤ into ④.
ii. Secure ⑥ with ④.
Waterproof Accessory Installation Figure 2-38
 Loading...