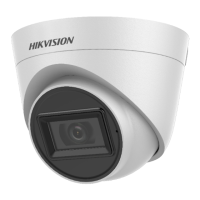
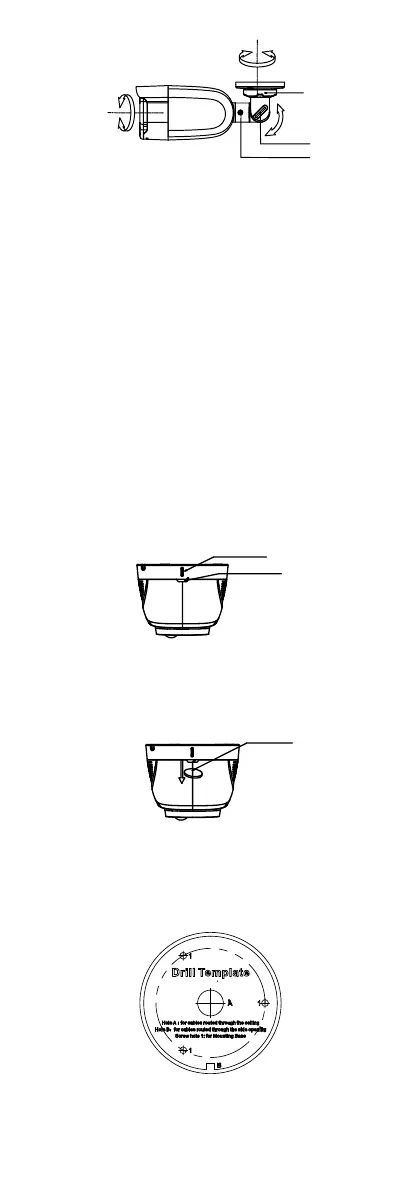
Figure 2-10 3-Axis Adjustment
1). Loosen the trim ring to adjust the pan position
[0° to 360°].
2). Loosen screw A to adjust the tilt position [0° to
180°].
3). Loosen screw B to adjust the rotation position [0°
to 360°].
2.3 Installation of Type III Camera
2.3.1 Ceiling/Wall Mounting without Junction Box
Before you start:
The installation of ceiling mounting and wall mounting
are similar. Following takes ceiling mounting as an
example.
Steps:
1. Disassemble the camera by rotating the camera to
align the notch to one of the marks, as shown in the
figure below.
Figure 2-11 Dissemble Camera
2. Pry the mounting base by using a flat object, for
example, a coin.
Figure 2-12 Pry Mounting Base
3. Paste the drill template (supplied) to the place
where you want to install the camera.
4. Drill the screw holes and the cable hole (optional)
according to the drill template.
Figure 2-13 Drill Template
Note:
Drill the cable hole, when adopting the ceiling outlet
to route the cable.