Do you have a question about the HIKVISION DS-2CE16D0T-I2PFB and is the answer not in the manual?
This document outlines the features, installation, and menu description for the HIKVISION TURBO HD D0T Series Bullet Camera.
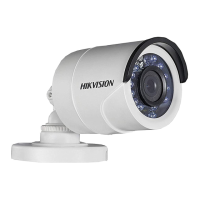
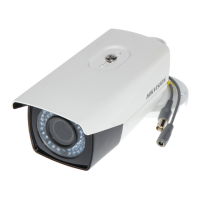
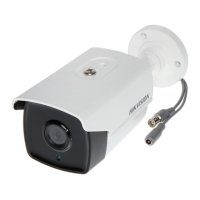
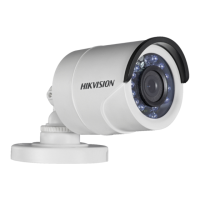
The camera is designed for surveillance applications, offering high-performance imaging and versatile installation options. It features a high-performance CMOS sensor, ensuring clear and detailed image capture. The inclusion of an IR cut filter with auto switch enables seamless transition between day and night modes, providing continuous monitoring in varying light conditions. The camera also supports an OSD (On-Screen Display) menu with configurable parameters, allowing users to customize settings directly from the camera. Auto white balance ensures accurate color reproduction, while the SMART IR mode intelligently adjusts infrared illumination to prevent overexposure of objects in close proximity. With 3-axis adjustment, the camera offers flexible positioning for optimal viewing angles.
The camera provides multiple video output options, including TVI, AHD, CVI, and CVBS, making it compatible with a wide range of DVRs and monitors. Users can switch between these video outputs by pressing and holding the switch button for 5 seconds. This versatility allows for integration into existing surveillance systems or new installations with different video standards. An auxiliary video interface is also available for professional personnel debugging or maintenance, ensuring that the camera can be serviced and optimized by experts.
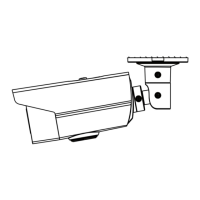
Installation of the camera is designed to be straightforward, with options for both ceiling/wall mounting directly or with a junction box. For direct mounting, a drill template is provided to ensure accurate placement of screw holes. The camera can be secured to wooden surfaces using self-tapping screws or to cement surfaces with expansion bolts. The 3-axis adjustment mechanism allows for precise control over pan, tilt, and rotation positions, enabling users to achieve the desired viewing angle after installation. The P, T, and R screws can be loosened to adjust the respective positions and then tightened to secure the camera.
When using a junction box, the process involves attaching the camera to the junction box's cover, then securing the junction box body to the ceiling/wall, and finally combining the cover with its body. This method provides a clean and secure installation, often preferred for cable management and enhanced protection. Cables can be routed through cable holes or side openings, maintaining a tidy appearance.
The camera's menu system is accessible via a connected TVI DVR and monitor. By entering the PTZ Control interface and calling the camera menu (either by clicking a specific button or calling preset No. 95), users can navigate and adjust various settings. The menu is organized into several sections, including FORMAT, LANGUAGE, MAIN MENU (AE, WB, DAY/NIGHT, VIDEO SETTINGS), RESET, and SAVE & EXIT.
Under the FORMAT section, users can set the video format to either 1080P@25fps or 1080P@30fps, depending on their regional standards and desired frame rate. The LANGUAGE setting allows users to select English for menu navigation.
The MAIN MENU offers comprehensive control over image parameters. The AE (Auto Exposure) section includes settings for BRIGHTNESS, EXPOSURE MODE, AGC (Auto Gain Control), and DWDR (Digital Wide Dynamic Range). Brightness controls the overall luminance of the image. EXPOSURE MODE can be set to GLOBAL, BLC (Backlight Compensation), or HLC (Highlight Compensation). GLOBAL is the standard exposure mode, adjusting lighting distribution. BLC compensates for strong backlighting, making foreground objects clearer, while HLC reduces the brightness of strong light spots to improve overall image quality. AGC optimizes image clarity in low-light conditions, with adjustable levels (HIGH, MIDDLE, LOW), though users should be aware that noise may be amplified when AGC is active. DWDR provides digital wide dynamic range, enhancing visibility in both dark and extremely bright areas of an image.
The WB (White Balance) section allows for adjustment of color temperature to remove unrealistic color casts. Users can choose between AUTO (ATW) mode, where white balance adjusts automatically, or MANUAL (MWB) mode, which allows for manual adjustment of R-GAIN (red gain) and B-GAIN (blue gain) values to fine-tune color shades.
The DAY/NIGHT setting offers options for B/W (black and white), SMART, or COLOR modes. In B/W mode, the image is always black and white. SMART mode refers to Smart IR, which intelligently adjusts infrared intensity to prevent overexposure. COLOR mode maintains a colorful image in day mode.
Under VIDEO SETTINGS, users can adjust IMAGE MODE, CONTRAST, SHARPNESS, COLOR GAIN, DNR (Digital Noise Reduction), and MIRROR. IMAGE MODE allows for setting image saturation to STD (Standard) or HIGH-SAT (High Saturation). CONTRAST enhances the difference between colors and light, with values from 1 to 10. SHARPNESS determines the level of detail, also adjustable from 1 to 10. COLOR GAIN is influenced by light intensity and wavelength distribution. DNR reduces noise, particularly in moving images under poor light conditions, resulting in a sharper image. MIRROR offers options to flip the image horizontally (H), vertically (V), or both (HV), or to disable the mirror function (OFF).
Finally, the RESET option allows users to revert all settings to factory defaults, and SAVE & EXIT saves the current settings and exits the menu.
The manual emphasizes several key points for maintaining the camera's performance and longevity. Users are advised to ensure all related equipment is powered off during installation to prevent damage. Checking product specifications for the installation environment is crucial to ensure the camera operates within its optimal conditions. Verifying that the power supply matches the camera's requirements prevents electrical damage. The camera should be firmly fixed during wall or ceiling mounting to prevent accidental falls.
In case of any abnormal behavior such as smoke, odor, or noise, users should immediately power off the device, unplug the power cord, and contact the service center. Disassembling the camera by unauthorized personnel is strongly discouraged, as it may void warranties and lead to further damage.
To protect the camera from physical damage, users should avoid dropping it or subjecting it to physical shock. Sensor modules should not be touched with fingers to prevent contamination or damage. The camera should not be placed in extreme temperatures (outside -40°C to 60°C), dusty, or damp locations, and should be kept away from high electromagnetic radiation. For cleaning, a clean cloth with a small amount of ethanol should be used to gently wipe the camera.
It is important not to aim the camera at the sun or other extremely bright places, as this can damage the sensor. Similarly, when laser equipment is in use, care must be taken to ensure the laser beam does not expose the sensor surface. Good ventilation is required for the operating environment to prevent heat accumulation. For non-waterproof devices, the camera should be kept away from liquids. During delivery, the camera should be packed in its original packaging or similar protective material to prevent damage.
The regulatory information section also highlights compliance with FCC, EU, and Industry Canada standards, indicating that the device is designed to operate safely and minimize interference. Users are reminded that unauthorized modifications could void their authority to operate the equipment. In a domestic environment, this Class A product may cause radio interference, requiring users to take appropriate measures. The WEEE and battery directives encourage proper recycling and disposal of the product and its battery to minimize environmental impact.
| Camera Type | Bullet |
|---|---|
| Signal System | PAL/NTSC |
| Lens Mount | M12 |
| Day & Night | ICR |
| Weatherproof Rating | IP67 |
| Operating Conditions | Indoor/Outdoor |
| Power Supply | 12V DC ± 25% |
| Material | Metal |
| Lens | 3.6mm |
| Focal Length | 2.8 mm, 3.6 mm |
| Operating Temperature | -30°C to +60°C (-22°F to +140°F) |
| Video Output | CVBS |
| Dimensions | 70 mm × 70 mm |
| Power Consumption | Max. 4W |