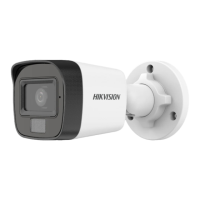
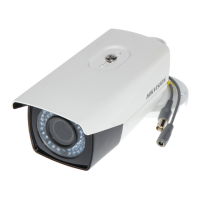
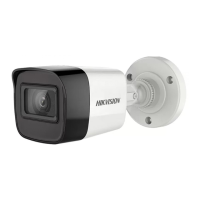
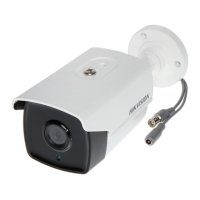
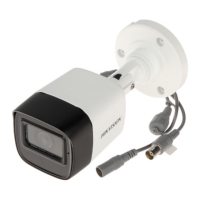
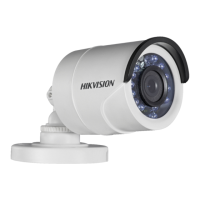
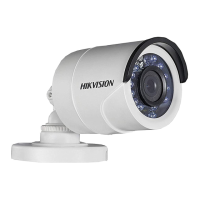
This document serves as a user manual for the HIKVISION TURBO HD TVI Bullet & Turret Camera, providing comprehensive instructions for its installation, operation, and maintenance. The manual covers three distinct types of cameras: Type I (DS-2CE16D0T-IR/IRP), Type II (DS-2CE56D0T-IRM), and Type III (DS-2CE56D0T-IRP), with Type III specifically noted for indoor use only.
Function Description
The HIKVISION TURBO HD TVI Bullet & Turret Camera is designed for surveillance applications, capturing high-quality video footage. Its core function is to provide reliable visual monitoring, adaptable to various lighting conditions and environments. The camera utilizes a high-performance CMOS sensor to deliver clear images, making it suitable for both general and specific security needs.
Key functional features include:
- High-performance CMOS sensor: Ensures superior image quality and detail capture.
- Auto white balance (AWB): Automatically adjusts color temperature to remove unrealistic color casts, providing natural-looking images across different lighting conditions. Users can also manually set white balance (MWB) by adjusting red and blue gain values.
- Auto electronic shutter: Manages the exposure time to prevent over or under-exposure, ensuring consistent image brightness.
- Auto gain control (AGC): Optimizes image clarity in low-light conditions by amplifying the video signal. AGC levels can be set to HIGH, MIDDLE, LOW, or OFF, though users are cautioned that noise may be amplified when AGC is active.
- IR cut filter: Enhances image quality by filtering infrared light during the day and allowing it at night for improved low-light performance.
- Digital Wide Dynamic Range (DWDR): Helps the camera provide clear images even in scenes with strong backlighting by balancing brightness levels across the entire image and preserving details in both bright and dark areas.
- Day/Night mode: Offers flexible operation with COLOR, B/W (Black White), and SMART options. In B/W mode, infrared can be turned on for better visibility in poor light. The SMART IR function adjusts infrared light intensity to prevent overexposure of objects close to the camera, with adjustable values from 0 to 3 for varying effects.
- Video settings: Allows for fine-tuning of image parameters such as IMAGE MODE (STD or HIGH-SAT), CONTRAST (1-10), SHARPNESS (1-10), COLOR GAIN (1-10), DNR (1-9), and MIRROR (OFF, H, V, HV).
- Digital Noise Reduction (DNR): Decreases noise, especially in moving images captured under poor lighting, resulting in more accurate and sharper images.
- Mirror function: Provides options to flip the image horizontally (H), vertically (V), or both (HV), or disable the function (OFF).
- Reset function: Restores all camera settings to their factory defaults.
- Save & Exit: Allows users to save their configured settings and exit the menu.
Usage Features
The camera is designed for straightforward use, with a focus on ease of installation and configuration. The manual provides detailed steps for mounting and adjusting the camera to achieve optimal viewing angles.
Installation:
- Preparation: Before installation, users must ensure the device and all assembly parts are in good condition, related equipment is powered off, product specifications are checked for the installation environment, power supply matches output, and the mounting surface is strong enough to support the camera. Specific instructions are provided for cement and wooden walls, requiring expansion bolts or self-tapping screws, respectively.
- Drill template: A drill template is supplied for accurate placement of screw holes and an optional cable hole on the ceiling.
- Mounting: Each camera type (Type I, Type II, Type III) has specific mounting instructions.
- Type I: The mounting base is attached to the ceiling with supplied screws.
- Type II: The camera body is first disassembled from its mounting base using a hex wrench. The mounting base is then secured to the ceiling, and the camera body is reattached and secured with a trim ring and clip plate.
- Type III: The mounting base is secured to the ceiling, and the camera is aligned with the mounting base, secured, and the trim ring fixed.
- Cable routing: Cables can be routed through an optional cable hole in the ceiling or via a side opening.
- Power and video connection: Users connect the power cord and video cable to the camera.
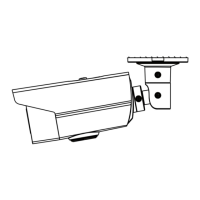
- 3-axis adjustment: All camera types feature 3-axis adjustment mechanisms (pan, tilt, rotation) to achieve the desired viewing angle.
- Type I: Involves loosening and tightening specific screws to adjust pan (0° to 360°), tilt (0° to 180°), and rotation (0° to 360°) positions.
- Type II and Type III: Involve rotating the enclosure for pan adjustment (0° to 360°), moving the camera body up and down for tilt adjustment (0° to 75°), and rotating the camera body for rotation adjustment (0° to 360°).
Menu Operation:
- Accessing the menu: The camera menu is accessed via the PTZ Control interface on a connected TVI DVR, either by clicking a specific button or calling preset No. 95.
- Navigation: Users navigate the menu using direction arrows (up/down for item selection, left/right for value adjustment) and the Iris+ button to confirm selections.
- Video format selection: Users can select the video format as 1080p@25fps or 1080p@30fps.
- Language selection: Supports English and Chinese.
Maintenance Features
The manual emphasizes several precautions and guidelines to ensure the longevity and proper functioning of the camera.
- Electrical safety: Strict compliance with national and regional electrical safety regulations is required.
- Power supply: Input voltage must meet SELV and Limited Power Source standards (12 V DC, IEC60950-1). Users are warned against connecting multiple devices to a single power adapter to prevent overload, overheating, or fire hazards. The power plug must be firmly connected.
- Physical handling:
- Avoid dropping the camera or subjecting it to physical shock.
- Do not touch sensor modules with fingers. If cleaning is necessary, use a clean cloth with a bit of ethanol and wipe gently.
- Do not aim the camera at the sun or other extremely bright places, as this can cause blooming or smearing and affect sensor endurance.
- Environmental considerations:
- Do not place the camera in extremely hot, cold, dusty, or damp locations.
- Avoid exposure to high electromagnetic radiation.
- Good ventilation is required to prevent heat accumulation.
- Keep the camera away from liquids during use.
- Laser exposure: Ensure the sensor surface is not exposed to laser beams when any laser equipment is in use, as this can burn out the sensor.
- Troubleshooting: In case of smoke, odor, or noise from the device, immediately turn off the power, unplug the cable, and contact the service center. If the product malfunctions, contact the dealer or service center; users are explicitly warned not to disassemble the camera for repair or maintenance themselves, as unauthorized repairs void responsibility for problems.
- Packaging: During delivery, the camera should be packed in its original packaging or packaging of the same texture to prevent damage.
The manual also includes regulatory information, such as FCC compliance, EU conformity statements (CE mark, WEEE directive), and Industry Canada ICES-003 compliance, highlighting the device's adherence to various safety and environmental standards. Users are advised that this is a class A product and may require adequate measures in a domestic environment to mitigate radio interference.