EasyManuals Logo

HIKVISION DS-2DB4236I-CWX Quick Start Guide

HIKVISION DS-2DB4236I-CWX
43 pages
To Next Page IconTo Next Page
To Previous Page IconTo Previous Page
Page #32 background imageLoading...
Page #32 background image
Explosion-proof IR Zoom Bullet Camera·Quick Start Guide
17
Pan
:
-
45
° to 45
°
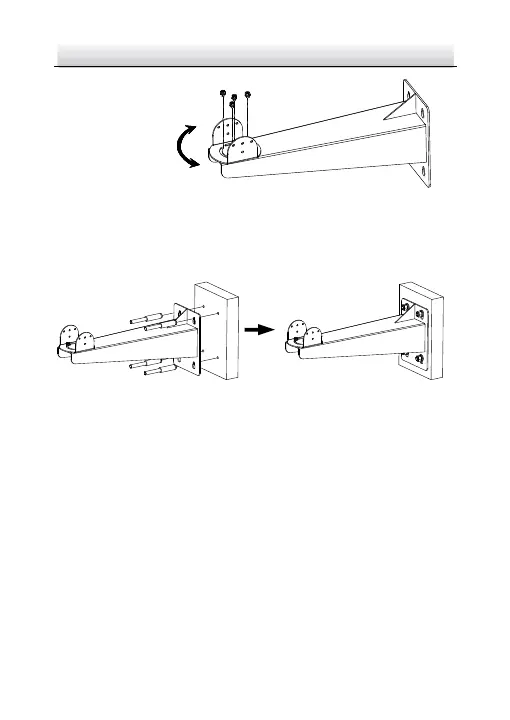
Figure 2-13 Screw the PT Joint to Wall Mounting Bracket
4. Fix the wall mounting bracket to wall with expansion bolts (M8 ×
100).
Figure 2-14 Install Bracket to Wall
5. Fix the camera to the bracket.
1). Use safety rope to hook the camera and the bracket.
2). Align the screw holes on pedestal with those on PT joint. Fix
the camera to the bracket.
Note:
Adjust the tilting position of the camera to desired angle when
installing. Use at least three M6 × 16 screws. on each side of
the PT joint to secure the camera.

Other manuals for HIKVISION DS-2DB4236I-CWX

Questions and Answers:

Question and Answer IconNeed help?

Do you have a question about the HIKVISION DS-2DB4236I-CWX and is the answer not in the manual?

HIKVISION DS-2DB4236I-CWX Specifications

General IconGeneral
BrandHIKVISION
ModelDS-2DB4236I-CWX
CategoryDigital Camera
LanguageEnglish

Related product manuals