DS-7600 Series NVR User Manual
51
NOTES: Redundant record determines whether you want the camera to save the record files or captured pictures in the
redundant HDD. You must configure the redundant HDD in HDD settings.
You must click the Apply button after adjusting the configuration of each tab before you move on to adjust another
one.
Event recordings are recordings that are triggered from motion detection and/or from an external alarm.
If an event occurs during Continuous recording, the frame rate will automatically switch to that set for Event recording.
For holiday settings, refer to page 54.
At least two hard disks must be installed when you want to set an HDD to Redundancy mode and one of them with
R/W property.
Configuring Record Schedule
A record schedule allows you to schedule multiple time periods per day for recording. Setting up a record schedule will allow you to further
conserve disk space by recording only during the time periods you would like to record.
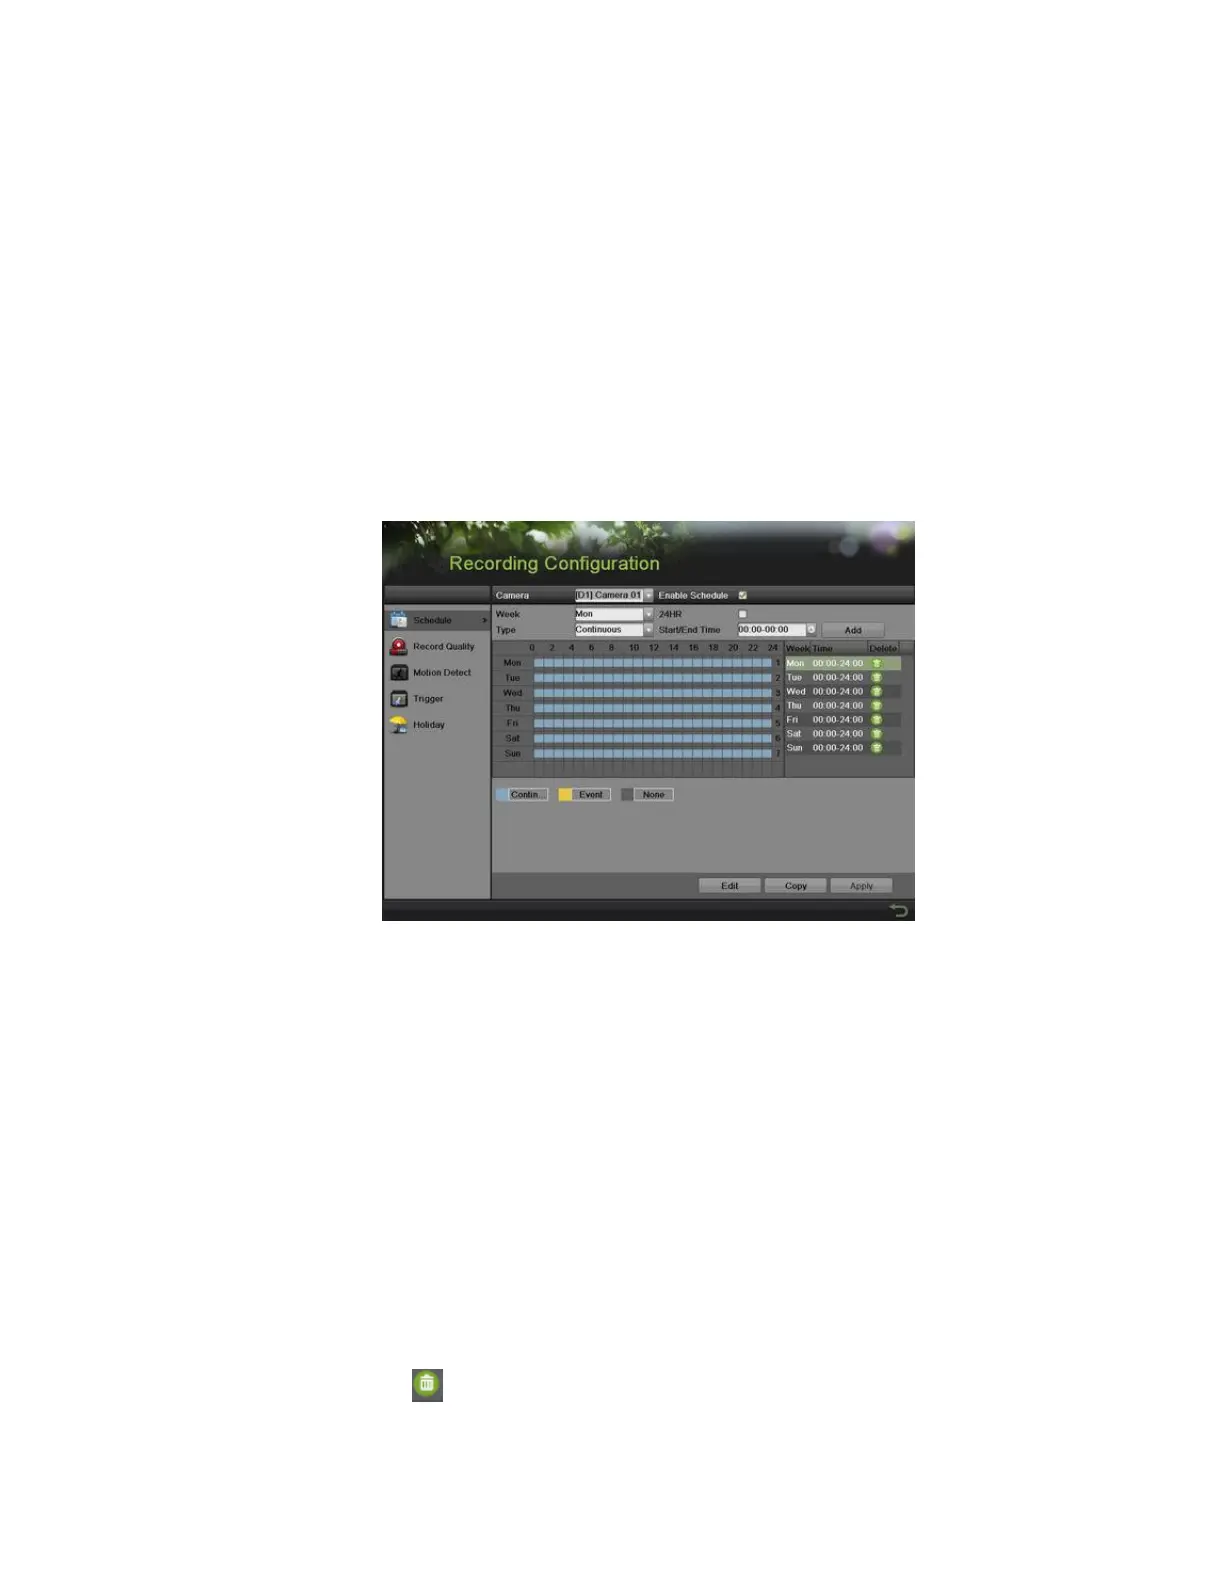
1. Enter the Schedule menu, shown in 51 by going to Menu > Recording Configuration > Schedule.
Figure 58, Record Schedule Configuration Menu
2. Select the camera to configure from the camera drop-down list.
3. Check the Enable Schedule checkbox to enable the record schedule. If the checkbox is unchecked, the record schedule will be
disabled.
4. Edit the record schedule. There are three ways to set the record schedule:
• Instant Edit
1) Select a day from Monday to Sunday to configure schedule.
2) Set up time periods for schedule. If the 24HR checkbox is checked, recording will occur over the entire day. To set up
multiple time periods, uncheck 24HR and enter the Start/End Time for the selected day. The Start/End Time are listed
using a 24 hr cycle (e.g., 18:00 is equivalent to 6:00 pm). Up to eight discontinuous periods can be configured for each
day.
3) Select recording type under Type for selected day of the week. Recording type includes Continuous for continuous
recording or Event for recording when an event is triggered (e.g., from detected motion) for the selected time period.
4) Select the Add button to add a time frame to a schedule. The newly added time frame will appear in the schedule on the
right. You can click to delete the selected time period on the right. Continuous recordings are shown in blue on the
schedule, while event recordings are shown in yellow. An example of this can be seen in Figure 58.
5) If there are scheduling errors detected, error messages such as those shown in Figure 59 will appear.
 Loading...