1 2 P L A Y B A C K R E C O R D E D V I D E O ( c o n t i n u e d )
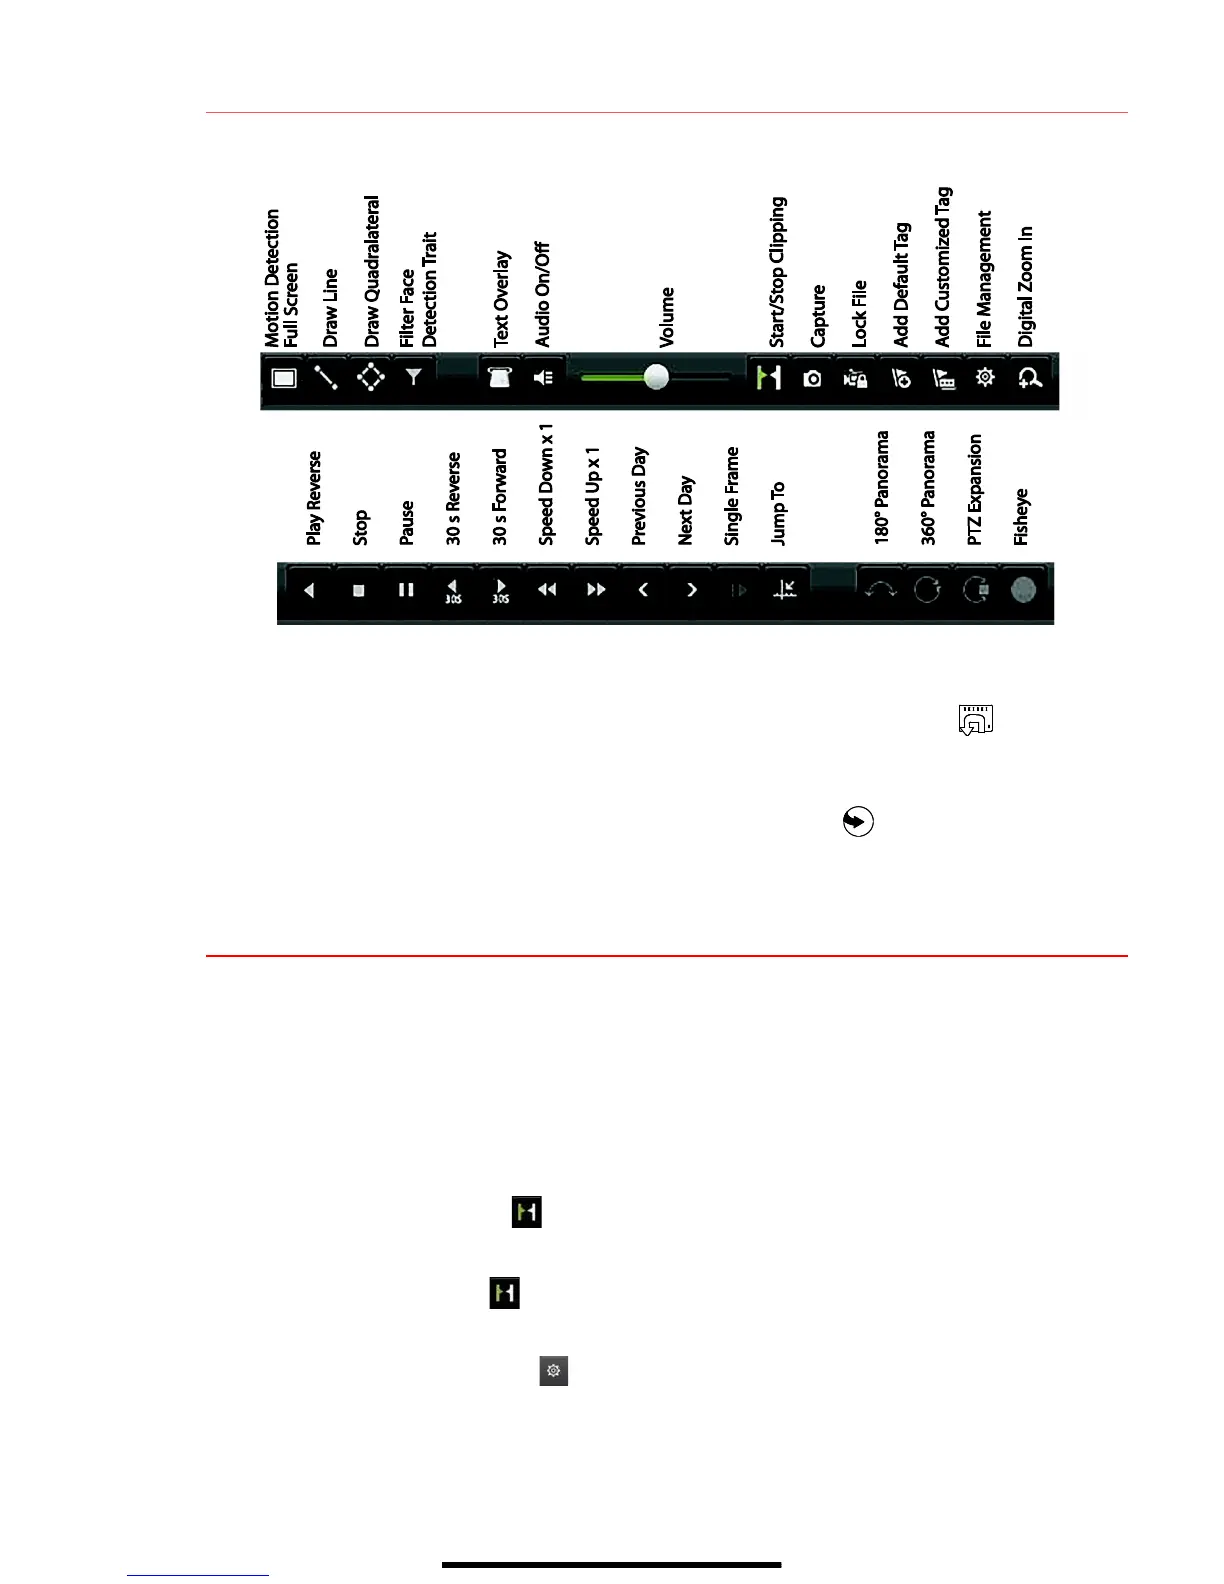
Playback Controls
Play Back Record Files
1. Go to MENU > LIVE VIEW.
2. Left click a Live View window to bring up a shortcut toolbar and click on the icon for instant
playback.
Playback Controls
1. Right click a Live Image to display a Quick menu and click on icon for instant playback.
13 B A C K U P V I D E O R E C O R D I N G S A N D C L I P S
Back up recorded video clips to ensure important video is not lost or destroyed.
Choose Recorded Video Clips To Back Up
1. Connect a USB flash drive, HDD, or DVD writer to an available USB port (this step is mandatory).
2. Go to MENU > PLAYBACK.
3. Select cameras for playback.
4. Select the date and beginning time of the incident.
5. Click START CLIPPING button.
6. Select the ending time of the incident.
7. Click END CLIPPING button (same button as START CLIPPING). Clip will be marked.
8. Repeat steps 1-6 as many times as required.
9. Click FILE MANAGEMENT button to display a new window containing all marked clips.
10. Select the desired clips.
11. Click EXPORT to save files to the inserted USB device.
 Loading...