Steps
Note
The funcon should be supported by the device.
1.
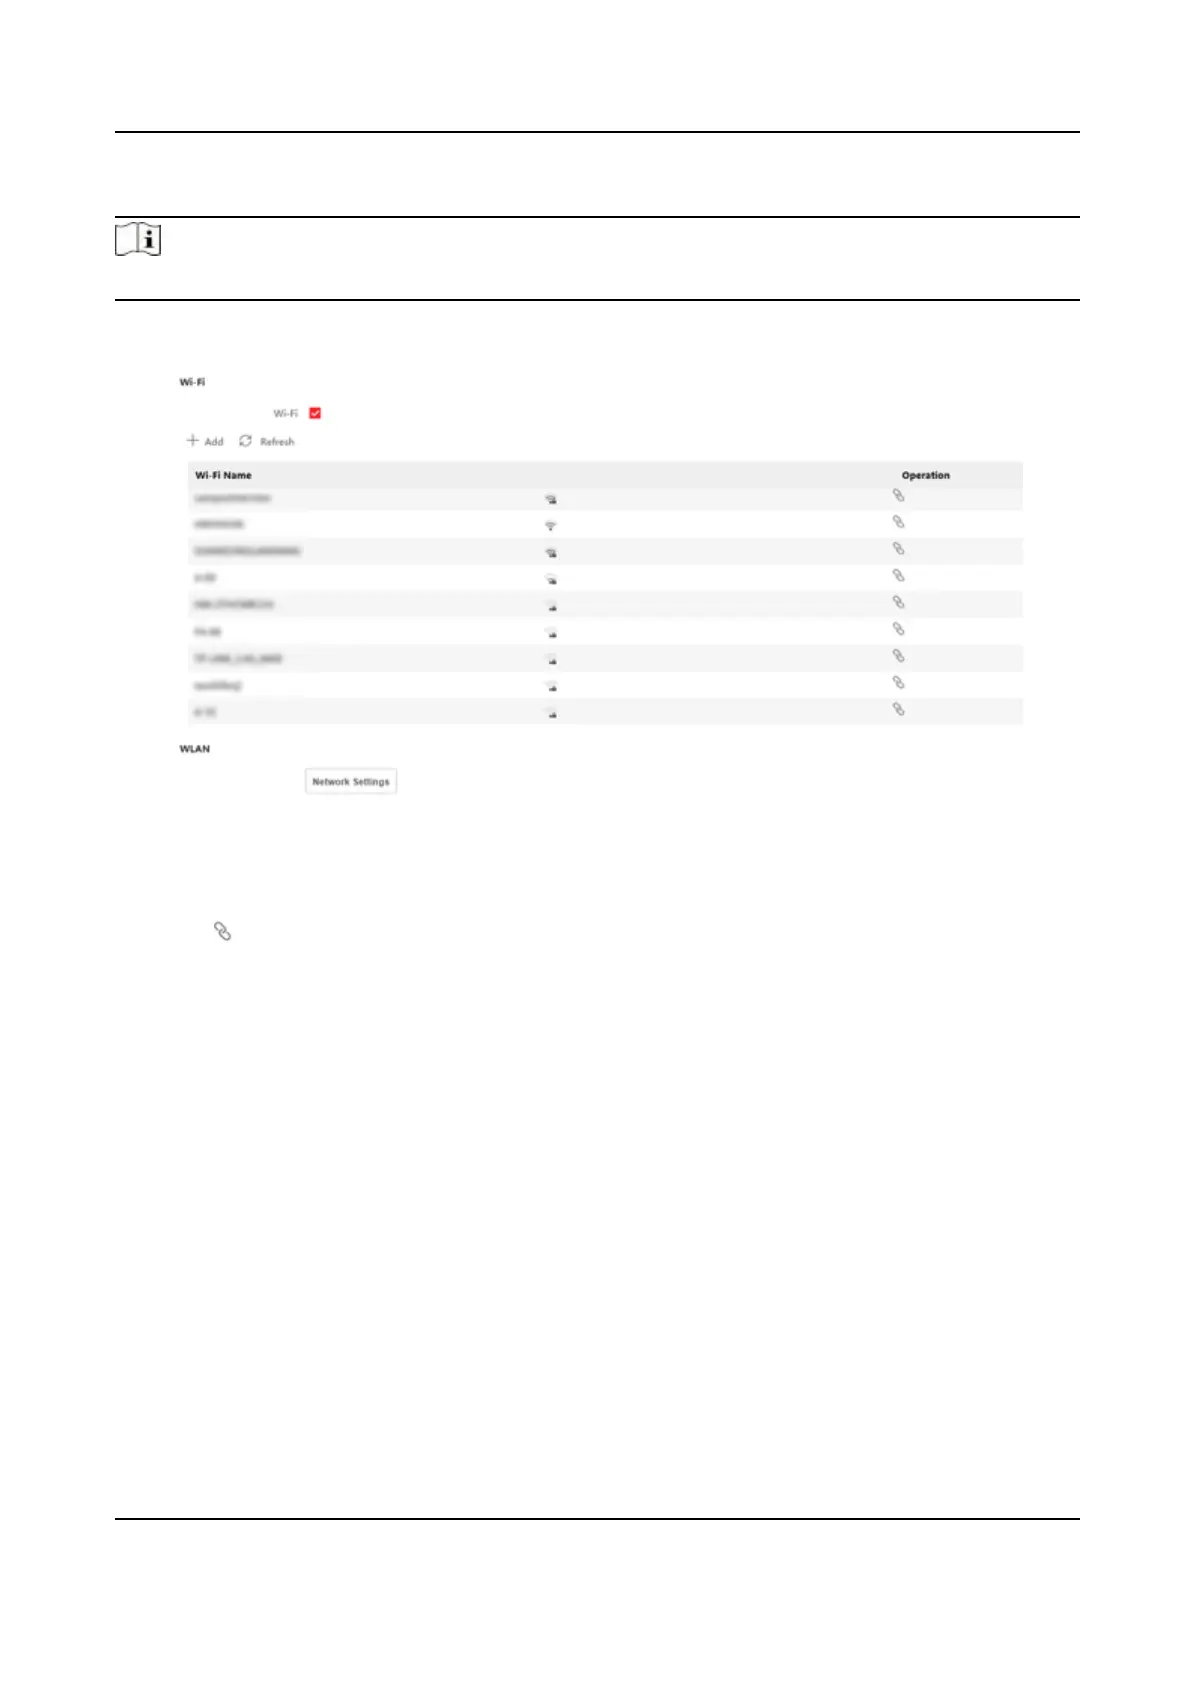
Click Conguraon → Network → Basic Sengs → Wi-Fi .
Figure 9-6 Wi-Fi Sengs Page
2.
Check Wi-Fi.
3.
Select a Wi-Fi
-
Click of a Wi-Fi in the list and enter the Wi-Fi password.
-
Click Add, and enter the SSID, working mode, and
encrypon type. Click Connect. When the
Wi-Fi is connected, click OK.
4.
Oponal: Set the WLAN parameters.
1) Click Network
Sengs.
2) Set the IP address, subnet mask, and default gateway. Or check Enable DHCP and the system
will allocate the IP address, subnet mask, and default gateway
automacally.
5.
Click OK.
Report Strategy
Sengs
You can set the center group for uploading the log via the ISUP protocol.
Go to Conguraon → Network → Basic Sengs → Report Strategy .
You can set the center group and the system will transfer logs via ISUP protocol. Click Save to save
the
sengs.
Center Group
DS-K1T343 Series Face Recognion Terminal User Manual
97
 Loading...