Using Drops
4.1 Manual-Drops
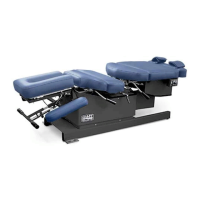
Cocking handles are located on both
sides of each drop. Lift the cocking han-
dle up (photo 5, A) to activate the drop.
Turn the tension knobs (5, B) clockwise to
tighten and counterclockwise to loosen (also see caution, pg. 6).
4.2 Air-Drops
Drop Selector Switches
The Drop Selector Switches (photo 6)
activate the table drops. You may choose
one or up to four drops simultaneously.
Once selected, press the Pressure Pedal
(or optional foot strips, #12, pg. 2) to
activate the drops. After discharging, press
the pedal or foot strip again to immediately
reactivate the drops.
Drop Tension Control Knobs
The Drop Tension Knobs are located on the left side of each drop (#14, pg.
2). Turn the knob clockwise to increase the firmness of the drop—counter
clockwise to decrease.
Caution: Do not loosen Tension Knobs too far- Adjusting the tension knobs out too
far can cause the drops to malfunction. See “Trouble Shooting” section on
pg.10 for more detail.
Headpieces
5.1 Tilting Headpiece
All AFT models are equipped with a tilting
headpiece. The lever for tilting is located
under the front of the headpiece (photo 7, A). It controls the angle of tilt 30° posi-
tive or negative. Pull the lever to unlock; adjust the angle; release to lock.
Photo 7
A
C
B
6
© Copyright 2020, Hill Laboratories
photo 6
Headpiece
photo 5
A
B