Endurance Test
Test Method
Be marked with name of manufacturer or manufacturer’s representative of the power-as-
sisted bicycle and serial number of this document, namely EN 15194.. Endurance test
method should be specified in “Endurance test”. If appropriate, the power-assisted bicycle
is furnished with trailer coupling device and the following data should be provided:
Total weight of trailer;
Vertical load of coupling system. Attention: Some countries/areas have legal requirements
for bicycle mark. There are no special requirements for components, but the following key
safety components should be provided with legible and permanent traceable mark, e.g.:
manufacturer name and part number;
Front fork;
Handlebar and handlebar rod;
Seat post;
Brake level, brake block and/or brake block frame;
Outer tube of brake cable;
Hydraulic brake oil pipe;
Disc brake calipers, brake disc and brake block;
Chain;
Pedal and crank;
Underframe spindle;
Rim.
Please be sure to inspect fixation of bicycle, brake, tire and screw/nut before riding.
Ensure all brake cables are connected well and the torque should be 8-10N.m.
Requirement
Wipe for 15s using a piece of cloth with water and then wise for 15s using a piece of cloth
with benzoline.
Warning 1-Like all mechanical parts, the power-assisted bicycle will be affected by wear
and high stress. Different materials and parts may respond to wear or stress fatigue
differently. If the design life of a part expires, the part may break down suddenly and
consequently the rider may be injured. Any form of crack, scratch or change in color of the
highly stressed area indicates that the service life of the part expires and the component
should be replaced.
Warning 2-The user may not see impact damage of parts made from composite materials
and the manufacturer should explain the impact damage and its consequences. The parts
made from composite materials should be returned to them manufacturer for inspection or
destruction and replacement.
The weighted A noise at ears of the rider should be less than 70dB (A).
The bicycle must not be tampered deliberately or refitted without authorization.
The manufacturer/seller does not assume any responsibility for damage arising from the
user’s tampering and the user should ask for help from professionals.
The child seat cannot be installed below the bicycle.
Be sure not to clean the bicycle using high pressure cleaner.
For minimum height and dimension of the saddle, please refer to the minimum insertion
mark on the seat post.
The total permissible load of the bicycle (including rider) is 75kg.
The bare weight of the bicycle is about 22kg.
The bicycle cannot be designed with a trailer.
When endurance is tested using the method described in “Test method”, mark should be
legible and hard to remove and should not be curly
Component Fixation
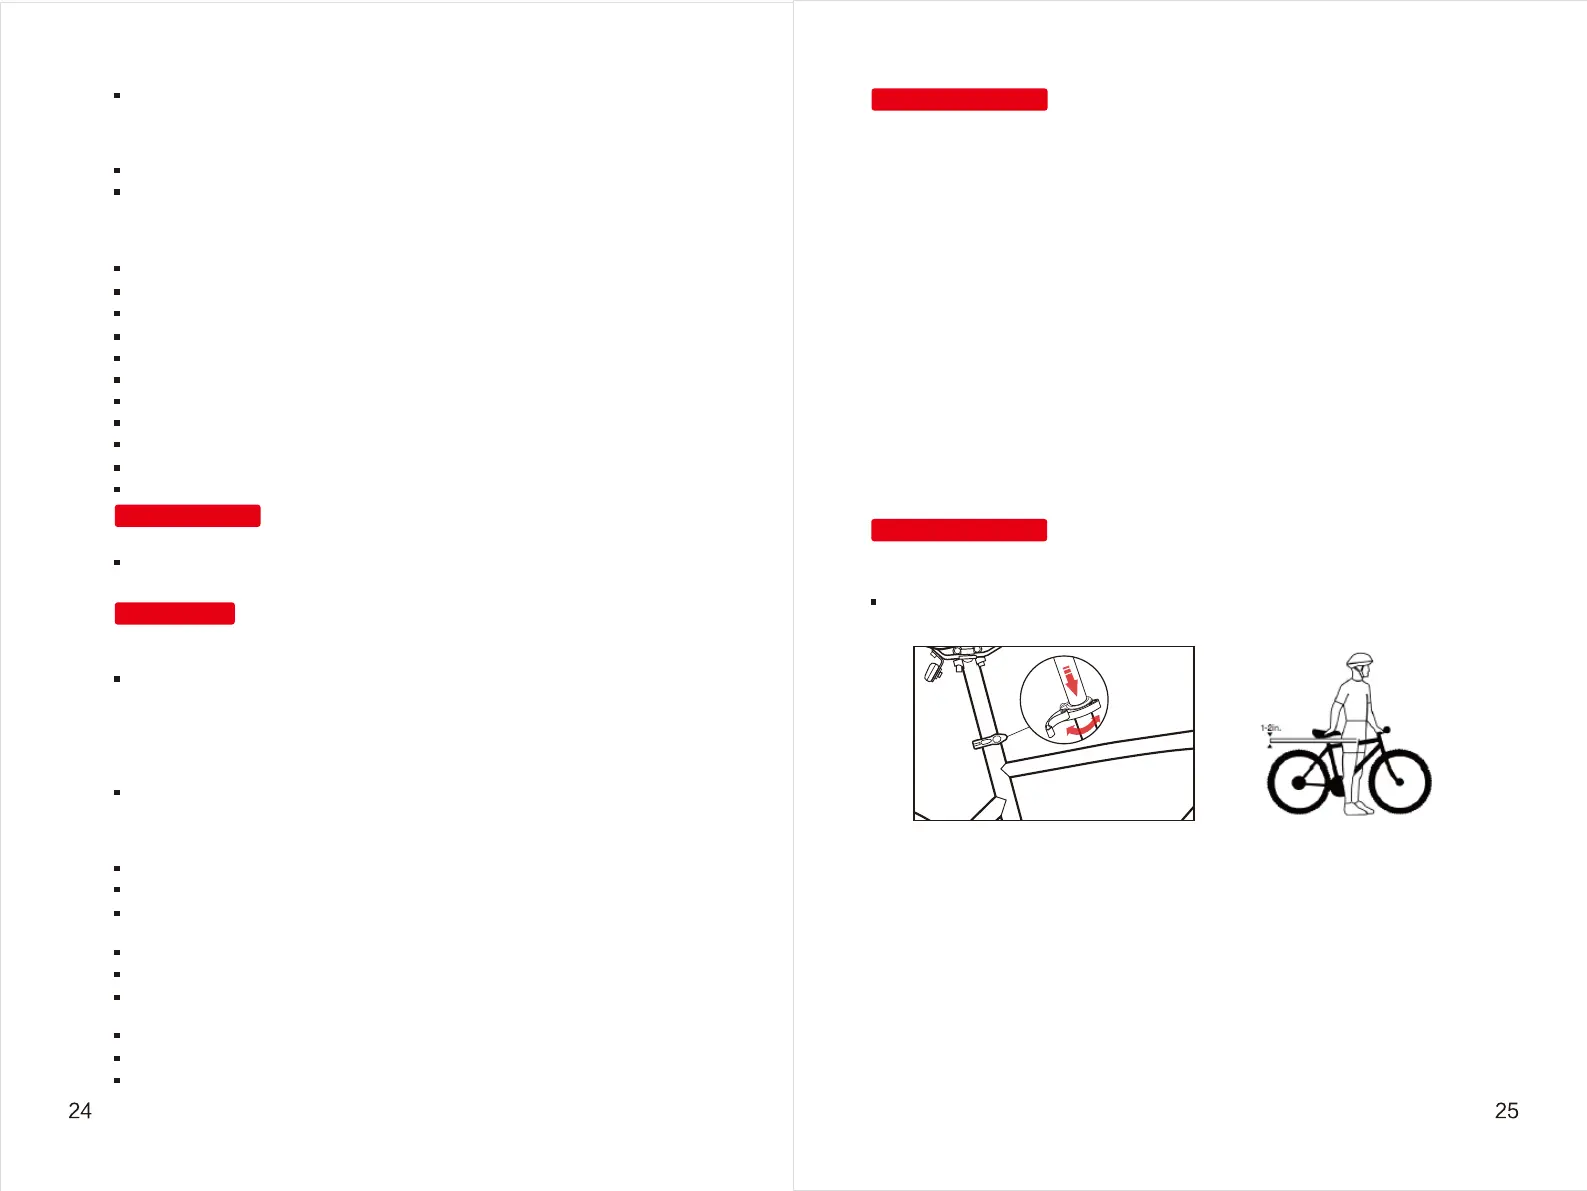
Seat Post Adjustment
The seat height can be adjusted using the seat post clamp. Pull the seat post clamp open
and insert the seat post to at least the minimum insert line marked on the seat post. Tighten
the nut through twisting the quick release rod of the seat post clamp and push the quick
release rod to the OFF position.
The seat angle can be adjusted using the nut at the joint between the seat and the seat rail.
The nut should be tightened so that the seat will not move forward or backward when the
rider is seated.
The seat post should be adjusted as follows:
Pull the quick release handle outward and lower the stand pipe to the bottom
After the wheel is loosened, please adjust it according to the recommended torque.
The seat height can be adjusted using the seat post clamp. Pull the seat post clamp open
and insert the seat post to at least the minimum insert line marked on the seat post. Tighten
the nut through twisting the quick release rod of the seat post clamp and push the quick
release rod to the OFF position.
The seat angle can be adjusted using the nut at the joint between the seat and the seat rail.
The nut should be tightened so that the seat will not move forward or backward when the
rider is seated.