2
(1) Before starting a test using the 3159,
check the following information regarding
the electrical appliance to be tested.
1. Test voltage
2. Reference leakage current value
(upper limit for the test)
3. Test time
4. Test points
Points to connect with test leads
(red, black) of the 3159
* This measurement guide explains the procedure based on an example using the following settings.
(Sample settings: Parameters and Values)
Parameter Test voltage Reference leakage current value Test time
Value 1000 V 10 mA 60 seconds
(2) Things to prepare:
1. Model 3159 Insulation/Withstanding HiTester
2. Electrical appliance to be tested
3. Rubber gloves for protection from high voltages (for safe testing)
4. Forms or a computer to record test results
5. Conductive wire (tinned wire or other non-insulated wire)
This wire is used to short-circuit the plug pins.
See figure below for details.
Short-circuit the plug pins with the conductive wire by following these steps.
1. Prepare a conductive wire.
2. Wind the wire tightly around the plug pins as shown
in the figure. Wind the wire around the pins 5 or 6 times.
Wind the wire tightly to ensure short-circuiting.
Wind the wire being careful not to bend the part of
the plug indicated by (A).
3. Check:
Conduct a final check to make sure that the wire is wound
tightly around the plug pins.
* Alternatively, use a receptacle, which is custom-made for the test, with the two leads short-circuited as
shown in the “Example test setup” above.
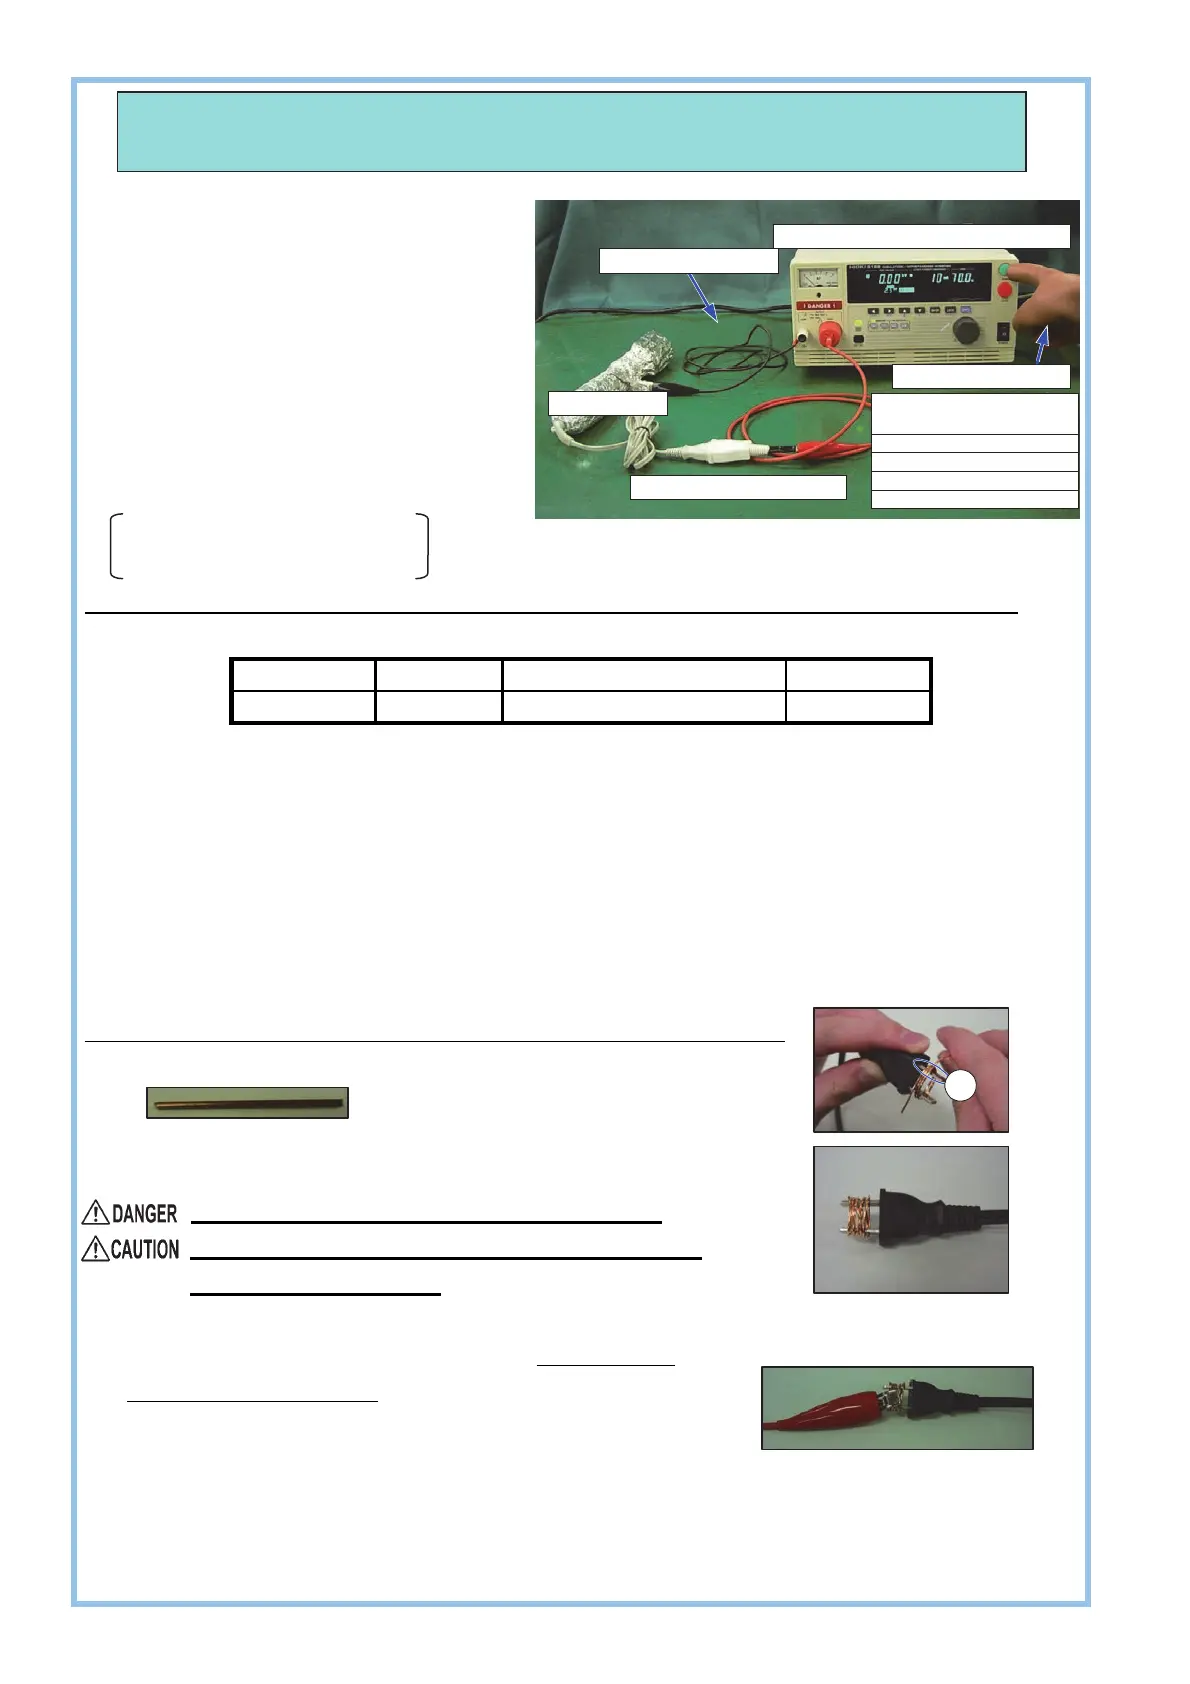
Electric appliance
Short-circuited receptacle
High-voltage rubber gloves
Do not perform tests in
locations that are:
• exposed to direct sunlight
• poorly ventilated
• subject to frequent mechanical vibrations
• near flammable objects
Electric-proof rubber sheet
Model 3159 Insulation/Withstanding HiTester
1. Preparation
(Example test setup)
(Short-circuited plug)
<Example>

 Loading...