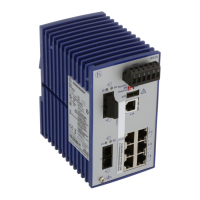
7
Notes:
– The front panel of the RS2-4R is groun-
ded via a separate ground connection.
– Do not open the housing.
– The shielding ground of the twisted pair
lines which can be connected is electrical-
ly connected to the front panel.
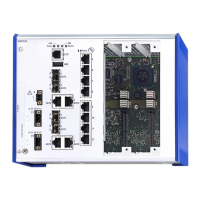
3.3 STARTUP PROCEDURE
You start up the RS2-4R by connecting the
supply voltage via the 6-pin terminal block.
3.4 BASIC SETTINGS
On the first installation of the RS2-4R you
have to enter the IP addresse(s). The RS2-
4R provides 4 possibilities to configure the
IP addresses (refer to RS2-4R manual):
– Configuration via BOOTP (bootstrap pro-
tocol)
– Configuration via DHCP (dynamic host
configuration protocol)
– Input via the V.24 interface
– AutoConfiguration Adapter
3.5 DISMANTLING
To take the RS2-4R off the ISO/DIN rail,
insert a screwdriver horizontally under the
housing into the locking slide, pull it (with-
out tipping the screwdriver) downwards
and lift the RS2-4R upwards.
4. Management
4.1 INTODUCTION
The RS2-4R supports SNMP and Web-based
management and thus offers a extensive
diagnosis and configuration functions for
an easy startup procedure as well as exten-
sive network- and device information. The
RS2-4R supports the TCP/IP protocol family.
You will find detailed descriptions regarding
the SNMP management, functionality of the
User Interface, web interface, system moni-
tors, software update and Management
Information Base MIB in the RS2-4R
manual.
4.2 SNMP MANAGEMENT
Factory settings: All parameters which can
be adjusted via management are pre-set to
default values. You will find detailed
descriptions in the RS2-4R manual.
4.3 USER INTERFACE
The User Interface (UI) can be used in addi-
tion to the web interface.
On the first installation of the RS2-4R you
have to enter IP addresse(s). If you do not
have a VT100 terminal near the installation
place at your disposal, you can enter the IP
addresses before the final installation. For
that you need a VT100 terminal or a corre-
sponding emulation (e.g. MS windows ter-
minal).
The User Interface starts after pressing any
key.
State of delivery: password „private“
– System parameters
Among others various addresses can be
entered in the window presented on the
screen (IP address, netmask, gateway IP
address) and the IP configuration mode can
be selected.
4.4 WEB-BASED INTERFACE
In order to open the Web-based interface
you need a Web browser (program which
enables to read hypertext), for example the
Netscape Navigator/Communicator from
version 6.0 or the Microsoft Internet Explo-
rer from version 5.5 on.
Note: The Web-based interface uses the
plugin "Java runtime environment version
1.3". If this is not installed on your compu-
ter, an installation via the internet is started
automatically on the first start of the Web-
based interface. This installation takes a lot
of time. For Windows NT users: Because of
that stop the installation. Install the plugin
from the enclosed CDROM. For that start
the program file
j2re1_3_1_07-windows-i586-i.exe
in the Java table on the CDROM.
The web interface is used to access the
object classes of the MIBs via a standard
web browser. Access to the web interface is
protected by a password. If you do not
enter a password, only read access to the
RS2-4R is possible.
Factory setting: password „private“
4.5 SYSTEM MONITORS
System monitor 1
The system monitor 1 is used to load the
operating system via the V.24 interface. It is
required only for service purposes. The
system monitor 1 is available immediately
after the system start (at 9,600 baud).
It offers the following functions:
– Update Operating System: Update the
operating system via X modem/CRC pro-
tocol
– Start Operation System: Start operating
system and applications
– Change Baudrate
– End: Quit the monitor program and restart
the system.
System monitor 2
The system monitor 2 is used to update the
complete operating software of the RS2-4R
via V.24 or via the network. It is available
after loading the operating system (at 9,600
baud).
When the software update is started via the
User Interface the monitor is opened
directly.
It offers the following functions:
– Software Update V.24: Update of the ope-
rating software
– Software Update tftp: Update of the ope-
rating software.
Note: The tftp path has to be defined cor-
rectly before the update.
– Cancel Automatic Update: Cancel the
update process
– Change Baudrate
– Restore Factory Settings: The factory set-
tings (without system parameters) replace
a previously saved configuration.
– Reset: RS2-4R boot again
– End/Quit: Quit the monitor program, cau-
ses to load the management software.
5. Further support
In the event of technical queries, please talk
to the Hirschmann contract partner respon-
sible for looking after your account or
directly to the Hirschmann office. You can
find the addresses of our contract partners
– on the Internet
(http://www.hirschmann.de).
Our support line is also at your disposal:
Tel. +49(1805) 14-1538
Fax +49(7127) 14-1551
Answers to Frequently Asked Questions can
be found on the Hirschmann internet site
www.hirschmann.de
The FAQs are located under „Service“ in
the Automation and Network Solutions
section.
www.hicomcenter.com gives you an up-to-
date overview of training courses about
technology and products.
 Loading...