Redundant coupling
34
3.2
Configuring the redundant coupling
Redundancy L2E
Release
4.1
03/08
Connect the two partners via their ring ports.
If the STANDBY DIP switch is OFF, connect the main line to the coupling
port.
Select the Redundancy:Ring/Network Coupling dialog.
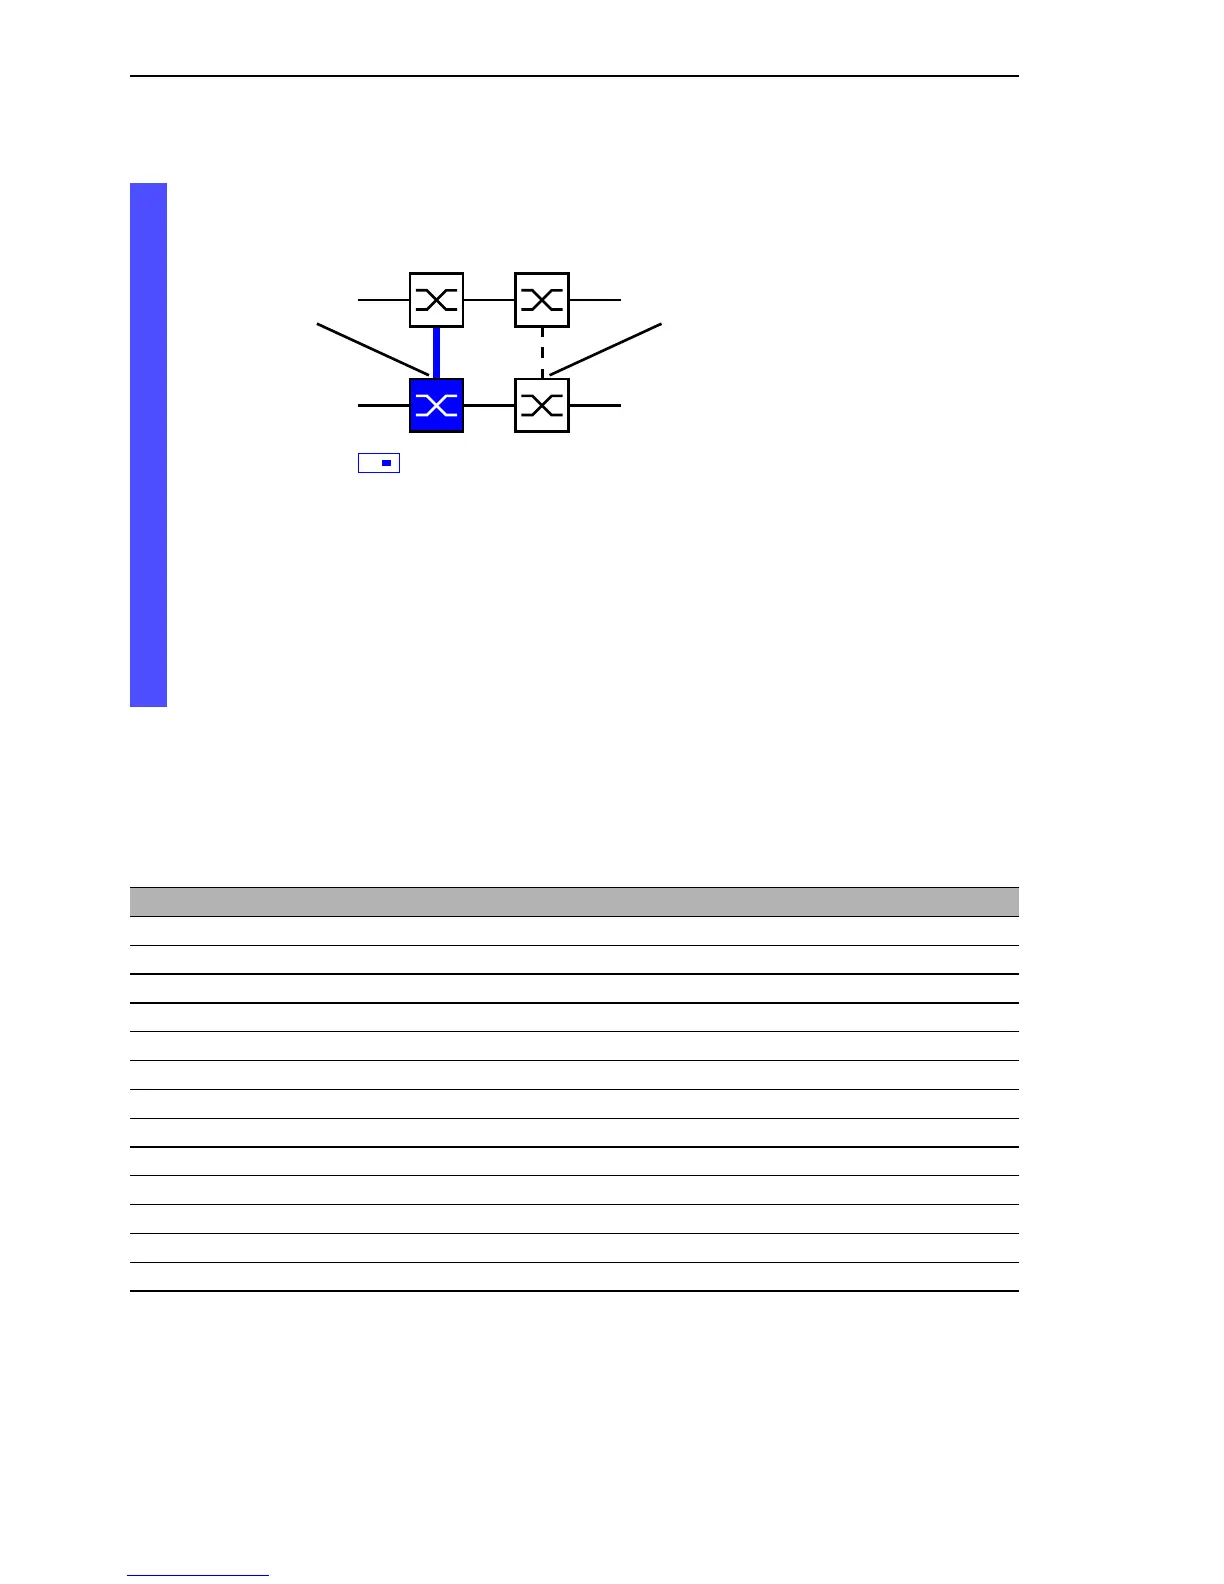
Select two-Switch main coupling (see fig. 14).
Figure 14: Two-Switch coupling
The following settings apply to the Switch displayed in blue in the
selected graphic.
Select the coupling port (see fig. 15), (see table 9).
With “Coupling port” you specify at which port you are connecting
the redundant line.
Switch Coupling port
RS2-../.. Not possible
RS2-16M Adjustable for all ports (default setting: port 1)
RS20 Adjustable for all ports (default setting: port 1.4)
RS30 Adjustable for all ports (default setting: port 1.4)
RS40 Adjustable for all ports (default setting: port 1.4)
MICE Adjustable for all ports (default setting: port 1.4)
PowerMICE Adjustable for all ports (default setting: port 1.4)
MS 20 Adjustable for all ports (default setting: port 1.4)
MS 30 Adjustable for all ports (default setting: port 2.4)
RSR20/30 Adjustable for all ports (default setting: port 1.4)
MACH 1000 Adjustable for all ports (default setting: port 1.4)
MACH 3000 Adjustable for all ports
MACH 4000 Adjustable for all ports (default setting: port 1.4)
Table 9: Port assignment for the redundant coupling