7
Window Installation
1. Roll the air conditioner to selected location. see “Location
Requirements.”
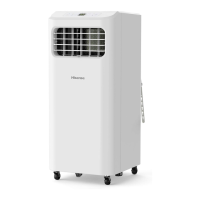
2. Stretch the end of the hose. Attach the dummy coupling to the
flexible exhaust hose. Turn counter-clockwise until securely
Install Exhaust Hose and Adapter
3. Attach the window exhaust adapter to the flexible exhaust
hose. Turn counter-clockwise until securely locked into place.
Your window slider kit has been designed to fit most standard
vertical and horizontal window applications. Roll the air
conditioner to selected location. see “Location Requirements.”
1. Attach the window exhaust adapter to the outer slider section
(the piece with the large exhaust hole).
A. Outer slider section
B. Window exhaust adapter
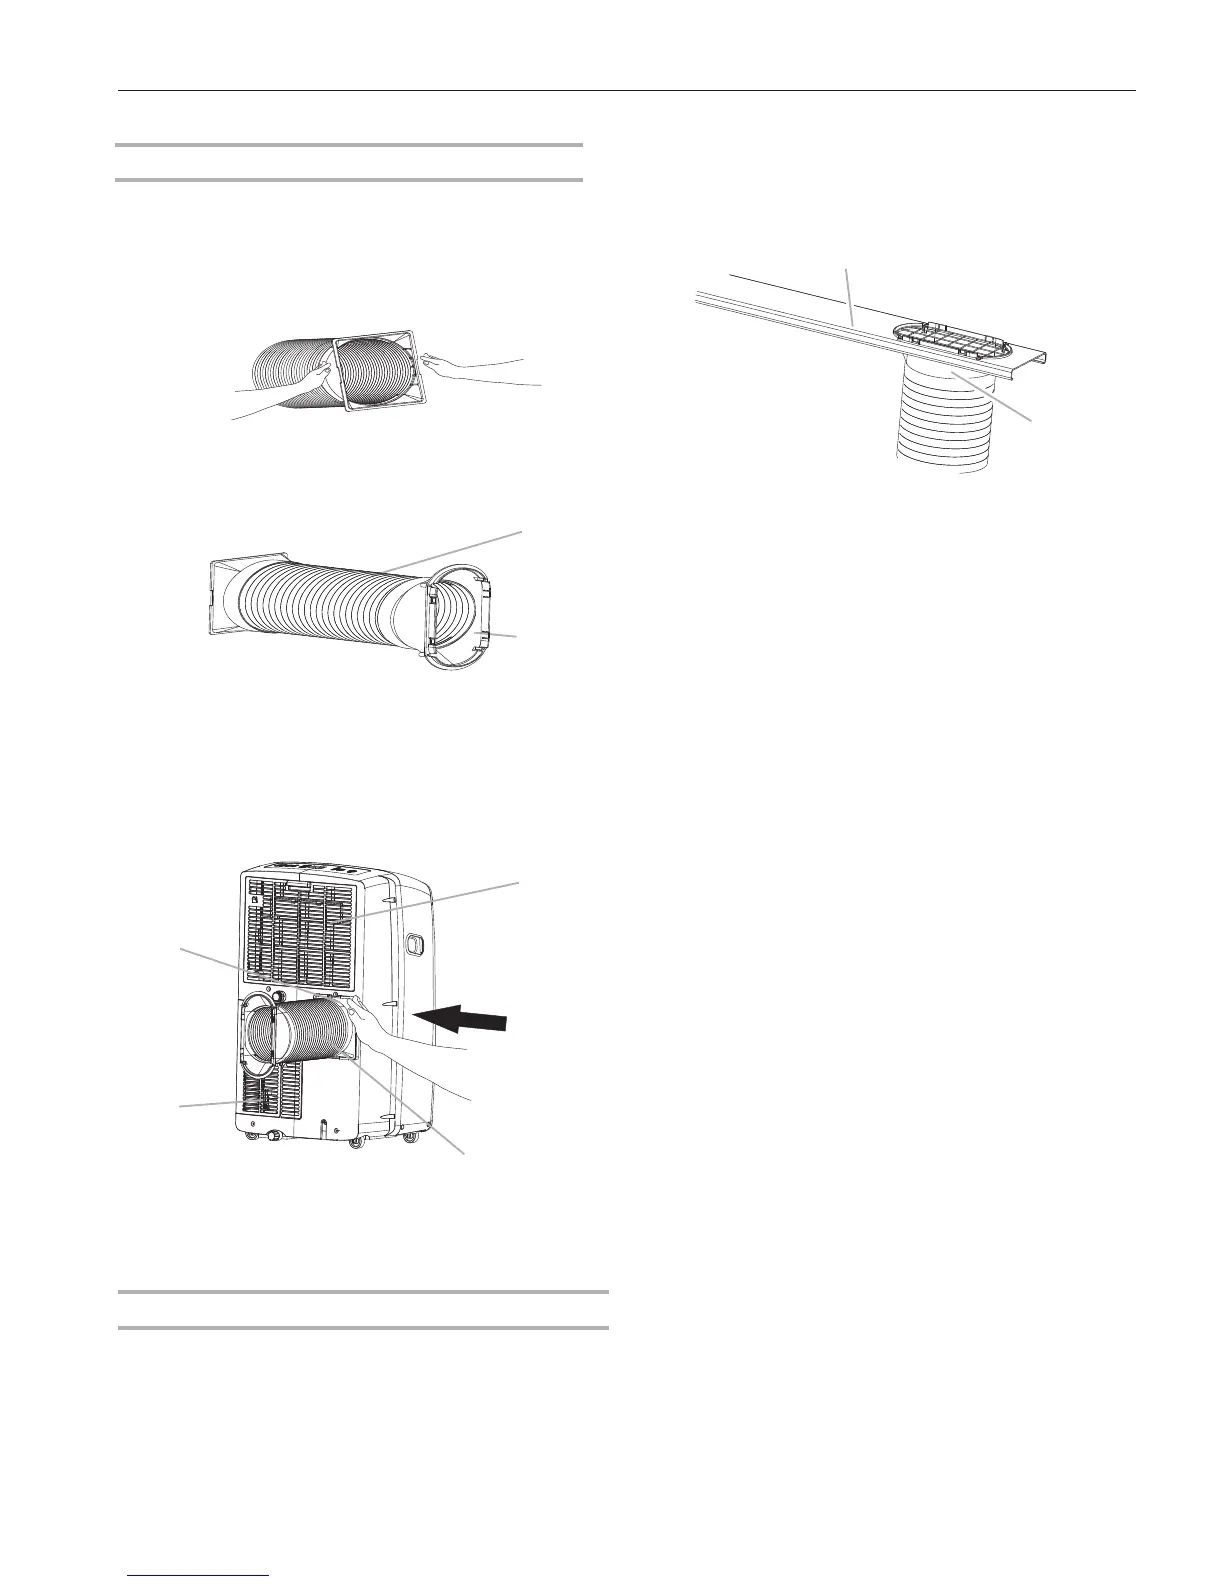
4. Insert the d
ummy coupling into the slot on the back of the air
conditioner.
5. Slide down to lock the hose into place.
A
B
Install Portable Air Conditioner
A. Evaporator air intake
B. Dummy coupling
C. Flexible exhaust hose
D. Condenser air intake
A
C
B
D
A. Flexible exhaust hose
B. Window exhaust adapter
A
B
NOTE: Product must be used with included Duct Window
installation kit for effective cooling.
locked into place.
 Loading...