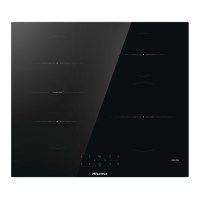
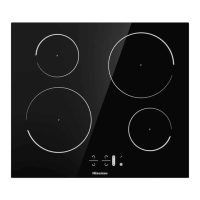
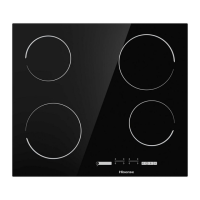
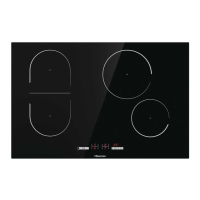
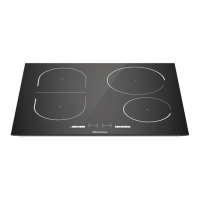
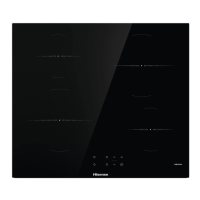
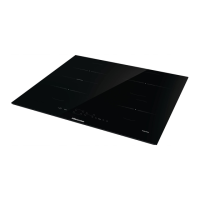
This document is a User and Installation Manual for a Hisense Built-in Electric Hob, covering models HBO60201, HBO60202, and HBO60203.
Function Description
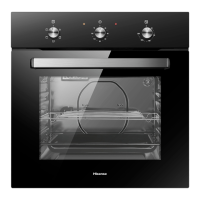
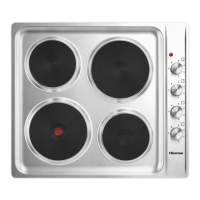
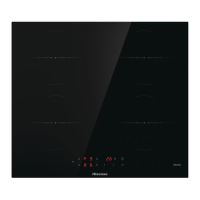
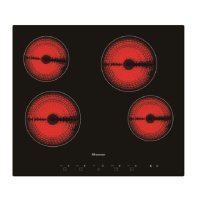
The Hisense Built-in Electric Hob is designed for household cooking. It features an oven with various heating modes and a hob for cooking with pans. The oven functions include:
- Separate oven lighting: For illuminating the oven interior, useful during cleaning.
- Bottom and top heaters on: Standard conventional heating for the oven.
- Bottom heater on: Heats the oven using only the bottom element, suitable for final baking from the bottom.
- Top heater on: Heats the oven using only the top element, suitable for final baking from above.
- Grill heater on: Activates the grill element for grilling dishes on the grate.
- Fan, bottom and top heaters on (for HBO60201/HBO60202): Executes a "cake function" for conventional oven cooking with a fan.
- Combined grill (Grill and the top heater) (for HBO60201/HBO60202): Enables grilling with both the grill and top heater simultaneously, providing higher temperatures at the top of the cooking area for more intense browning and larger portions.
- Fan and combined grill on (for HBO60201/HBO60202): Activates both the combined grill and fan, speeding up the grilling process and improving taste. This function should be used with the oven door shut.
- Defrosting (for HBO60203): Rapidly and delicately thaws frozen foods using the internal fan.
The appliance also includes a minute minder function that can be used independently of oven cooking for up to 120 minutes.
Important Technical Specifications
The manual provides technical data for the different models:
EHC Models HBO60201, HBO60202:*
- Voltage rating: 220V-240V~; 50/60Hz
- Power rating: max. 2.2kW
- Cooker dimensions (H/W/D): 59.5/59.5/53.0 mm
- Usable capacity of the oven: 67 liters
- Energy rating: (indicated on the energy label)
- Weight: Approx. 22.7kg
EHC Models HBO60203:*
- Voltage rating: 220V-240V~; 50/60Hz
- Power rating: max. 2.9kW
- Cooker dimensions (H/W/D): 59.5/59.5/53.0 mm
- Usable capacity of the oven: 61 liters
- Energy rating: (indicated on the energy label)
- Weight: Approx. 25.8kg
The oven light bulb specifications are:
- Voltage: 230 V
- Power: 25 W
- Type: G9 (high temperature bulb, 300°C)
Installation dimensions for the built-in hob are:
- Product Height: 595 mm
- Product Width: 595 mm
- Product Depth: 530 mm
- Aperture Height: 600 mm
- Aperture Width: 560 mm
- Aperture Depth: 560 mm (min)
The electrical connection requires a three-phase alternating current (220V-240V/50Hz) and a safety switch with a minimum contact distance of 3 mm. A dedicated power circuit is recommended.
Usage Features
Before First Use:
- Remove all packaging.
- Clean the interior of the oven and the hob.
- Wash oven fittings with warm water and washing-up liquid.
- Ventilate the room.
- Heat the oven to 250°C for approximately 30 minutes to remove any residue, then clean.
- Heat hob zones for about 4 minutes without a pan.
Operating the Oven:
- Oven functions are controlled by the oven function selection knob and the temperature control knob.
- To switch on, set the desired function and temperature.
- To switch off, set both knobs to the "•"/"0" position.
Using the Minute Minder:
- Turn the knob fully clockwise until it stops, then turn it back anticlockwise to the desired time (up to 120 minutes).
- An audible signal will sound when the set time expires, and the oven will stop.
Fast Oven Heat-up:
- Available in ovens with automatic air circulation, a fan, and an ultra-fan heater.
- Reaches 150°C in approximately 4 minutes.
- Mode of operation: Set oven function to "ultra-fan and bottom heater," temperature to 150°C. Once the red temperature regulator light goes off, place the tray with dough in the oven and then set the desired heating mode.
- Important: Do not use a baking tray with dough or other non-fitting elements during fast heat-up. Not recommended with the programmer set.
Using the Grill:
- To switch on: Set the oven knob to the grill position.
- Preheat the oven for approximately 5 minutes (with the oven door shut).
- Insert a tray with the dish onto the appropriate cooking level. If grilling on the grate, insert a dripping tray immediately below.
- The oven door should be shut during grilling.
- For grill and combined grill functions, the temperature must be set to 250°C.
- For grill function with fan, the temperature must be set to a maximum of 200°C.
- Caution: Accessible parts become hot. Keep children away.
Energy Saving Tips:
- Do not uncover pans or open the oven door unnecessarily.
- Switch off heating zones 5 to 10 minutes before cooking finishes to use residual heat.
- Use the oven only for larger dishes; smaller meat dishes can be cooked more economically on the hob.
- If cooking time is over 40 minutes, switch off the oven 10 minutes before the end.
- Ensure the oven door is properly closed and seals are clean.
- Avoid installing the cooker near refrigerators/freezers.
Maintenance Features
Cleaning and Maintenance:
- Always switch off the cooker and ensure all knobs are at "•"/"0" position before cleaning.
- Allow the cooker to cool completely before cleaning.
- Use appropriate light cleaning or washing products, such as liquids or emulsions for fat removal. Special cleaning products like COLLO Luneta, Sidol Stahlglanz, Stahl-Fix, and Cera Fix are recommended. If unavailable, use warm water with washing-up liquid or stainless steel sink cleaning products.
- Caution: Do not use abrasive materials or sharp metal objects on the oven door glass. Do not use a steam cleaner.
- Steam cleaning: Pour 250ml of water into a bowl on the first level of the oven, close the door, set temperature to 50°C, and function knob to bottom heater. Heat for approximately 30 minutes. Open the door, wipe the chamber with a cloth/sponge and warm water with washing-up liquid. Wipe dry.
- Oven cleaning: Clean after every use. Turn on lighting for better visibility. Wash with warm water and a small amount of washing-up liquid. Wipe dry.
Replacement of the Oven Light Bulb:
- Safety: Ensure the appliance is switched off and disconnected from the mains supply to avoid electric shock.
- Set all control knobs to "•"/"0".
- Unscrew and wash the lamp cover, then wipe dry.
- Unscrew the old light bulb from the socket.
- Replace with a new high-temperature bulb (300°C) with the specified parameters: 230 V, 25 W, G9.
- Screw the bulb in, ensuring it is properly inserted into the ceramic socket.
- Screw in the lamp cover.
Removing and Installing Oven Doors:
- Removing:
- Open the oven door fully.
- Lift the latch hinges completely.
- Gently close the oven door until it reaches a clamping position (you'll hear an engagement sound).
- With both hands, hold the door and push/pull up to remove the hinge bolt from the oven.
- Installing:
- Align the hinge with the oven door latch push until they bite each other.
- Open the oven door fully and push the latch down to its original position.
Removing and Installing Inner Glass Panel:
- Removing:
- The glass door has two plastic fixed blocks. Insert a slotted screwdriver into the hole of the plastic fixed block and gently pry it.
- Remove the fixed block and the top ends of the plastic ventilation grid.
- The inner glass can then be pulled out from beneath the plastic fixed block.
- Installing:
- After cleaning, insert the inner glass into the following plastic fixed block.
- Install the above plastic mounting block.
Troubleshooting:
- Appliance not working: Check household fuse box; replace blown fuse.
- Oven lighting not working: Tighten or replace the blown bulb.
- In case of emergency, switch off all working units, disconnect the mains plug, and call the service center.
Warranty Conditions (Hisense South Africa):
- Warranty periods vary by product type (e.g., TVs - 36 months, Washing Machines - 36 months, Fridges/Freezers - 48 months, Built-in ovens/hobs - 24 months).
- Extended warranties may be available upon registration.
- Installation and service must be performed by a certified electrician, gas installer, or Hisense authorized service agent using genuine parts to maintain warranty validity.
- Warranty is voided by improper use, faulty installation, physical damage, water damage, pest infestation, tampering, or use of non-authorized parts.
- After 6 months from purchase, the warranty typically covers replacement/repair of defective parts only, not installation/removal.
- Retain original proof of purchase and packaging for warranty claims.