
T
Teresa CampbellAug 2, 2025
What does F2 on the display of my Hisense I6433C7 mean and how to fix it?
- AAlan ScottAug 2, 2025
F2 on the display indicates that the cooking zone has overheated. Wait for the cooking zone to cool down.
What does F2 on the display of my Hisense I6433C7 mean and how to fix it?
F2 on the display indicates that the cooking zone has overheated. Wait for the cooking zone to cool down.
What does 'F' on the display of my Hisense I6433C7 Hob mean?
F on the display indicates that there has been an error during operation.
Why does my Hisense I6433C7 Hob make a transformer-like buzz?
A transformer-like buzz occurs when cooking at a high power level. This noise will disappear or weaken when you reduce the power level.
Why is my Hisense Hob fan still running after I turn it off?
Correct operation of induction electronic components requires temperature control. The fan may operate even after the cooking hob has been switched off, if the temperature remains too high.
Why does my Hisense I6433C7 make induction-generated operating noise?
Induction technology is based on the properties of some metals under electromagnetic effect. This noise is normal and it is not a result of any malfunction.
What to do if my Hisense I6433C7 is beeping continuously?
A continuous beep indicates that water has spilled over the sensor surface, or an object has been placed over the sensors. Wipe the sensor surface to resolve this.
Why does my Hisense Hob cookware vibrate and crackle?
This noise appears in cookware (pots or pans) made of different materials. It results from vibrations along the adjacent surfaces of different material layers.
Covers safe usage, supervision, cleaning, and general warnings for the appliance.
Details on surface cracks, fire risks, unattended cooking, and hob guard usage.
Advises on intended use, storage, and cleaning to prevent damage and ensure longevity.
Emphasizes reading instructions before connecting and warranty implications of incorrect use.
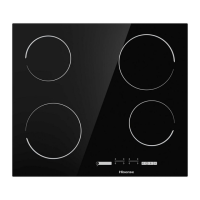
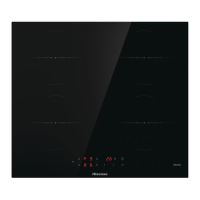
Identifies and illustrates the cooking zones and control module of the hob.
Details technical specifications and the location of the appliance's rating plate.
Information on the hob's surface material, power levels, and energy saving tips.
Explains how induction zones generate heat directly in the pan for efficiency.
Details how the hob detects pans and adjusts power based on their size and position.
Lists suitable and unsuitable cookware materials for induction hobs.
Matches cooking zones with minimum pan bottom diameters for optimal performance.
Specifies that the pan bottom must be flat for effective heat transfer.
Identifies and explains the function of each key and display on the control panel.
Detailed description of individual control keys like on/off, lock, and timer functions.
Step-by-step guide to powering on the entire cooking hob.
Instructions for activating individual cooking zones and setting power levels.
Explains the function that boosts power for initial heating and then reduces it.
Provides a table of automatic rapid heating times for different power levels.
Explains how to combine two zones for larger cookware and its limitations.
Details automatic bridging based on pan placement and size.
Step-by-step guide to activating and using the automatic bridging feature.
Explains how to use Power Boost for rapid heating and its limitations.
Describes the hob's built-in fan and protector to prevent overheating damage.
Instructions for locking and unlocking the hob controls to prevent unintended activation.
How to use the function for defrosting food or reheating meals.
Setting and using the independent minute minder for timed alerts.
Setting cooking timers for individual zones with automatic switch-off.
How to modify or view remaining time on active timers.
Using Stop&Go to pause and retrieve settings if the hob is switched off.
Methods to turn off individual cooking zones or the entire hob.
Explanation of the 'H' symbol indicating residual heat and associated dangers.
Details the safety restrictions on maximum operating duration for each power level.
Setting the volume and duration of acoustic signals and alarms.
Configuring the child lock and automatic pan recognition features.
Enabling or disabling automatic pan position recognition and zone bridging.
Adjusting the hob's maximum power consumption for electrical installation limits.
Instructions for cleaning the glass ceramic surface after each use.
Advice on using scrapers and special cleaners for tough dirt and burnt residues.
Identifies common error displays (F2, F) and their causes and solutions.
Addresses frequent fuse tripping and continuous beeping errors.
Explains normal induction noises like buzzing, vibrations, and fan operation.
Steps for installing the hob into a worktop, including general requirements.
Specifies required clearances and dimensions for worktop cutouts and surrounding cabinets.
Details necessary air vents for cabinets with drawers or ovens for component cooling.
Instructions for flush mounting into temperature-resistant countertops.
Specifies precise cutout dimensions and sealing tape application for flush mounting.
Instructions for applying temperature-resistant silicone sealant for a flush mount.
Steps for safely disconnecting and removing the hob from the worktop.
Details slot adjustability and glass edge radii for ceramic/wood/glass countertops.
Specific worktop thickness requirement when an oven is installed under a flush hob.
Instructions for attaching the foam gasket to the hob's bottom edge.
Outlines essential regulations, voltage checks, and safety precautions for connection.
Illustrates connection points and specifies requirements for the power cord.
Details wiring and fuse requirements for single-phase 32A connections.
Wiring and fuse requirements for two-phase 16A connections.
Illustrates wiring for two-phase connections with 1 or 2 neutral conductors.
Specific connection requirements for 30cm wide hobs.
Instructions for proper disposal of the appliance as electronic waste.
| Hob type | Zone induction hob |
|---|---|
| Frame type | Frameless |
| Finish type | Gloss |
| Warming zone | Yes |
| Product color | Black |
| Hob width size | 59.5 cm |
| Top surface type | Glass-ceramic |
| Appliance placement | Built-in |
| Cooking zone 1 type | Regular |
| Cooking zone 3 type | Large |
| Cooking zone 4 type | Simmer |
| Cooking zone 1 boost | 2000 W |
| Cooking zone 1 power | 1500 W |
| Cooking zone 1 shape | Round |
| Cooking zone 4 boost | 1600 W |
| Cooking zone 4 power | 1200 W |
| Warming zone position | - |
| Cooking zone 1 diameter | 180 mm |
| Cooking zone 1 position | Left front |
| Cooking zone 2 position | Left rear |
| Cooking zone 3 diameter | 210 mm |
| Cooking zone 3 position | Right rear |
| Cooking zone 4 diameter | 145 mm |
| Cooking zone 4 position | Right front |
| Number of cooking zones | 4 zone(s) |
| Number of warming zones | 4 |
| Cooking zone 1 power source | Gas |
| Cooking zone 2 power source | Electric |
| Number of gas cooking zones | 0 zone(s) |
| Stop & Go function | No |
| Country of origin | Slovenia |
| Clock type | Electronic |
| Timer type | Digital |
| Control type | Touch |
| Display type | LED |
| Control position | Front |
| AC input voltage | 220-240 V |
| AC input frequency | 50 - 60 Hz |
| Connected load (gas) | 0 W |
| Connected load (electric) | 7200 W |
| Package depth | 575 mm |
| Package width | 640 mm |
| Package height | 160 mm |
| Package weight | 8100 g |
| Depth | 520 mm |
|---|---|
| Width | 595 mm |
| Height | 58 mm |
| Weight | 7600 g |
| Cord length | 0 m |
| Installation compartment depth | 490 mm |
| Installation compartment width | 560 mm |
| Installation compartment height | 74 mm |