--- 43 ---
141
142
143
144
143
145 146
147
148
149
150
151
152
143
153
154
155 156
157
158
159 160
161
162
163
164
169
155
170
171
172
173
174
175
176
177
178
179
180
181
182
183
196
197
212
213
214
217
218
219
222
231
224
154
225
226
227
230
223 224
234
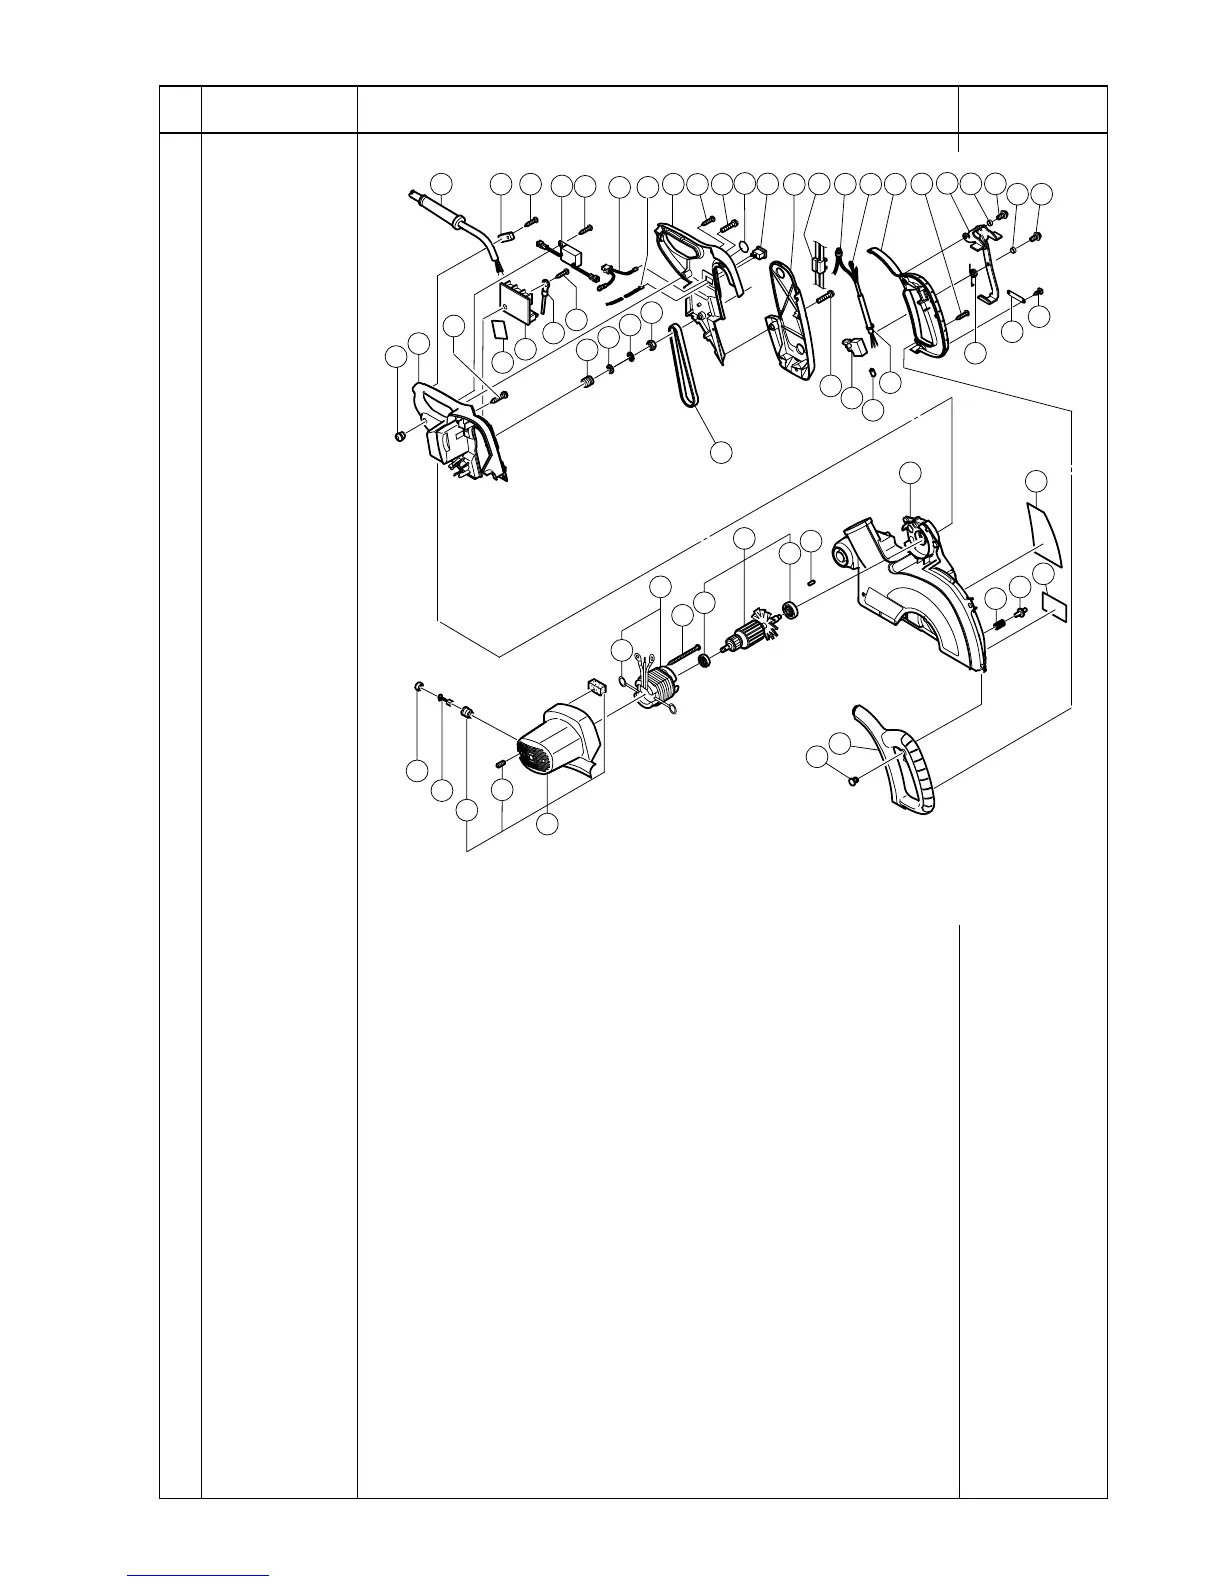
Disassembly procedure
Disassembly
spots
Item
No.
Necessary tools
5
Armature ass'y,
stator ass'y,
housing ass'y,
switch, pulley (A)
1. Remove the two Tapping Screws (W/Flange) D3 x 10 (Black) [227]
to remove Plate (C) [226].
2. Remove the three Machine Screws (W/Washers) M4 x 12 (Black)
[224] to remove Lever [222] and Lever Spring [225].
3. Remove the three Tapping Screws (W/Flange) D4 x 20 (Black)
[154] to remove Switch Handle (R) [160] and Switch Handle (L)
[218].
4. Remove the two Machine Screws (W/Washers) M5 x 25 (Black)
[155] to remove the Pulley Cover [157]. Remove three Tapping
Screws (W/Flange) D4 x 20 (Black) [154] and two Machine Screws
(W/Washers) M5 x 25 (Black) [155] to raise Handle (R) [153] a little.
Disconnect the terminals of Connector (B) [145] and Internal Wire
[146] that are connected to the Switch [156]. Remove Handle (R)
[153] together with the Switch [156].
Phillips
screwdriver
Fig. 63
Phillips
screwdriver
Long-nose pliers
219
Phillips
screwdriver
Phillips
screwdriver
 Loading...