– 8 –
NAMES AND FUNCTIONS OF EACH PART
● Signal Emitting Window/Transmission Sign
Point this window toward the indoor unit when controlling it.
The transmission sign blinks when a signal is sent.
● Display
This indicates the room temperature selected, current time, timer status,
function and intensity of circulation selected.
● START / STOP Button
Press this button to start operation. Press it again to stop operation.
● HEATING Button
Heating mode direct selection.
● AUTO Button
Auto mode direct selection.
● COOLING Button
Cooling mode direct selection.
● TEMPERATURE Button
Use these buttons to raise or lower the temperature setting.
(Keep pressing and the value will change more quickly.)
● FAN Button
This determines the fan speed. Every time you press these buttons, the
intensity of circulation will change from “
(AUTO) ↔ (HI) ↔
(MED) ↔ (LOW) ↔ (SILENT)” (This button allows selecting the
optimal or preferred fan speed for each operation mode.)
● SLEEP Button
Use this button to set the sleep timer.
● TWO WAY AIR EXCHANGE Button
Press this button to start the two way air exchange mode.
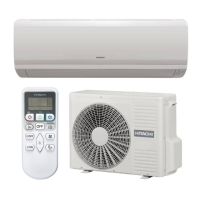
REMOTE CONTROLLER
• This controls the operation of the indoor unit. The range of control is about 7 meters. If indoor lighting is controlled
electronically, the range of control may be shorter, in some cases, the control signal may not be received. This
unit can be fixed on a wall using the fixture provided. Before fixing it, make sure the indoor unit can be controlled
from the remote controller.
• Handle the remote controller with care. Dropping it or getting it wet may compromise its signal transmission
capability.
• After new batteries are inserted into the remote controller, the unit will initially require approximately 10 seconds
to respond to commands and operate.
 Loading...