3. Before Installation
1) Check to ensure that the following accessories are
packed with the air panel.
If any of these accessories are not packed in the
packing, please contact your contractor.
Name
Q’ty
Purpose
P-AP160NA1 P-AP160NAE
Long Screw
(M6 Cross Screw)
44
For
Fixing Air Panel
Relay Wire
-1
For
Motion Sensor
Wiring Cover
-1
For
Protection of
Relay Connector
Plastic Band
-3
For Clamping
Wiring Cover and
Relay Connector
1. Applicable Model
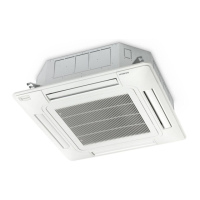
This air panel is applicable to the following indoor
unit model.
Air Panel Indoor Unit Model
P-AP160NA1
(without Motion Sensor)
RCI-1.0FSN3 to 6.0FSN3
P-AP160NAE
(with Motion Sensor)
2. Transportation and Handling
1) Transport the air panel without unpacking as close
to the installation location.
2) Mount the air panel as soon as possible after
unpacking.
3) When the air panel is placed on the ÀRRU after
unpacking, place it with the rear side downward (the
surface to ¿W the indoor unit body) on an insulation
material, etc. However, do not leave the air panel
on the ÀRRU for long time. It may cause air leakage
due to scratch the seal packing.
In addition, if the air panel is placed with the surface
downward, the louver mechanism may be damaged
due to touch the louver to the ÀRRU etc.
4) Do not move the louver by hand.
If moved, the louver mechanism will be damaged.
2) Attachment for Corner Pocket Cover with Motion
Sensor (For P-AP160NAE)
(a) The corner pocket cover with motion sensor can
be attached to any of corners (4 directions,
1
,
2
,
3
and
4
).
Determine the attaching place as user’s request.
(b) Remove the electrical box and connect the relay
wire (attached in the air panel) to CN10 in the
electrical box as the following ¿JXUH
NOTE:
The wiring connections and the dip switch
settings for other optional accessories should be
referred “Installation and Maintenance Manual” of
the optional accessories for the indoor unit.
3Poles 5Poles
Air Panel
1
2
34
Relay Wire
L
RS
CN10
(5 Poles, Red)

 Loading...


