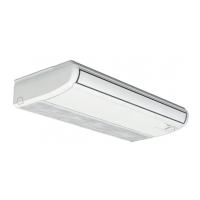
FEATURES
TCI-20007-rev.1
1-17
1.4.2 Wireless Controller: PC-AWR
Model: PC-AWR
NOTE
l
Press lightly the switches to control the controller. Do not press the controller by sharp objects such as a
pen. It may cause breakage of control part.
l
For UTOPIA or SET FREE series, either wired or wireless controllers are available. However, when the
centralized controller is connected, there are restrictions in order to operate the multiple indoor units by
one wireless controller or utilize the wired and wireless controllers together. Contact your distributor or
contractor.
l
For twin, triple and quad combination, the wired controller shall be utilized. When the wireless controller is
utilized, the optional receiver kit is required.
● Transmitter
Point the transmitter towards the receiver of the indoor unit when sending
commands. The transmitting indication on the liquid crystal display flashes
when sending commands.
● Transmitting Indication: It will turn ON when sending commands by infrared rays.
● LCD (Liquid Crystal Display)
The set temperature, timer operation, position of air louver, operation mode,
air flow mode, etc., are indicated.
NOTE:
The diagram of the display shown on the left is for explanation purposes only.
The display will differ during actual operation.
● Fan Speed Switch
Press this switch to select the fan speed. By repeatedly pressing the switch,
the setting will change sequentially through LOW, MED, HIGH, HIGH2 and AUT
* Depending on the setting for selecting the function, it is possible to set the
ON/OFF for the Fan Speed AUTO.
● Louver Angle Switch
The airflow angle and auto-louver operation can be set by this switch.
When pressing the switch, the angle is changed in the following order.
(In COOL or DRY or AUTO operation modes, steps 1-5 and Auto swing are
available.)
● Filter Sign Reset Switch
When it is time to perform the filter cleaning, the filter indicator lamp will be
turned ON so turn is OFF.
The alarm sound can be cancelled temporarily by pressing the switch.
● Temp. Switch
The setting temperature can be adjusted using this switch.
By “ ∆ ” pressing, the temperature will increase by 1°C (or 0.5°C*) at a time.
By “
∆
” pressing, the temperature will decrease by 1°C (or 0.5°C*) at a time.
NOTE:
Depending on the setting for selecting the function, it is possible to set
the unit 1
o
C (or 0.5
o
C*) for the temperature range.
* Only available for the combination of the indoor unit and receiver kit with
the function “0.5
o
C increment”.
● Timer Switches
Used to set the timer.
The set time can be changed by pressing “On Timer” or “Off Timer”.
The timer can be set from 0.5 to 23 hours. When 0.5 to 9.5 hours, the unit will
set as 30 min. at a time, and when 10 to 23 hours, the unit will be set as 1 hour
● On Switch
Operation of the unit can be started by pressing this switch.
● Off Switch
Operation of the unit can be stopped by pressing this switch.
● Mode Selection Switch
By repeatedly pressing the mode switch, the unit cycles through
the different operating modes in the order of FAN, COOL, HEAT, DRY, AUTO.
* Depending on the setting for selecting the function, it is possible to set
the ON/OFF for AUTO, HEAT and DRY display.
FAN, COOL, HEAT, DRY, AUTO
LOW → MED → HIGH → HIGH2 → AUTO
1 Step 2 Step 7 Step
Auto Swing
3 Step 4 Step 5 Step 6 Step
 Loading...