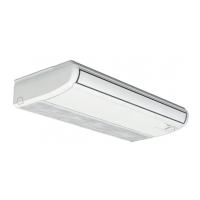
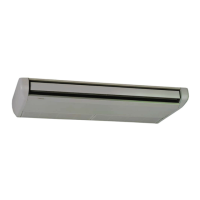
Mounting of Indoor Unit.
• Remove side covers of the unit
• To avoid damage to the resin side covers, before lifting or
moving the indoor unit, remove the resin side covers as
indicated in the following procedure.
Top Side of Unit
Hooking Part
Air Inlet Grille
• Slide the resin side covers forward approximately 15mm.
• Carefully pull the bottom of the side covers away from the
indoor unit approximately 10mm.
• Remove the resin side covers upward.
! CAUTION
The mechanism of the automatic swing louver is utilized. Do not move the
swing louver by hand or other objects. This can damage the mechanism
of the automatic swing louver.
M4 Screw
Do not hold
this louver
Fixing Screw
Connector
For Hanging Type Installation.
• Hook the indoor units on the suspension brackets, by
setting the mounting bolts on the units with the notches of
the bracket, as shown below. Fix the units with the nuts, at
washers and spring washers. (Each four nuts and washers
are supplied.)
Fix the unit
with four M8
nuts.
For Semi-Concealed Installation.
• Open a hole in the false ceiling.
≥605
≥300
≥A
≥50
≥8
Model A
RPC-(3.0/4.0) 1780
RPC-(5.0/6.0) 2040
• When installing the indoor unit as shown in the following
gure, insulate the top part of the cabinet which will be
concealed in the ceiling because dew may occur under
cooling operation.
A
Insulation Material
(Field-Supplied)
Model A
RPC-(3.0/4.0/5.0/6.0) 75
• Secure the indoor unit with the suspension bolts. Position
the false ceiling panels along the indoor unit.
Hole
Attach False Ceiling to Seal Space
Drain Pan Level
• The level of the drain pan has to be checked by a water level
of a transparent plastic tube containing water, as water, as
shown below so as to avoid the incorrect position of the
drain discharge.
Water level
Transparent
plastic tube
Containing Water
0~3mm
0~3mm
• The unit should be installed so that the rear side of the unit
is slightly (approximately 3mm) lower than the front side, in
order to avoid the incorrect position of the drain discharge.
Also incline the unit aprox 3 mm to the drain side.
• Tighten the nuts of the suspension bolts with the suspension
brackets after adjustment is completed. Special plastic paint
must be applied to the bolts in order to prevent them from
loosening.
? NOTE
When the false ceiling has been already installed, all piping work inside
the ceiling has to be completed before the indoor unit is hooked.
UNITS INSTALLATION
PMML0320A rev.4 - 08/2016
 Loading...