low duty (VLD), follow the installation
procedures shown in the drawings below.
Tighten (four) spacers to the (upper and lower) brackets
as shown in Figure 1 using (four) M3×8 screws included
low duty (VLD), follow the installation
procedures shown in the drawings below.
Tighten (four) spacers to the (upper and lower) brackets
as shown in Figure 1 using (four) M3×8 screws included
(Tightening torque 0.6 to 0.8 Nm)
low duty (VLD), follow the installation
procedures shown in the drawings below.
Tighten (four) spacers to the (upper and lower) brackets
as shown in Figure 1 using (four) M3×8 screws included
(Tightening torque 0.6 to 0.8 Nm)
low duty (VLD), follow the installation
procedures shown in the drawings below.
Tighten (four) spacers to the (upper and lower) brackets
as shown in Figure 1 using (four) M3×8 screws included
(Tightening torque 0.6 to 0.8 Nm)
Tighten (four) spacers to the (upper and lower) brackets
as shown in Figure 1 using (four) M3×8 screws included
screws prepared on your own.
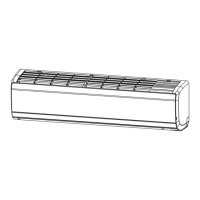
Figure Front and right side diagrams
220L) on the wall using four
screws prepared on your own.
Figure Front and right side diagrams
220L) on the wall using four
screws prepared on your own.
Figure Front and right side diagrams
220L) on the wall using four
Figure Front and right side diagrams
 Loading...