2
RECEIVING & INSTALLATION
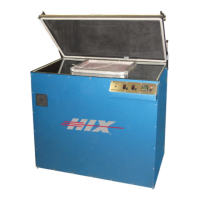
NOTE: The HIX Halux 1200D is not compatible with the M&R Trilok
pin registration system.
CAUTION: Before installing or operating this unit be sure to read
these instructions thoroughly. Disconnect all electric
power before performing maintenance on this unit. Never
operate this equipment with the power supply cover re-
moved. If you fi nd that this should be necessary, contact
a licensed electrician. Make sure the circuit for this unit
is well grounded.
WARNING: ULTRA VIOLET LIGHT CAN CAUSE SKIN & EYE IR-
RATION OR BLINDNESS. TO PREVENT DAMAGE TO YOUR
EYES AND SKIN, AVOID DIRECT EXPOSURE TO THE LAMP
WHILE IT IS ON.
INSTALLATION
1. Carefully uncrate exposure unit from its shipping container.
2. Place exposure unit on a level surface close to the wall circuit to
be used. Adjust leveling feet, if necessary, so the unit does not
“rock” on the fl oor.
WARNING: When using an extension cord, use 12 ga.-3 conductor.
Maximum length, 25’ (7.62m).
3. Check unit over for any transportation damage and make sure all
foreign objects, such as packing material, have been removed.
Clean both sides of glass from any dust. (See page 8)
4. The vacuum hose is connected to the top frame by a small hose
clamp prior to shipping. Make sure the hose connection is still
in place and secure. If the hose seems loose or has come off
during shipping, secure hose and tighten hose clamp screw with
a small fl at-head screwdriver.
15
TROUBLESHOOTING
PROBLEM
4. Lamp fails to remain
ignited.
5. Lamp ignites OK
when cold, but
will not HOT
Restrike reliably.
6. Unit fails to turn off
when the power
switch is “OFF”.
7. Blanket won’t “pull”
a vacuum.
POSSIBLE CAUSE
4. a. Lamp housing
cooling fan failure.
b. Obstruction of
air input or output
causing over heat-
ing, thus tripping the
thermostat.
c. Defective high
limit thermostat.
5. Low voltage supply.
Must be 115-120v
on a 120v unit or
230-240v on a 230v
unit. Voltage mea-
sured must be when
unit is on and under
load.
6. Power switch is
shorted.
7. Vacuum leak.
REMEDY
4. a. Replace cooling
fan.
b. Remove obstruc-
tion, allow thermo-
stat to cool, it will
then reset itself.
c.Replace thermo-
stat.
5. Have a electrician
remedy the cause of
low voltage supply
to the unit.
6. Replace power
switch.
7 a. Check hose con-
nections to vacuum
pump and to blanket
frame.
b. Check gasket to
glass seal, replace if
necessary.
c. Realign lid.
d. Check vacuum
pump.