8
MAINTENANCE
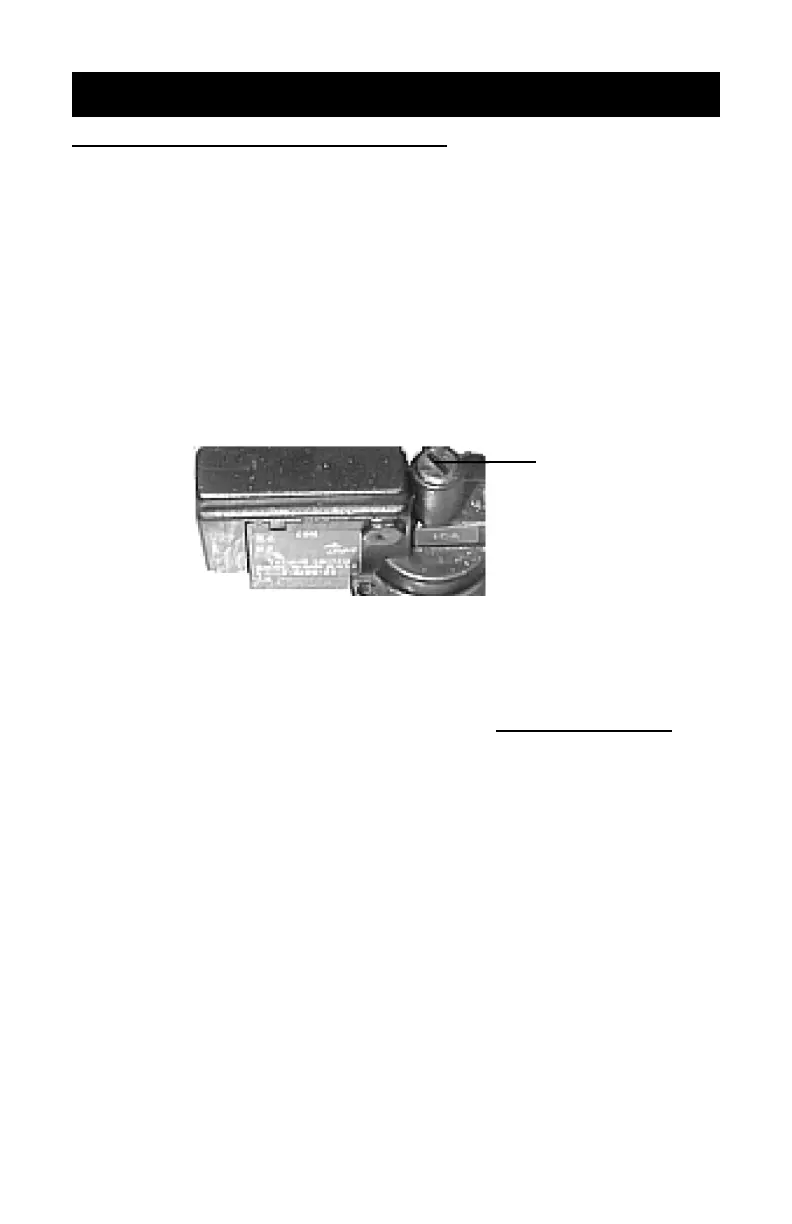
VACUUM SWITCH ADJUSTMENT
If your machine is new or has been moved recently and your lamp
fails to work on fi rst operation, the safety vacuum switch may need
some adjustment. After going through the following procedure and
your lamp still fails to work, check the Trouble Shooting Charts.
1. Pry off chrome cap on control panel to access the vacuum limit
control.
2. Close and latch blanket lid with both rubber latches.
3. Turn on vacuum power switch and make sure the blanket pulls
down tight against the glass before proceeding.
4. Locate the vacuum limit slotted control (see fi gure below).
5. Set the timer to 3 minutes and press the “Start” switch.
6. Insert a small fl athead screw driver with a blade length of at least
3” through the hole in the control panel and into the vacuum
control as shown above. With your small fl athead screwdriver
adjust the screw clockwise very slowly (1/8 turn at a time) just
until the lamp comes on.
7. Shut off the vacuum. The lamp will extinguish immediately with
vacuum off. If not, repeat step 6 until the lamp works with vacuum
on and the lamp extinguishes with vacuum off. Reinstall chrome
cap when fi nished.
Insert Small
screwdriver
here
9
MAINTENANCE
GLASS CLEANING
In order to maintain short exposure times and minimize pin holes in
the emulsion, keep the unit’s exposure glass clean. Dusting is usually
suffi cient. If more cleaning is required use a soft cloth moistened with
alcohol. A dusty environment will require more cleaning.
1. Unscrew glass hold-down tab on the front of the unit as shown
in illustration above.
2. Slide hold-down tab straight out.
3. Carefully lift front of glass from the gasket (leave back of glass
resting on its gasket), clean underside, lay back down carefully
and reinstall the hold-down tab and screw.
WARNING: Do not use metal objects, such as screwdriver to lift
glass as they will chip or break the glass.
FAN FILTER SERVICING
WARNING: Unplug unit from outlet before cleaning fi lter.
NOTE: It is very important to periodically (once a month min.) clean
or replace the fan fi lter. The fi lter prevents dust from enter-
ing the cabinet and gathering onto underside of the glass .
Excessive dust deposits will cause “pinholes” to be exposed
in the screen emulsion and will give poor results. This would
also be a good time to clean both sides of the glass.
1. Pry off plastic guard.
2. Remove fi lter, wash with soap and water - DO NOT USE SOL-
VENTS. Pat fi lter dry with a paper towel. NOTE: If fi lter is dete-
riorated, replace it.
3. Reinstall fi lter and plastic fan guard.
Glass Hold-
down Tab
Vacuum
Bleeder Cord