4
OPERATION
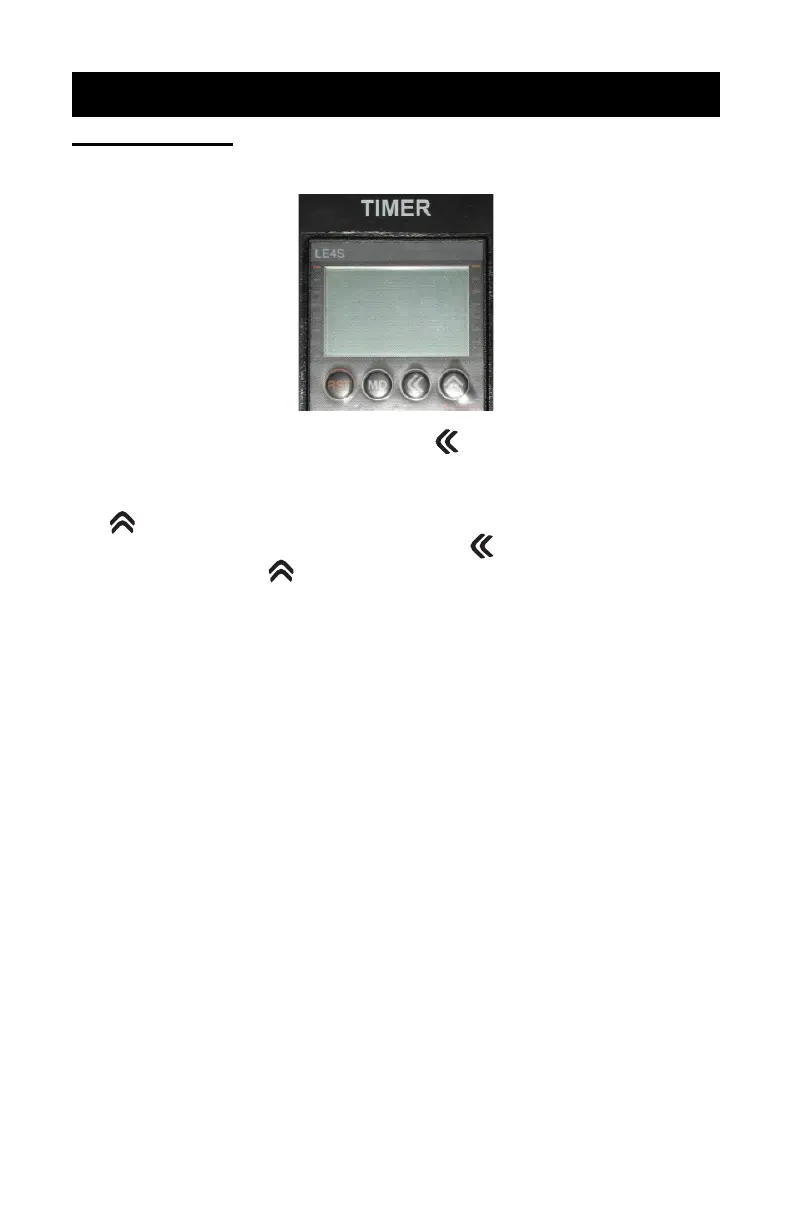
DIGITAL TIMER
1. Turn Main Power “On”. Timer will illuminate.
2. To change time setting, press the button on the front of the
timer face. Timer will display “Minutes” and “Seconds”.
3. To program the desired time (minutes and seconds), press the
button; once for each digit. The counter will loop from 0-9.
To change to the next digit, press the button and again
press the button until the desired number is reached.
4. Once the new time is entered, press the “MD” button on the
face of the timer to lock in this new setting. Failure to press
the “MD” button will not “lock” in the new setting.
5. Press the “Start” button on the control panel. This will start the
timer and turn the exposure lamp on.
6. Timer will count down and when time reaches zero, the expo-
sure lamp will extinguish.
7. If at any time you want to extinguish the exposure lamp before
time expires, you may do so by pressing the “RST” button on
the face of the timer.
13
REPAIRS
7. Retighten the 1/4” allen screws on the hinge bracket at the back
of the unit.
8. Turn off the vacuum and allow it to stabilize.
9. Carefully lift the lid to the open position and push the end of the
gas spring back onto the ball connector.
10. Check operation, repeat alignment procedure if necessary.
11. Replace the plastic gas spring end covers and recheck for proper
operation.
BLANKET REPLACEMENT
NOTE: If the blanket fails to pull a vacuum, check the Troubleshooting
Chart for possible causes. If you determine that your blanket
has begun to leak, it needs to be replaced. New blanket re-
placement kit can be ordered from HIX Corporation by call-
ing Customer Service at 800-835-0606. Refer to Customer
Service sheet CS-170.